Kit bashing model building and painting

Kit Bashed Models WK
Hey my name is Staymor and I like to kitbash models as well as paint miniature soldiers and do artwork for t-shirts. I do this for fun and as a creative outlet. The model making I engage in is not so much a science but more like a painting in progress. While there are some really great precision model makers and kit bashers out there I go by whether it works for me and it is as realistic as I can make it. I certainly understand the level of talent out there and am really just satisfied to make a lense and show some of my work. Check some of the stuff out and comment if you like but most of all thanks for stopping by.
Star Wars Corellian Snub Carrier
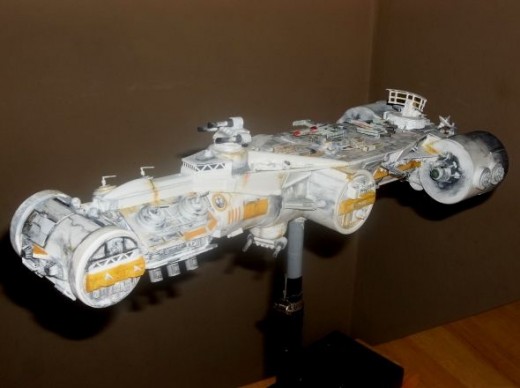
Back Story-The Corellian Snub Carrier was created following Episode 6. Due to the lack of Rebel funds, smaller support and attack craft were created utilizing spare Empire parts in order to tackle the huge mop up campaign.
This scratch built craft measuring 17.5 inches long took a while to build. I of course kit bashed for a lot of the detail parts. I also lit the model with battery operated LEDs.
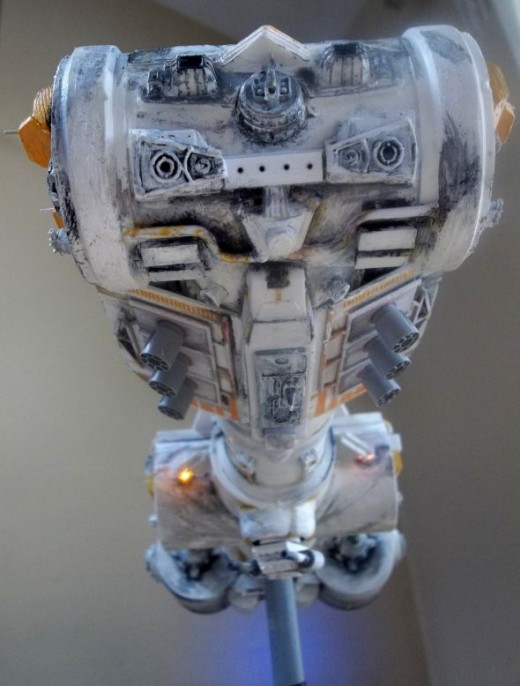
Snub Carrier Front Section
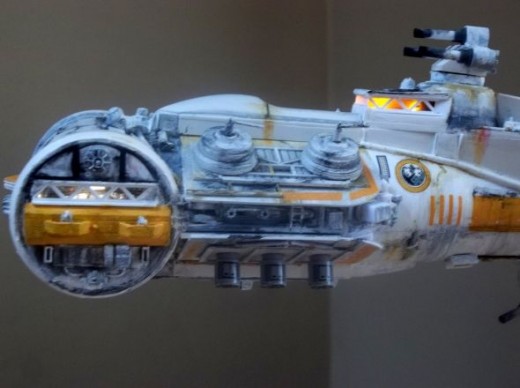
The front portion of the carrier with bridge lit orange. All the turrets move. The front lighted windows in white have some recessed detail inside.
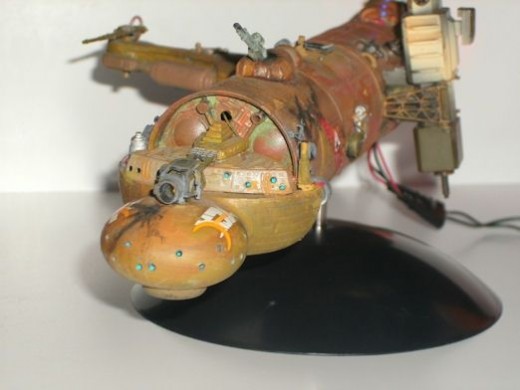
Snub Carrier Front Section Underneath
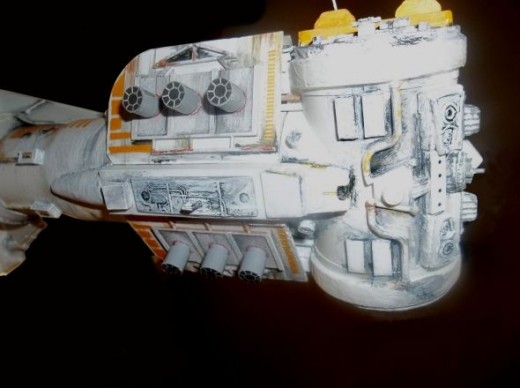
Here you can see a lot of the detail underneath as well as the larger escape pods.
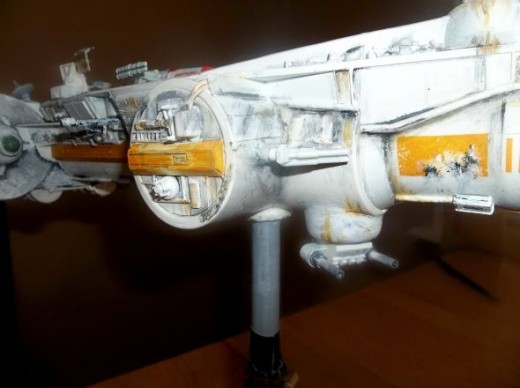
Snub Carrier Side Rear Section
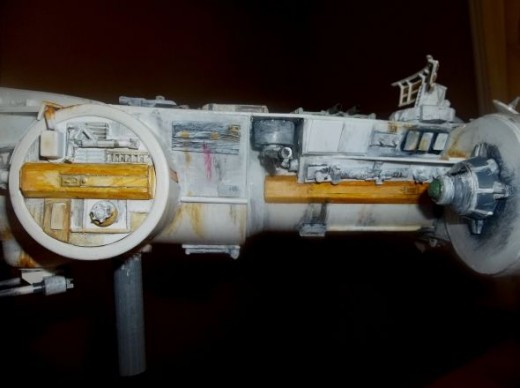
Here you can see the side section and rear portion. Battle damage and extreme weathering present from a very active vessel.
Snub Carrier Flight Deck
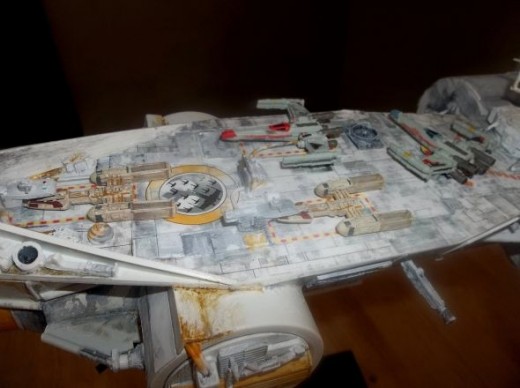
Here we see the flight deck where we have 2 Y-Wing fighters docked. In space pilots are able to access the cockpit from the docking structure. There are also 2 x-wings one being re-fueld while the other is in launch position.
Snub Carrier Flight Deck Top View
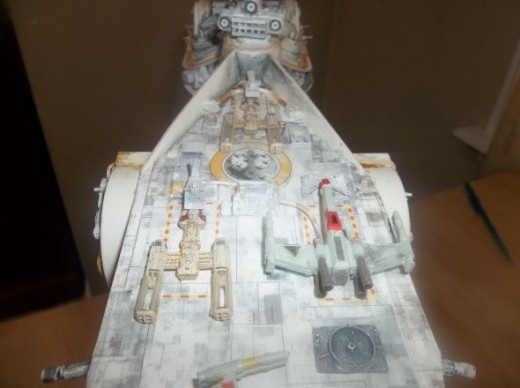
Here is just a different angle of the carrier flight deck. Pictured on the deck is the logo for the battle group this ship belongs to.
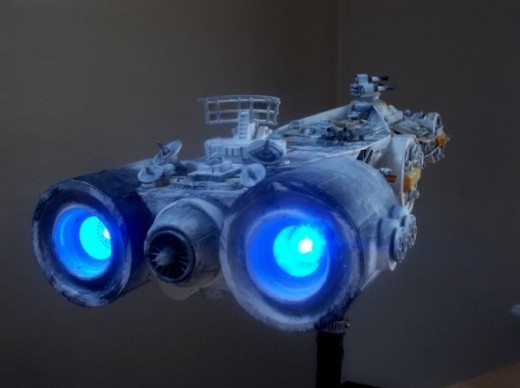
Snub Carrier Rear Engines
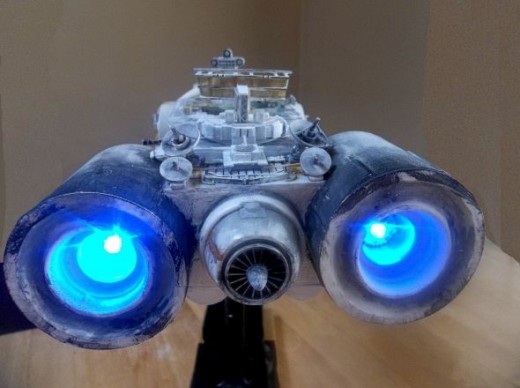
A rear shot of the massive engines powering the Carrier. Also seen in the rear section is the antenna array.
Snub Carrier Rear Antenna Array

Close up of antenna array.
Snub Carrier Side Detail
Here is another shot of the side of the carrier. The lower turret has 2 barrels while the top has the three.
Snub Carrier Underneath Front Angle
Here is another front angle from below. More detail plus some lighting is visible.
Snub Carrier Rear Medium Shot
The final shot of the Corellian Snub Carrier from the rear.
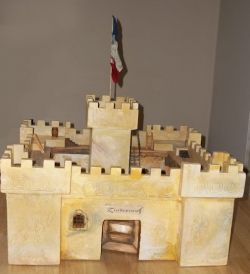
Beau Geste castle
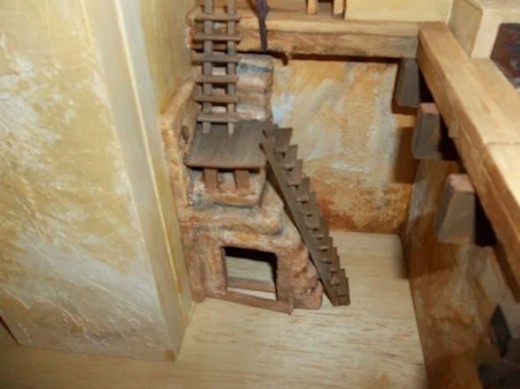
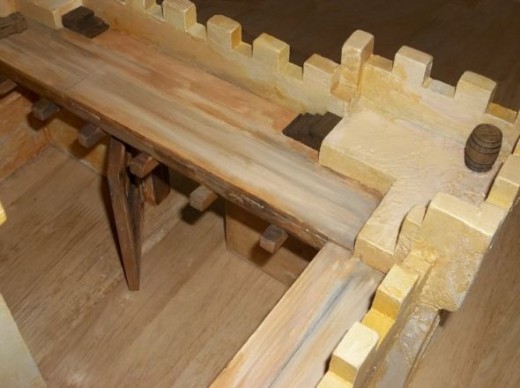
My Dad had made a castle based on the movie Beau Geste back in the 1970s. The scale is 1/32 fitting figures of the 3-3 1/2 inches range. I kept it and recently decided to fix it up and detail it. I added texture to the walls, replaced the gate with a more detailed piece, replaced and aged all of the wood planks. I created a brand new staircase from the floor to the upper deck. I added all of the small detail pieces, the barrels, gun and ammo boxes as well as new flagpole and ropes. I re-painted and aged the whole castle inside and out. I added the Fort Zinderneuf sign at the request of my father. Here are some pics:
Beau Geste Staircase detail
Beau Geste Front gate with sign
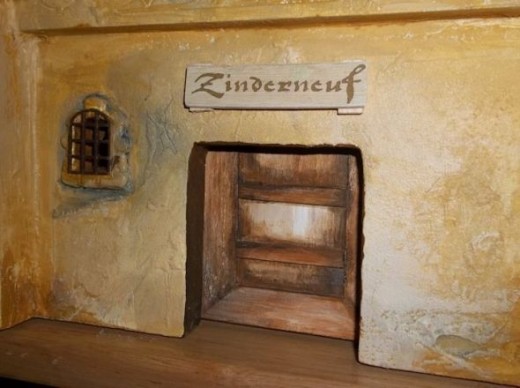
Beau Geste interior front with gate open.
Beau Geste interior view of tower with staircase.
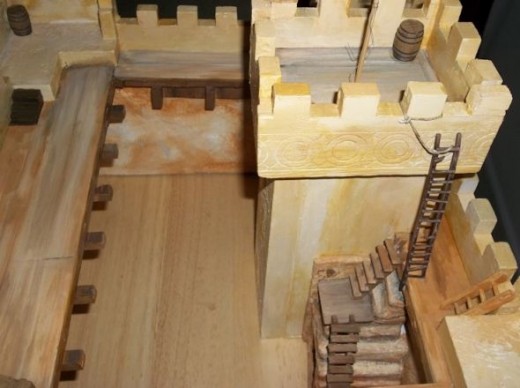
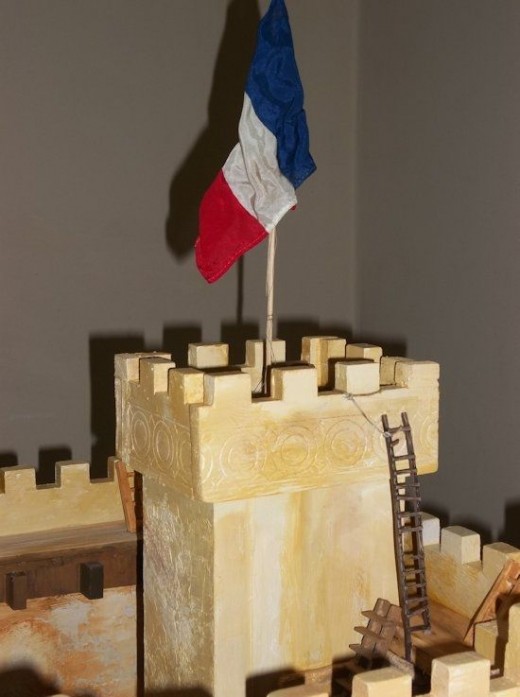
Beau Geste tower with French Flag.
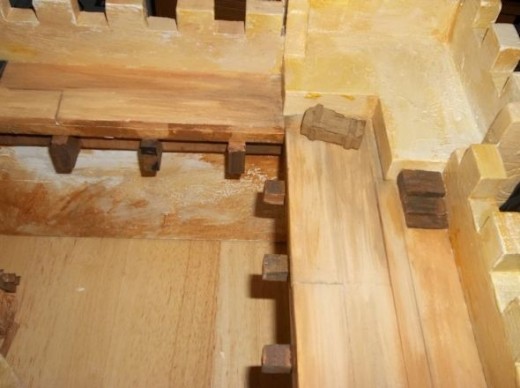
Beau Geste interior wall and wood detail.

Kit Bashed Sci-Fi Cruiser
This particular project was finished in the early 1990.s and was done for a video movie project by my brother. It was created from kit bashing many other models. I lighted the engine, the top navigation light and the torpedo weapon in the front. Detail and weathering done by acrylic paints and brushes. I like to use acrylic paint for almost everything as you can blend and mix so many combinations of color.
Cruiser Top View

This is the top view of the cruiser with battery pack (4 Double A's) seen in the rear. The lights are off. I tend to use acrylic paints for most of my projects. Acrylic dries faster and has endless mixing capabilities. It easily washes off with mistakes as well. Navigation light on below.
Aft view of detail.

Top front detail.

Aft view lights on.

Front and Rear detail.
Amazon model kits

54mm Plastic Teddy Roosevelt

I painted a BMC plastic Theodore Roosevelt 1/32 scale. Height is about 2 and1/2 inches tall. I used acrylic paints and this results in a matte finish.
Back view of Teddy
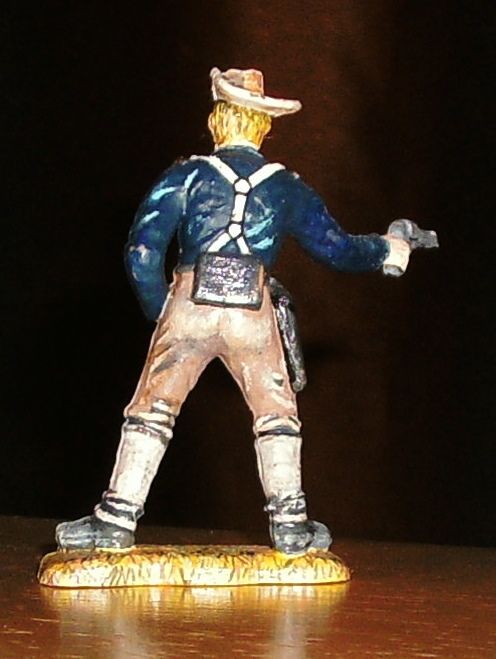
Painting small figures is tough and sometimes requires magnifying glass and a lot of light. Hilariously shown in "The Forty Year Old Virgin" where Steve Carell nerdily paints his soldiers.
Side view of Teddy

54mm Indian from Little Big Horn.

Here is another plastic BMC soldier. This 1/32 scale figure was painted in acrylic. I researched for the colors and design on the warrior.
Side view of warrior

Here you can see some of the detail work on the pants and headdress.
Top view of Warrior

More detail on the headdress. I painted the fur individually varying the colors black, white & grey.
Underneath view.

Here you see more of the detail on the chest plate and face.
USS Hannibal Model (Lights Off)
Here is the USS Hannibal model which was kit-bashed from the Star Trek movie Enterprise model kit. The Hannibal is a Heavy Destroyer with one engine and multiple Photon Torpedo bays. The model took a great deal of time to complete. The hull is detailed with the aztec pattern which gives the effect of paneling or grey areas. The model is fully lit with LED lights for the windows. A small heatless neon tube lights the engine and red LED lights for the Photon torpedoes in the front saucer section. There are multiple blinking navigation lights on the top and bottom of the saucer section. The model was painted in both gloss white spray paint as well as light grey flat spray paint. Decals and Federation markings were taken from other kits. The first set of pictures are different angles of the model with the lights off.
Top of Hannibal model (lights off)

Right rear of Hannibal (lights off)

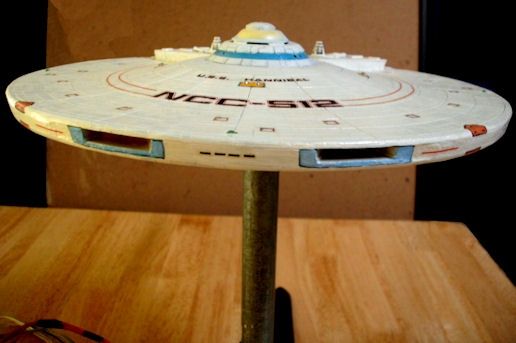
Top rear saucer section Hannibal (lights off)

In this picture you see the rear saucer section with shuttle bay doors 1 and 2.
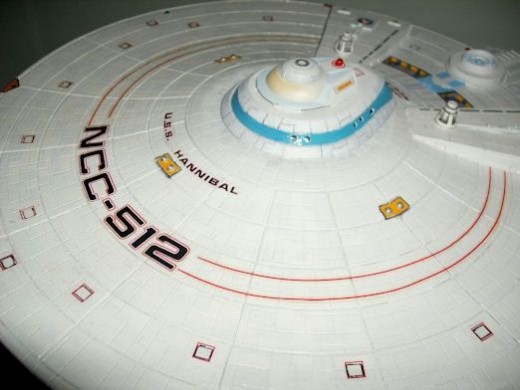
Front saucer section Hannibal (lights off)
In this picture you can see the front inset photon torpedo bays.
Isolated lighting on Hannibal Model

Isolated lighting on Hannibal Model: Main engine
Isolated lighting on Hannibal Model Front Photon Torpedoes.

Isolated lighting on Hannibal Model: Front photon torpedoes.
Isolated lighting on Hannibal Model

Isolated lighting on Hannibal Model: Rear impulse engines.
Isolated lighting on Hannibal Model

Isolated lighting on Hannibal Model:Side windows and bottom saucer lights.
Isolated lighting on Hannibal Model

Isolated lighting on Hannibal Model: top saucer section with rear upper decks and neck.
Isolated lighting on Hannibal Model

Isolated lighting on Hannibal Model: Top saucer section and neck.
Isolated lighting on Hannibal Model

Isolated lighting on Hannibal Model: Top bridge lighting with some photo distortion.
USS Hannibal Lights
Here are the navigation lights on the saucer section
In Progress DEATH STAR

Here is the Death Star Kit still in progress. The light holes were drilled with a 1/16" drill bit . By scale this leaves the windows a little larger then I would like however due to the thickness of the plastic, made them the best size for visibility. In some cases I used a metallic duct tape cut in tiny squared sections and place them over the larger holes. Then with a pin poked smaller holes. I painted these the same color scheme. This provided for some variation in the window sizes. Each indentation in the death Star is hand painted with a mixture of gray and white. The main Death Star surface was painted with a flat light aircraft grey.
In progress DEATH STAR interior

Here is the interior of 1/2 of the Death Star model. I have the metal pole going through and stopping at the top where both halves will rest on it. I have battery operated LED lights bundled and giving off light close and far in the model. The interior is painted both with reflective silver and then a flat gray in the seams to prevent light from seeping out.
Death Star Lighting
A little grainy I know, I just wanted an overall lighting feel.
More to come.........
More lighted pictures to come.........

Related

Ballroom Dance Bashed and Re-Bashed: Controversial Moments in the Waltz's History

Why Are Fans So Hyped About Getting the Gundam Epyon RG Kit

How to Get Body Painted

Rites of Passage for a Model Railway - 5: Motive Power - Model True to Prototype?

How to Direct a High School Play - Behind the Scenes Jobs for Students


