How to Start a Mineraft Server with Pictures


So you want to set up a server?
This guide will be the easiest and simplest guide you have ever seen. Not only are there pictures, drawings, and explanations with each step, but I will also answer any question you have at the end. If you follow every step just as I have done it, you will succeed. Questions like "How do I get my server to work?" "What is port forwarding?" and "How can my friends join?" are going to be answered along with many others.
I will keep it simple, precise, and put as simply as possible. I promise that after following this guide, you will have a server. Good luck!
Dowloading and Using The Server: Step 1 - (For Windows Users)

Go to https://minecraft.net/download and click on the link that says "Minecraft_Server.exe (802 KB)" Simple so far?
When you download this, be sure to download it (or move it) into a newly created folder. To create a new folder, click on your computer button, right click, and then look closely and you will see the new folder button. The reason for making a new folder is because once you run the "Minecraft_Server" file, it will create many other files. You want them all organized and inside the same folder, so try not to forget this step. If you do it will still work, it will just be less organized.
*You may download and use the software without actually purchasing the game, but if you don't purchase it, you will have to play offline. (We will get to that later)
Step 2 - Dowloading and Using The Server

Run the Minecraft_Server file in the folder, and you will see many new files appear. When you run, it essentially creates these new folders, which can be used to change the server properties, white-list (Make it so only people on the list can join the server), and the op menu.
It should look something like this when you finish. (Note the box, you must leave this open at all times when you run the server or it won't work.)
IMPORTANT: Only have one minecraft server in each folder, if you have the need for more, be sure they are all in their own folders. If they are in the same area, they will combine and become ruined.
Step 3 - Dowloading and Using The Server
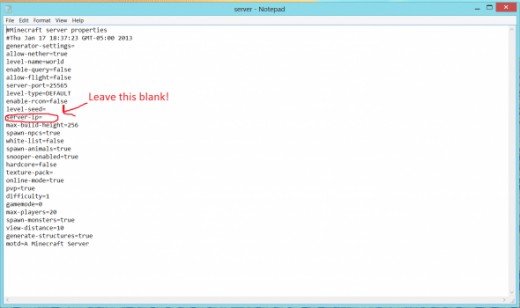
Open your Server Properties file to change how your server rules. You can make it so the nether won't work by changing it from "allow-nether=true" to "allow-nether=false" Most of the properties are changed either by switching it from true to false, or by placing numerical values into the blanks. I can't really tell you what to do here, you can change everything based on your own personal preferences.
If you want to change worlds, you will have to change the world name to the world name you would like to use. It is set to "World" as a default.. If you made a level called "Bobs Level" you would change "World" to "Bobs Level" in the server properties.
IMPORTANT: DO NOT PUT ANYTHING INTO THE SERVER IP SPOT! This will make it impossible to run the server! It should be blank, do NOT fill it in.
Step 4 - Dowloading and Using The Server
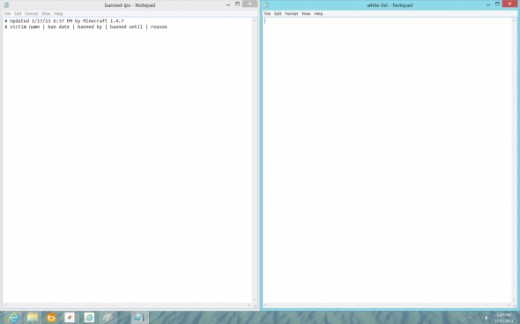
You can open the White list to ban certain players from ever joining your server. If you know your friends username and he plans to grief your world, you can ban him before he is ever on your world.
You can also use the Ban IP list to ban individual IP addresses from ever joining your server, these are very useful tools.
Another good option is the OP list, which lets you set yourself as an OP. Just type your username into the box, and you will be allowed to use all commands in the game, it makes you the superior being of you world.
Step 5 - Dowloading and Using The Server
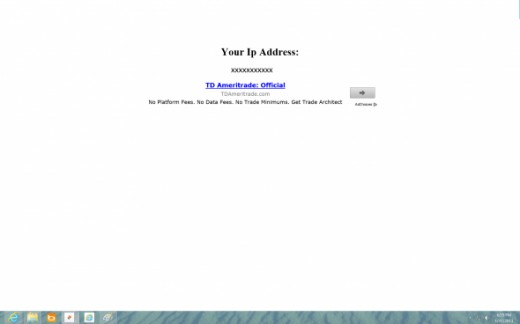
Go to http://www.whatismyip.org/ in order to find your IP address, this is what people will use to connect. Please note that this is a Dynamic IP address and always changing, therefore every few weeks or days, you may have to find out what it has changed to. It is possible to make it permanent by changing your IP to a domain name, I'm sure you've noticed lots of minecraft server IP's are websites. This is recommended for anybody looking to open a long time server.
Go to www.dyndns.com to make your IP a Domain name! Also, check out this http://www.youtube.com/watch?v=mggJUYNPirI video, if you want a step by step guide on how to make it a domain name.
Are you still with me? We aren't even to the hard part yet, hopefully this hasn't taken you very long.
Step 6 - Dowloading and Using The Server
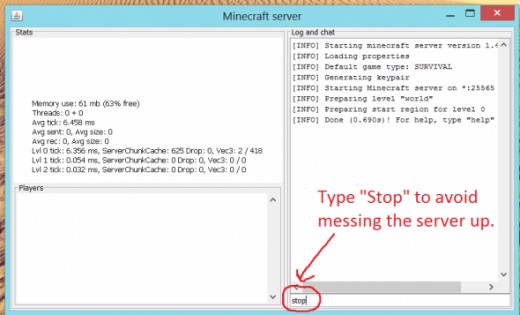
To stop your server from running, type stop into the prompt that opens. To run it, just click the same button you clicked earlier that made all of the files appear. The "Minecraft_Server" file. Make sure you give your IP or Domain name to friends and family or they won't be able to join.
The server is now setup, it will not be working at this point. We have one more thing to do, and that's port forward.
How to Port Forward: Step 1 - Port Forwarding
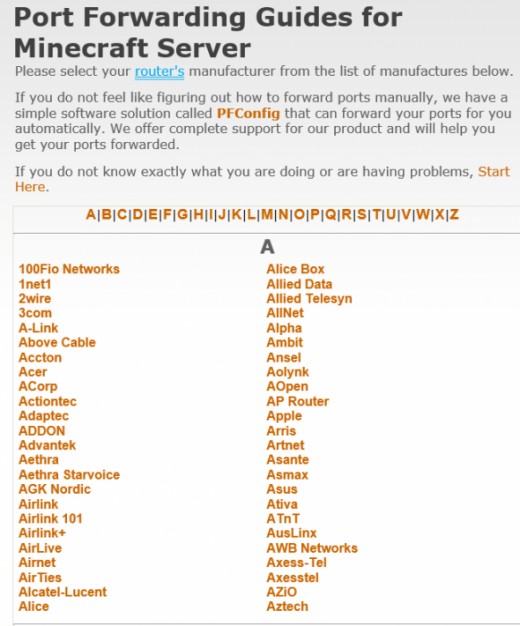
To start, you want to go to http://portforward.com/english/applications/port_f... and basically follow the instructions on the site. You search for the name of your router, so if you use a "Zoom" Router.
Step 2 - Port Forwarding
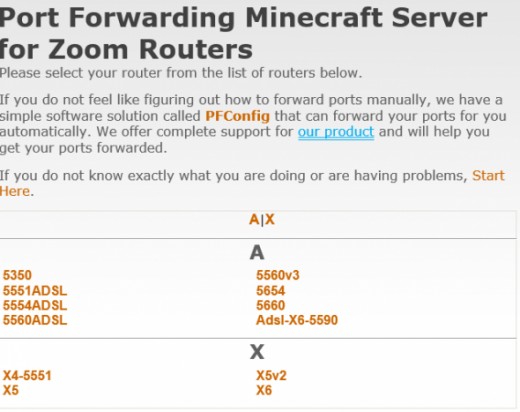
Find your Router Model Number, which is listen on the router itself. It could be on the bottom, sides, top, virtually anywhere. Look closely, and click on the link that pertains to you.
Step 3 - Port Forwarding
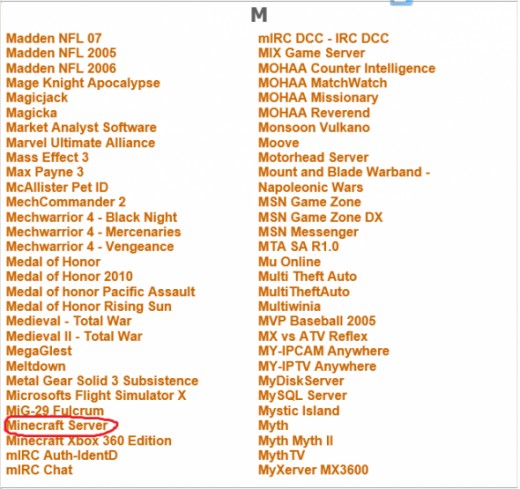
Here you just click on the game you want to forward the port for, and in this case we will simply click on minecraft.
Step 4 - This is where it gets hard.. Focus now!
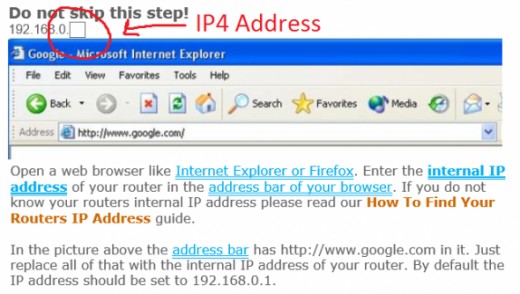
You're almost there! What you want to do on this page, is fill out your IP4 Address, and I'm sure most of you don't know anything about it. So, read on to see how you can get your IP4 Address.
From this point forward, you can follow the website you are on, as it will be different based on everyone's router. If my tutorial does not make sense to you anymore, just read what the site tells you to do.
Step 5
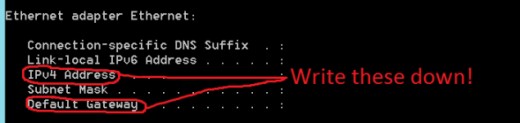
You want to go into your programs and open up "Command Prompt" and type in "ipconfig" without the quotation marks. A huge list of tons of information will come up, and this might be the first time many of you have seen this menu. Don't freak out, you are looking for two things; the Default Gateway address and the IP4 address, write these down.
Step 6 - Port Forwarding

Open a new window, preferably google. Type that IP4 address into your url, and press enter. It should take you to a screen that requires a login and password.
Step 7 - Port Forwarding
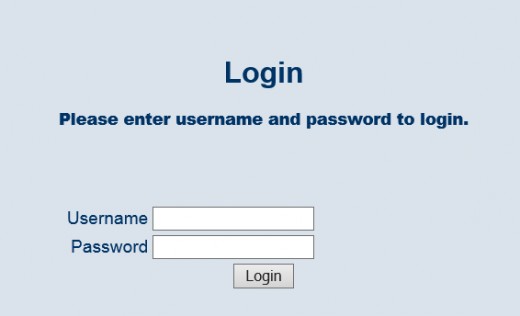
Here is what the screen should be similar to (but remember we may all have slightly different screens, it depends on what type of router you have). Type "admin" for the username and password, and it should log you into your Wi-Fi settings.
Step 8 - Port Forwarding
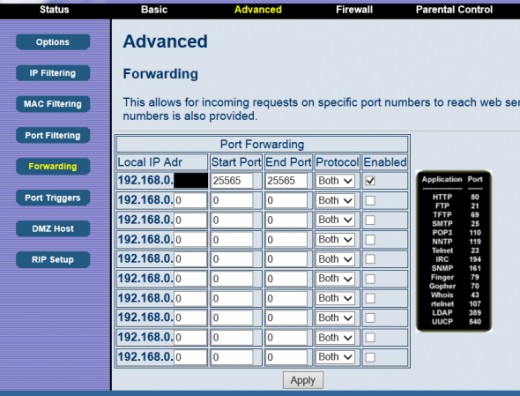
Once you are here, you are almost done. I cannot show you a screenshot of what you will see, as we all have different routers. So don't worry if the last few pictures have been different, it is normal.
What you want to do, is navigate around the site and find a button that says "Forwarding" or "Port Forwarding". Often times this is located under the "Advanced" or "Gaming" tabs. Just look around, use common sense, and you will find it. When you do, it will look similar to the picture below. You will want to make the start and end port say "25565" and check the "enabled button" like I have done. As for the Local IP address, it just the IP4 Address, found in Command Prompt with the "ipconfig" command. You wrote that down earlier, right?
Step 9 - Port Forwarding

Make sure you click apply or save, and you should be ready to go! What you basically did is open the port to other people around the world, letting them connect to your world. This is, as far as I know, the only way to forward ports and set up a server for minecraft (Other than Hamachi, which I will explain later). To test it, open up your server, type in your server IP address and it should work. Start giving your IP's to friends and get your server started!
*If you want to make an online server, you will want plugins. To get plugins you must make a Bukkit server, not a Minecraft server. This is for people who don't want their land destroyed or hacked. Plugins add interesting modifications to the game that do anything from adding massive chess games to preventing X-Ray vision. If you would like to know more about Bukkit Servers, leave me a comment and I will write an Article about it within the next week. This Article was updated 1/17/2013
Bukkit Server
Who knows what a Bukkit Server is?
All Links
This includes all links on my website, if you missed one it is here.
- Minecraft Server File Download
This is for Step 1, where you download the server.exe file. - What is my IP?
This shows you what your IP Address is, the one people use to connect to your server. - IP to Domain Name
Use this link to make your Static IP Address a Domain Name.