How to Make Calming Meditation Bottles

Make your own meditation bottle (and play with glitter, too!)
After a particularly stressful period, I decided to make some changes for the better- eating right, exercise, and even meditation.
The problem is that I'm not very good at sitting still for very long. Well, that's not exactly accurate- I sit at my desk for hours and hours...but that's researching, reading, working and goofing off. What I needed was a quick fix; something I could do at the drop of a dime, without having to go into a darkened room or disrupt what I was in the middle of.
None of which remotely qualifies as 'meditative.'
Until a friend suggested a meditation bottle, the idea being that you shake it up and gaze into it, clearing your mind while the glitter settles, providing enlightenment in easy to manage 5 minute chunks.
The ridiculously simple instructions
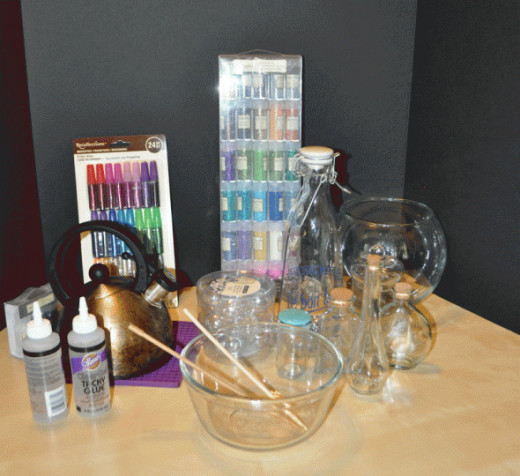
Obtain the following:
- Container with TIGHT fitting cap
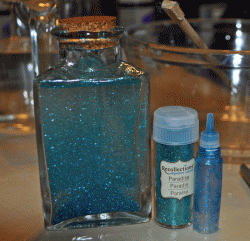
- Desired colors of fine glitter & glitter glue
- Clear drying gel-style glue
- Optional extra credit fancy style: food coloring
- Very hot (not boiling) water
- Chopstick, straw, or anything long and thin that will fit inside your container to stir & break up clumps
- Bowl or sink to do the combining in so it doesn’t get all over
Now the “complicated” bit: mix items #2-5 inside #1 using #6&7 to make the job easier.
Wow, so far this meditation stuff is a breeze, right?
Let's be a little more specific.
Heat your water- I used a teakettle because it held a lot and was easy to handle/pour. You don’t want it boiling, which could hurt your glassware — it’s made to be more decorative than sturdy, after all– but it needs to be hot enough to melt the glue.
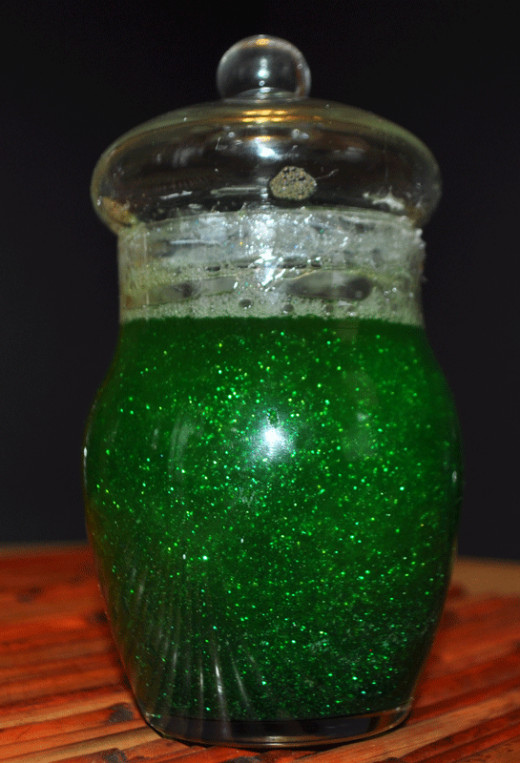
Now comes a little trial and error: you’re going to play with your water-to-glue ratio until you obtain a look you like. Your goal is to get the glitter to take several minutes to fully settle after you’ve shaken it vigorously.
For a smaller bottle like those I used, you’ll end up with a very high percentage of glue- perhaps as much as 1/3 of the bottle, but start with a tablespoon or two- you can always add, you can’t subtract.
Squeeze the glue into your bottle, pour the hot water over it, filling only 2/3 of the bottle so you can make adjustments later. Generously pour your glitter/glitter glue into the bottle- enough to coat the bottom to a depth of 1/8 inch minimum.
Shake, Scrape & Stir
Shake vigorously, using your chopstick to get any stubborn glitter or glue from the sides.
The glue will go from being a pool at the bottom to forming into glitter coated blobs. Once those dissolve, you’re ready to time to your bottle.
Sit & watch your glitter settle. At first it’ll move quickly, then slower, finally drifting down toward the bottom.
Based on what you learned, add to the bottle, leaving 1/2 inch of air between your liquid and the cap:
Did it happen too fast? Then use a lot more glue than water to fill the remainder of the bottle.
Did it happen too slow? Thin the liquid out with more water than glue in the remainder of the bottle.
Not sparkly enough? By all means, go crazy with the glitter!
Was it just right? Try to keep the same proportions you used previously to finish filling the bottle.

Food coloring is a powerful thing
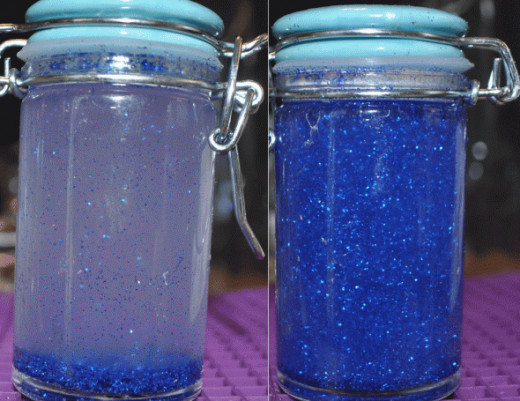
You might have noticed in the above pic of the blue bottle on the left that the water is murky from the dissolved glue.
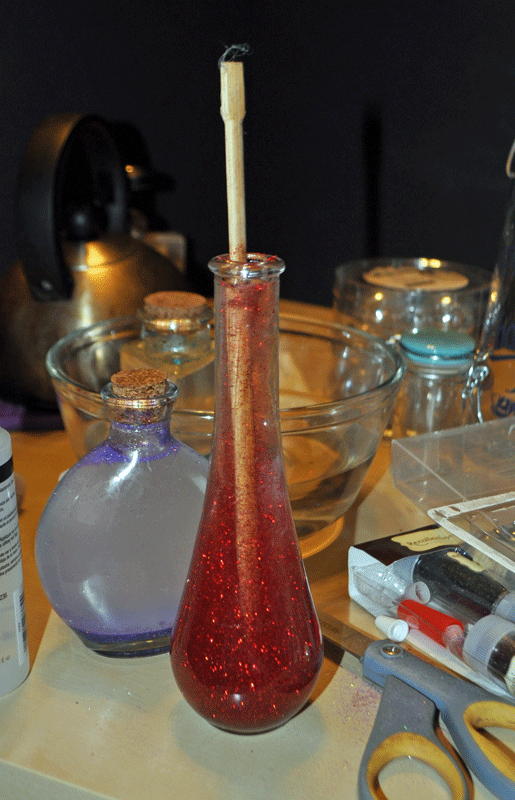
If that bothers you, food coloring is your friend…but a somewhat overbearing one, as I discovered.
A single drop goes a long way. In making the purple bottle, I followed the instructions for mixing red and blue and what I got was black, pretty much. A much larger bottle would’ve been more diluted and would’ve been fine I suppose, but in this case I’ll have to put this in the “oops” column.
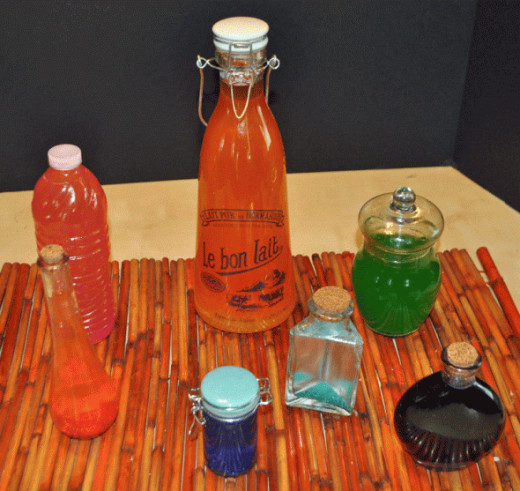
The “after” photo is here, the “before” can be seen behind the red bottle with the chopstick inside.
That bottle settled particularly slowly- it was interesting to see how the different shapes of the bottles affected the glitter’s patterns and rates they settled- the corners on the teal bottle seemed to make it take the longest, for example.
The little bottle results
Careful with caps...
I’m so glad I know myself- instead of just doing one of these bottles to see how it went, I knew I’d have to play around & screw some up before I felt like I really “knew” the bottles.
Then again, maybe that’s my OCD. Maybe that’s why I need the bottles in the first place? Hmmm.
ANYway, here’s a pitfall to beware of: I used this little apothecary bottle, thinking it was cute, but not so much.
What seemed like a fairly tight seal on the lid did not stand up to liquid at all, and my khakis paid the price. Not one to give up, I super glued it shut, but that didn’t work so well, plus it’s really ugly.
I would stick with corks, screwtops (which you could glue on the inside and no one would see) or latch-type closures.
The results
I’m really glad I made a bunch to play with, which was very useful. Plus it gave me a legitimate excuse to buy the extra large variety pack of glitter I’ve had my eye on for awhile!
I chose to focus on the smaller ones (6-9 in high on average. The orange milk bottle is 14in) so I could put them on my windowsill while I work. The sun shining through them is lovely, and it reminds me to stop, take a break, and re-center.
The swirling inside reminds me of the milky way, or a dwindling snowstorm- I’m generally a little skeptical about meditation and that sort of thing, though I’m trying to be better!
This is a fun, painless, and pretty way to dip a toe in that pool- who knows, we might just find enlightenment through glitter!


")