Carpal Tunnel Syndrome - Home Management Part 4 - Exercises
Introduction
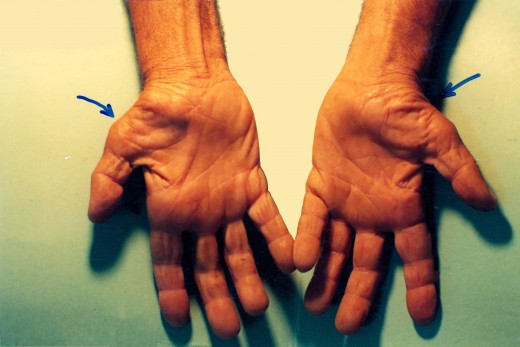
In the case of Carpal Tunnel Syndrome, there may be numbness and tingling sensation in the thumb, index and middle fingers in the areas of Median Nerve distribution areas. Moreover, there may be weakness and wasting of thenar muscles with sensory deficit in that area. In the long standing cases there may be inco-ordination of the hand and fingers. Hence the treatment for Carpal Tunnel Syndromealso aims at strengthening the thenar as well as the smaller muscles of the hand.
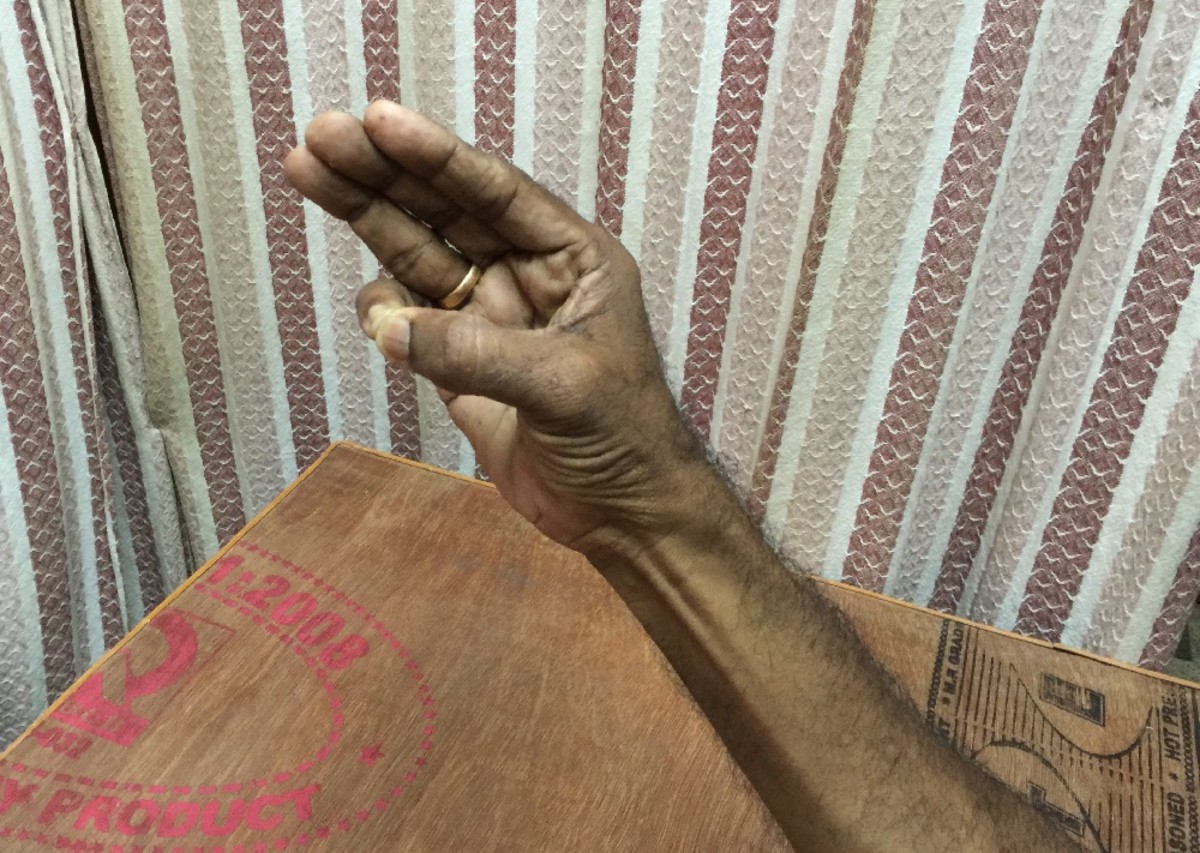
Exercise- No.1
Let the patient have right Carpal Tunnel Syndrome.
Starting Position- The patient sits in a chair near a table facing it. The patient keeps his bend right elbow on the table in such a way that the right elbow is flexed (bend) approximately to 45 degrees with the anterior aspect (front side) of the right forearm and the palmar aspect (front side) of the right hand facing upwards with the right wrist in the neutral position and the right fingers extended.
Exercise- Touch the tip of the right little finger with the tip of the thumb as if ‘pinching’. Press each other for 2 seconds. Now relax and bring the little finger and the thumb back to the starting position.
Repeat the same exercise with the other fingers in the order starting from the ring finger and ending up with the index finger.
Repeat the same exercise in the reverse order starting from the index finger and ending up with the ring finger.

Exercise- No.2
Let the patient have right Carpal Tunnel Syndrome.
Starting Position- The patient sits in a chair near a table facing it. The patient keeps his bend right elbow on the table in such a way that the right elbow is flexed (bend) approximately to 45 degrees with the anterior aspect (front side) of the right forearm and the palmar aspect (front side) of the right hand facing upwards with the right wrist in the neutral position and the right fingers extended. Exercise-Touch the tip of the right little finger with the tip of the thumb as if ‘pinching’. Place a piece of paper between the tips of the thumb and the little finger and hold the paper tightly. Now pull out the paper from the clutches of the thumb and the little finger.
Repeat the same exercise with other fingers in the order starting from the ring finger and ending up with the index finger.
Repeat the same exercise in the reverse order starting from the index finger and ending up with the ring finger.

Exercise- No.3.
Let the patient have right Carpal Tunnel Syndrome.
Starting Position- Same as above
Exercise- Touch the tip of the right little finger with the tip of the thumb as if ‘pinching’.
Slide the thumb down the little finger along its anterior aspect (front side). A slight pressure may be exerted by the thumb against the little finger along the course of the movement. Once the tip of the thumb has reached the base of the little finger, reverse the movement by sliding the thumb up the little finger, thumb exerting a slight pressure against the little finger as it slides up.
Repeat the same exercise with other fingers in the order starting from the ring finger and ending up with the index finger.
Repeat the exercise in the reverse order starting from the index finger and ending up with the ring finger.
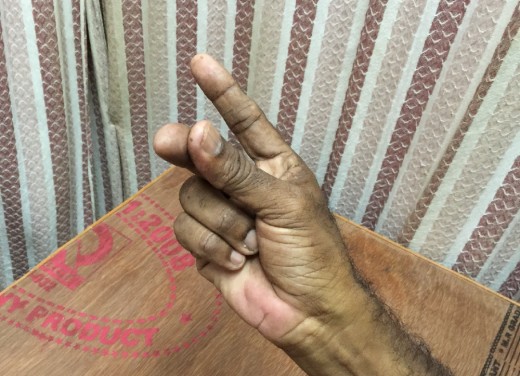
Exercise- No.4.
Let the patient have right Carpal Tunnel Syndrome.
Starting Position- Same as above
Exercise- Touch the tip of the right little finger with the tip of the thumb as if ‘pinching’. Make the thumb ‘flick’ on the little finger.
Repeat the same exercise with the other fingers, in the order starting with the ring finger with the index finger.
Repeat the same exercise in the reverse order starting from the index finger and ending up with the ring finger.
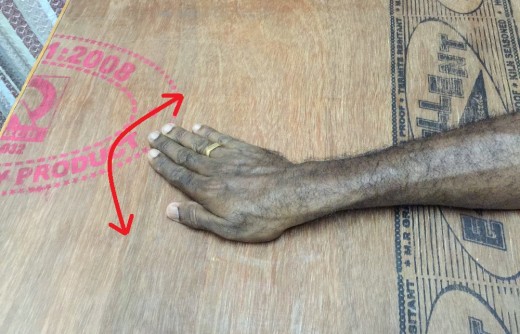
Exercise- No.5.
Let the patient have right Carpal Tunnel Syndrome.
Starting Position- The patient sits on a chair near a table facing it. He keeps his right forearm and right hand on the table in such a way that the anterior aspect (front side) of the right forearm and the palmar aspect (front side) of the right hand lie flat on the table.
Exercise- Keeping the forearm still on the table, the hand is slid along the surface of the table, with the fingers held closer and parallel to each other, from side to side at the wrist
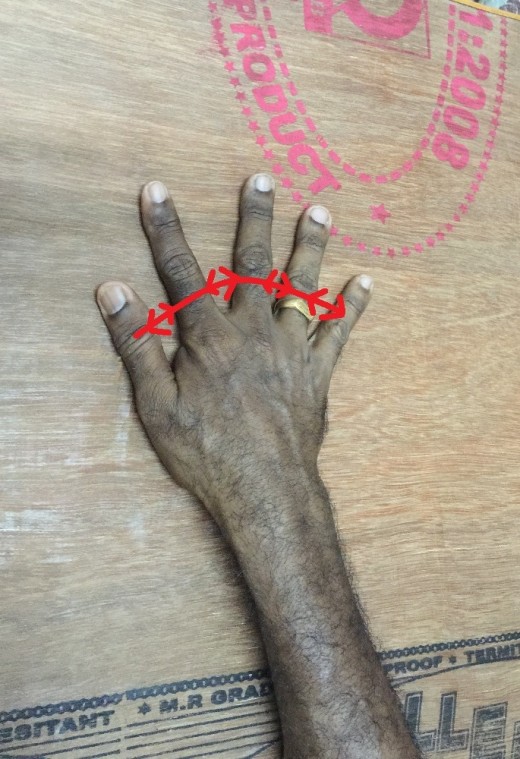
Exercise- No. 6
Let the patient have right Carpal Tunnel Syndrome.
Starting Position-Same as in Exercise.No.4
Exercise- Keeping the forearm still on the table, the fingers are spread apart sliding along the surface of the table and then bringing the fingers together

Exercise- No.7
Let the patient have right Carpal Tunnel Syndrome.
Starting Position- The patient sits on a chair near a table facing it.
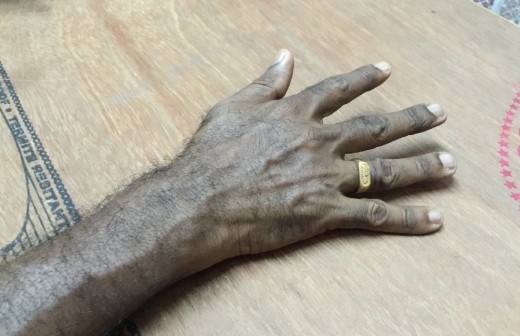
Exercise- The patient keeps his right forearm and right hand on the table in such a way that the anterior aspect (front side) of the right forearm and the palmar aspect (front side) of the right hand lie flat on the table. Lift the right hand up at the knuckles in such a way that the hand is formed into a ‘tent’ shape, with the fingers still touching the surface of the table (as shown in the figure). While doing this exercise, the fingers must be kept straight as far as possible. Return back to the starting position.
Exercise- No.8
Let the patient have right Carpal Tunnel Syndrome.
Starting Position- The patient sits on a chair near a table facing it.
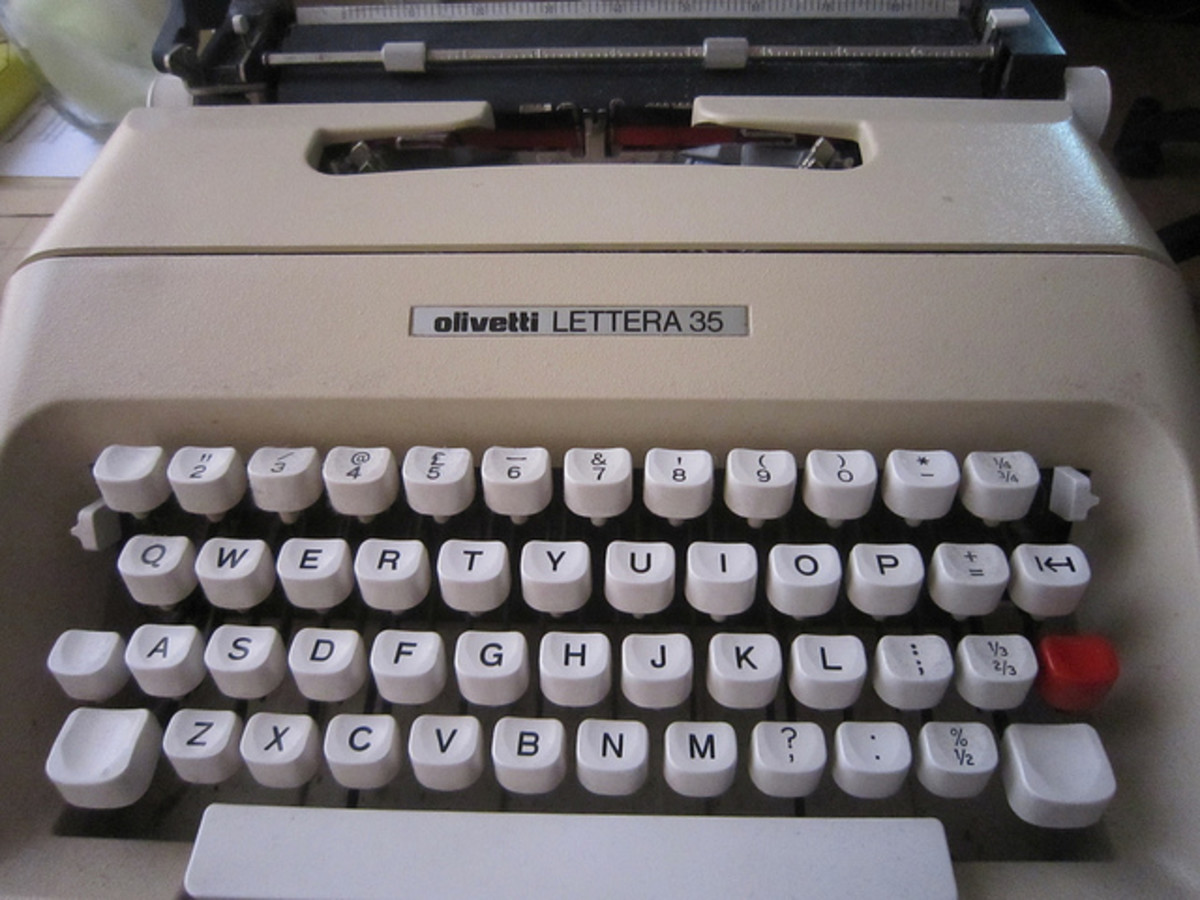
Exercise- The patient keeps his right forearm and right hand on the table in such a way that the anterior aspect (front side) of the right forearm and the palmar aspect (front side) of the right hand lie flat on the table. Lift the thumb and the fingers up individually (one at a time) and tap them on the table individually (one at a time) as if typewriter buttons are pressed in the order starting from the thumb and ending up with the little finger. The fingers are tapped with certain amount of force or pressure.
The exercise may be repeated in the reverse order starting from the little finger and ending up with the thumb.
Exercise. No.9
Let the patient have right Carpal Tunnel Syndrome.
Starting Position- The patient sits on a chair near a table facing it.
Exercise- The patient keeps his right forearm and right hand on the table in such a way that the anterior aspect (front side) of the right forearm and the palmar aspect (front side) of the right hand lie flat on the table.
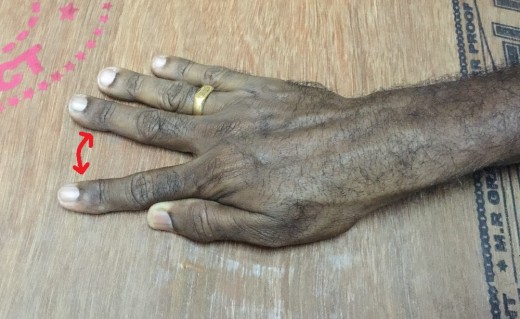
To start with move the index finger sideways away from the middle finger (sliding the index finger along the surface of the table), keeping the fingers straight. Now bring them back to the starting position.
Now move the ring finger sideways away from the middle finger (sliding the ring finger along the surface of the table), keeping the fingers straight. Bring them back to the starting position.
Now move the little finger sideways away from the ring finger (sliding the little finger along the surface of the table), keeping the fingers straight. Bring them back to the starting position.
Use the other hand to help to move the fingers until they get a ‘feel’ for it.
Once the patient gets a ‘feel’ of the exercise, a mild or moderate resistance may be given against the movements by the other hand.

Exercise-No. 10.
Let the patient have right Carpal Tunnel Syndrome.
Starting Position- The patient sits on a chair near a table facing it.
Exercise- The patient keeps his bend right elbow on the table in such a way that the right elbow is flexed (bend) approximately to 45 degrees with the anterior aspect (front side) of the right forearm and the palmar aspect of the right hand facing upwards with the right wrist in the neutral position and the fingers held extended.
Make a tight ‘fist’ with the thumb inside the ‘fist’ (right).Now stretch out the fingers widely.
Make a tight ‘fist’ with the thumb outside the ‘fist’ (right). Now stretch out the fingers widely.
Make a tight ‘fist’ with the thumb inside or outside the ‘fist’ (right). Hold the (right) ‘fist’ with the left hand in such a way that it wraps round the ‘fist’ (right). Now stretch out the right fingers to which a mild or moderate resistance is offered by the left hand.
Exercise-No.11
Let the patient have right Carpal Tunnel Syndrome.
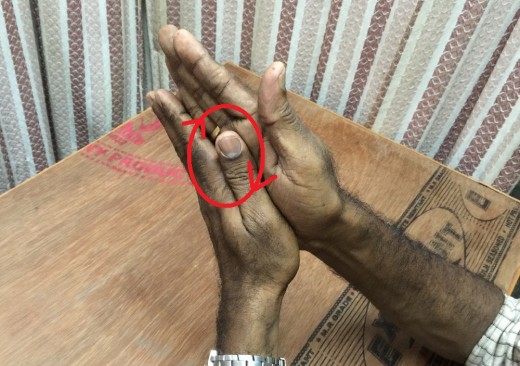
Starting Position- The patient sits on a chair near a table facing it. Exercise- The patient keeps his bend both elbows on the table in such a way that both the elbows are flexed (bend) approximately to 45 degrees with the anterior surfaces (front side) of both forearms and the palmar aspects of both the hands facing each other with the wrists in the neutral position and the fingers held extended. The forearms and the hands are held closer and parallel to each other in such a way that the palmar aspects of both the hands are in close contact with each other. Press the palmar aspects of the hands against each other and move them in circles in the clockwise and then in the anticlockwise directions against each other.
Exercise-No.12.
Let the patient have right Carpal Tunnel Syndrome.
Starting Position- The patient sits on a chair near a table facing it.
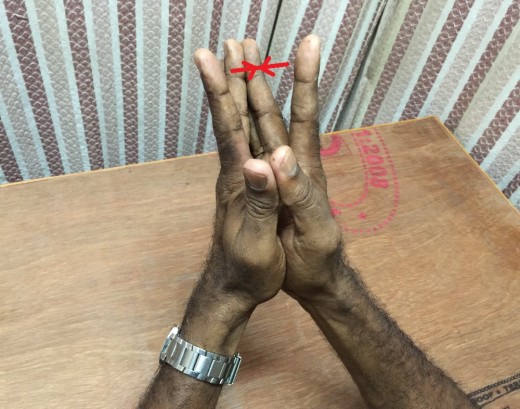
Exercise- The patient keeps his both bend elbows on the table in such a way that both the elbows are flexed (bend) approximately to 45 degrees with the anterior surfaces (front side) of both the forearms and the palmar aspects of both the hands facing each other with the wrists in the neutral position and the fingers held extended. The forearms and the hands are held closer and parallel to each other in such a way that the palmar aspects of both the hands are in close contact with each other so that the fingers of both the hands lie parallel to each other and in contact with the corresponding finger of the other hand. Press the palmar aspects of both the hands against each other.
Separate the thumbs and stretch them out to the maximum while the palmar aspects of both the hands and the rest of the fingers of both hands are still in contact.
Repeat the same exercise with other fingers in the order starting from the index finger and ending up with the little finger.
Repeat the same exercise in the reverse order starting from the little finger and ending up with the thumbs.
Exercise-No.13
Let the patient have right Carpal Tunnel Syndrome.
Starting Position- The patient sits in a chair near a table facing it.
Exercise- The patient holds a pencil in the right hand in a correct tripod grip between the thumb, the index and the middle fingers, the anterior aspect of the right forearm and the right wrist resting on the table. Make small circles on a paper placed on the table with only the fingers moving to make the pencil move, the wrist remaining stuck to the paper without moving throughout the exercise.
The same exercise can be done by drawing small straight lines or zigzag lines

Exercise-No.14
Let the patient have right Carpal Tunnel Syndrome.
Starting Position- The patient sits in a chair near a table facing it. Exercise- The patient holds a pencil in the right hand in a correct tripod grip between the thumb, the index and the middle fingers, the anterior aspect of the right forearm and the right wrist resting on the table. Bend the thumb, the index and the middle fingers, with the grip on the pencil intact, in such a way that the pencil is pulled towards palm. Once the pencil is pulled in to the maximum the thumb, the index and middle fingers are straightened, with the grip on the pencil still intact, in such a way that the pencil is pushed out.

Exercise- No.15
Let the patient have right Carpal Tunnel Syndrome.
Starting Position- The patient sits in a chair near a table facing it.
Exercise- The patient holds a pencil in the right hand at one end in a right tripod grip between the thumb, the index and the middle fingers, the anterior aspect of the right forearm and the right wrist resting on the table. Walk the fingers up and down the pencil

Exercise-No.16.
Let the patient have right Carpal Tunnel Syndrome.
Starting Position- The patient sits in a chair near a table facing it.
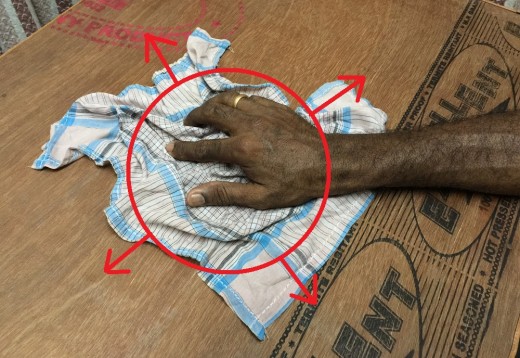
Exercise- Spread out an hand kerchief on the table. Keep the palmar aspect of the right hand on the spread out hand kerchief in such a way that the heel of the right hand rests at the middle of the handkerchief. Now pull the hand kerchief towards the palm of the hand with the fingers individually and finally with the fingers together, with the heel of the right hand still resting at the middle of the hand kerchief. This is continued till the whole hand kerchief is within the palm of the right hand. Now spread out the hand kerchief which is within the palm with the fingers individually and finally with the fingers together, with the heel of the right hand still resting at the middle of the hand kerchief. This is continued till the whole hand kerchief is spread out.
Exercise-No.17.
Let the patient have right Carpal Tunnel Syndrome.
Modeling Clay Exercise- Modeling Clay is available in the market. Squeeze and make models with the modeling clay
Exercise-No.18
Let the patient have right Carpal Tunnel Syndrome.
Sand Exercise- Take sand in a small bucket. Put the right thumb and fingers into the sand and squeeze the sand several times

Exercise- No. 19-Grip Exercise.1
Let the patient have right Carpal Tunnel Syndrome.
Squeezing the ball Exercise- Take a small exercise ball (available in the market) and squeeze it several times. If the exercise ball is not available, a small ordinary ball may be used.
Exercise- No.20- Grip Exercise. No.2
Let the patient have right Carpal Tunnel Syndrome.
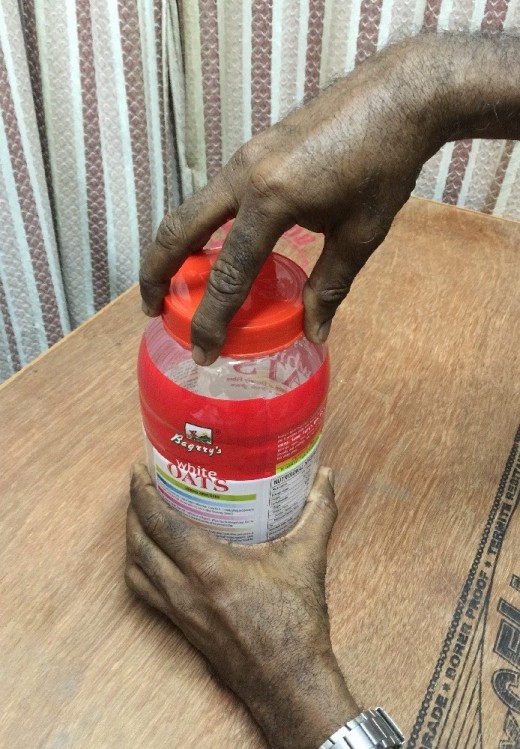
Take a cylindrical container with a lid (lid is to be of screwing type). Let the lid be in a closed state. Now hold the lid of the container with the right hand in such a way that the tips of the right thumb and the right fingers encircle the lid as shown in the figure. Now try to loosen the lid by rotating the lid in the anti clockwise direction with the right hand. Once the lid is loosened, try to tighten the lid by rotating the lid in the clockwise direction with the right hand. Repeat the exercise several times
Exercise- No.21. Grip Exercise. No.3.
Let the patient have right Carpal Tunnel Syndrome
Take a cylindrical container with a lid. Let the lid be in a closed state. Now hold the container at its top (as shown in the figure) with the right hand tightly in such a way that the tips of the right thumb and right fingers encircle the top of the container as shown in the figure. Now pull the container out of the clutches of the grip of the right hand by the left hand. Repeat the exercise several times

Exercise- No.22. Grip Exercise. No.4
Let the patient have right Carpal Tunnel Syndrome.
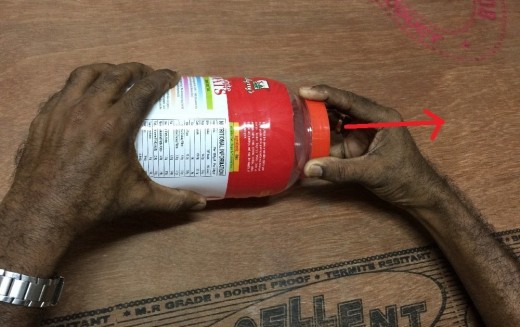
Take a cylindrical container. Now hold the container at its middle by the right hand tightly in such a way that the right thumb and the right fingers wrap around the container (as shown in the figure). Now pull the container out of the clutches of the grip of the right hand by the left hand. Repeat the exercise several times

Exercise- No.23
Let the patient have right Carpal Tunnel Syndrome.
Starting Position- The patient sits in a chair near a table facing. The patient keeps his bend right elbow on the table in such a way that the elbow is flexed (bend) approximately to 45 degrees with the ulnar border (inner side) of the right forearm and the right hand facing downwards with the right wrist and the fingers extended.
Exercise- The patient holds the right thumb by the left hand in such a way that the left fingers lie on the anterior aspect (front side) of the right thumb and left thumb lies on the dorsal aspect (back side) of the right thumb. Now the right thumb is moved towards the right little finger in an attempt to touch the tip of the little finger to which a resistance is offered by the left hand which is holding it. The resistance offered by the left hand must be such that the right thumb must be able to move and touch the tip of the little finger irrespective of the resistance offered. Repeat the exercise 10 times, thrice a day


