Sewing PPE Face Masks: 5 Things They Forget to Say
Making a PPE Face Mask
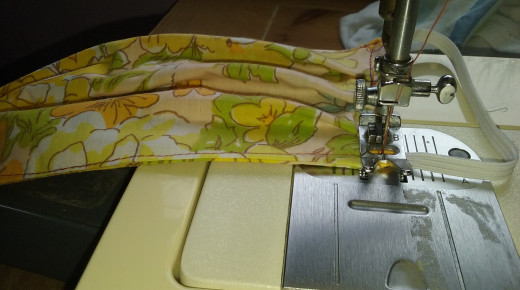
Volunteers Step UP to COVID-19 Pandemic
The pandemic is scary. In the United States, we hear first-hand accounts of our brave healthcare providers and first responders risking their own health with insufficient PPE (Personal Protective Equipment.) Now many of them are re-using face masks. This breaks all accepted medical protocol and can spread disease among patients.
Many videos appeared teaching the public how to sew a face mask for contribution to our medical personnel or for our own use.
But, these videos leave out steps that would make it easier to produce these PPE masks.
Loops Better Than Ties
I am sewing for a local doctor. She can use my clean, but not sterilized, masks for low risk cases.
Her staff requested masks with elastic loops for around the ears.
This makes total sense. A mask with 4 tie strings must be tied. That takes time and may not result in a great fit. Meet their needs.
Don’t do tie strings if you have elastic available for ear loops.
Fabric Size
A video which I studied repeatedly for a side-gathered mask instructed you to cut two rectangles measuring 6 inches (15.25 cm) by 9 inches (21.5 cm.) The latter 9-inch side is the width of the mask going across the face.
You will eventually be creating three tucks on the shorter sides to create the three-dimensional fit around the chin, mouth and nose.
A “tuck” is a fold creating a small overlap. Think of a pleated skirt or a paper fan.
Well, I am an experienced sewer. Over half a century of experience sits in my hands and brain. I find the 6 inch size to be quite challenging and thus time wasting. Getting three evenly (or close enough to that) overlaps and pinning through the resulting four layers of fabric is harder than it needs to be.
Unfortunately, I did a heap of cutting first, so I was stuck with the 6 inch height for a while. I muddle through, growling a little.
However, my next batch was cut at 7 inches (18 cm) by 9 inches. This made the sewing more efficient and the mask more comfortable for the wearer.
Cut the fabric in 7 inch by 9 inch rectangles.
Seam Size
Some videos suggest the first seam attaching the rectangles face-to-face should be one-quarter inch. Experienced sewers should be able to go smaller. Perhaps one-eighth of an inch or somewhere between one-quarter and one-eighth.
A small seam allowance won’t be critical because after the rectangles are turned right-side out, you will be overstitching along the sides.
Don’t waste fabric in seams. Go as narrowly as possible.
Tucks, or Pleats, Make a Comfortable Fit
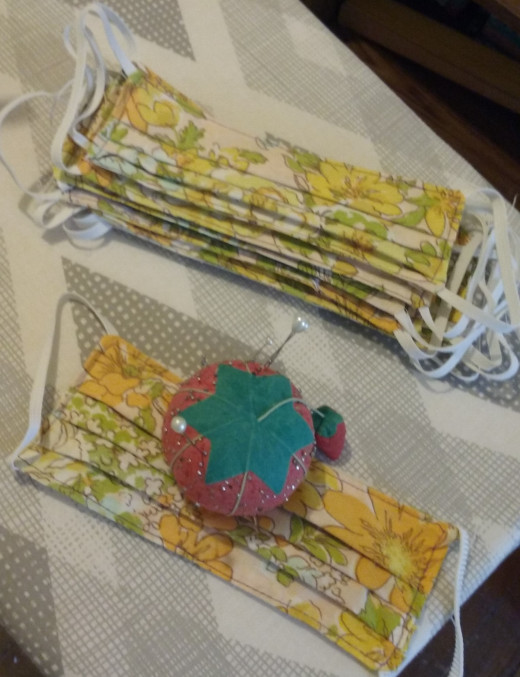
Iron
Ironing is not mentioned in the instructional videos, but it will make things better in three ways:
- Flattens the edges- very useful
- Maximizes the mask size
- Improves the ease of making the three tucks
I do not rush to do ironing in my sewing, so if I am recommending it – it must be dramatically useful. It is!
After turning the rectangles right side out, of course, use a pencil or ruler to push the two surfaces as flat and large as possible. Then mist lightly with water and iron the edges flat.
Then, as you are folding the tucks mist and iron each fold before pinning. It makes it easier to get the size of each tuck more even. Also, it makes pinning easier.
Iron the turned-out mask AND the tucks.
Double-Overstitch
I had thought the fabric masks that we volunteers are making would be thrown in the trash after a single use with a single patient. This was the way masks were used in the world before the COVID19 pandemic.
However, if these PPE masks are going to be worn, washed, and re-worn for days or
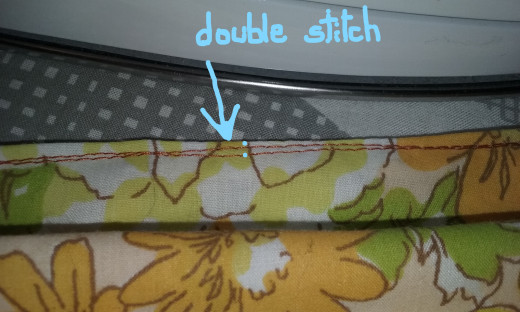
weeks, they must be sturdier. That is why I recommend going twice around the perimeter with overstitching. Make the mask able to bear hand washing without coming apart.
Overstitch the perimeter of the mask two times around.
Twice Around the Edge for Stability
The Five Extra TIps Re-capped
- Don’t do tie strings if you have elastic available for ear loops.
- Cut the fabric in 7 inch by 9 inch rectangles.
- Don’t waste fabric in seams. Go as narrowly as possible.
- Iron the turned-out mask AND the tucks.
- Overstitch the perimeter of the mask two times around.
Use My Tips with This Mask Making Instructional Video
This content is accurate and true to the best of the author’s knowledge and does not substitute for diagnosis, prognosis, treatment, prescription, and/or dietary advice from a licensed health professional. Drugs, supplements, and natural remedies may have dangerous side effects. If pregnant or nursing, consult with a qualified provider on an individual basis. Seek immediate help if you are experiencing a medical emergency.
© 2020 Maren Elizabeth Morgan

