Treating Lower Back Pain With Yoga Exercises

Yoga for Lower Back Pain
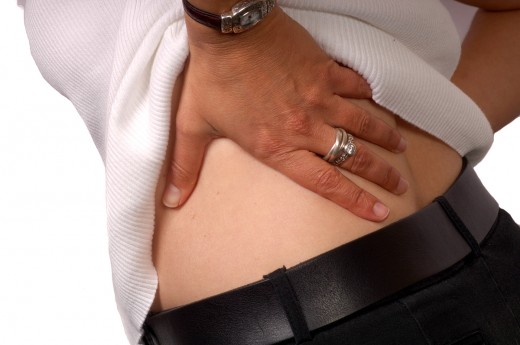
Stress has been an integral part of the modern lifestyle. This has also resulted in the acquisition of several chronic conditions, whether mental or physical. One of the physical manifestations of stress is lower back pain, due to poor posture or extended periods of sitting at your office chair. Fortunately, yoga provides a natural approach towards managing pain caused by yoga and treating it altogether.

Effective Pain Management
Depending on the severity of your lower back pain, it can be annoying or it can incapacitate you to a certain extent. Hence, an effective pain management is very useful in overcoming this condition and finding ways to totally eliminate it.
Too much dependence on painkiller medications is not healthy, plus they only mostly provide temporary relief. Yoga is a natural method that effectively relieves pain caused by strain on your lower back. You can perform exercises that add flexibility into that specific area of your body. It will also help you in the future, such that you can prevent any similar injuries from happening again.
Yoga Asanas 13 - Savasana - deep relaxation
Suggested Yoga Exercises
There are several yoga exercises that target your lower back. Even expert yogis perform these exercises on a regular basis to increase muscle flexibility in your lower back and avoid the same problem. But the key to experiencing relief from pain or eliminating lower back pain problems altogether is in the proper execution of these poses. In fact, slight mis-execution of these poses could potentially lead to acquisition of serious injuries.
Here are a few exercises you should try.
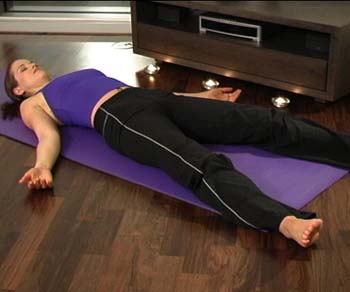
Corpse Pose or Savanasana
The Corpse Pose is one of the most relaxing positions in yoga. You will start this execution while lying with your back against the floor. Rest your arms on either side of the body and your legs on their natural resting position. If possible, turn out your knees slightly but only if it does not produce any sensation of pain on your lower back. If there is any form of pain, you can opt to perform this position with your knees bent.
Stay in this position for at least 10-15 seconds. Follow a rhythmic inhalation and exhalation while on this position. Doing so will release any form of muscle tension off your body.
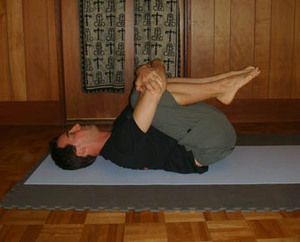
Wind Releasing Pose or Pavanamuktasana
This one also begins on a supine position (back on the floor) with your arms and legs positioned naturally. Then, slowly bend your knees as you breathe in. Place your hands below your knee to recreate the motion of pulling that knee closer to your chest. As you do this, maintain a steady position for your other leg. During the exhalation process, lift your forehead slightly until it touches your knee.
Take note of the positions that you need to perform with every inhalation or exhalation. Once you are complete with this set, you can switch positions, pulling your other knee this time. You can do as many repetitions of this pose as you can.
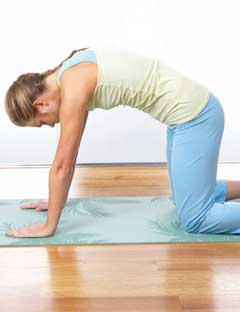
Cat Stretch Pose or Bidalasana
Start this position on all fours, meaning your knees and hands on the floor. Make sure that your hands and knees are properly aligned against the floor. Meanwhile, straighten up your back while on this position for proper alignment. Your head must fall loosely such that you are looking down towards the floor, specifically the space between both hands.
Once in correct position, you can start with your breathing exercise. Arch your back slightly with each exhalation, then tuck in your chin closer to your chest. Stay in this position for a few seconds or until you can hold before going back to the starting position.
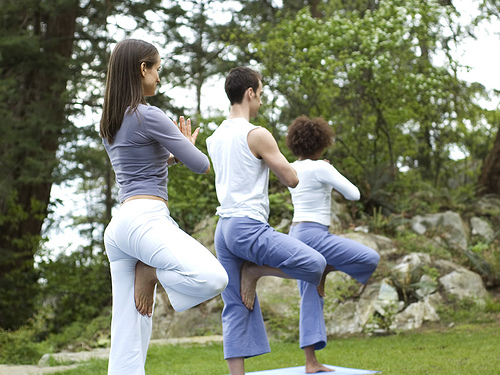
Palm Tree Pose or Talasana
This is a variation of the basic standing position with both arms resting on the sides of your body. Make sure that your entire body weight is evenly distribute on both feet. Once you are comfortably in position, raise your arms upwards such that it is over your head. Then, allow both hands to meet and interlock fingers from both hands. Turn both fingers upward with palm facing upwards. After that, rest your hands on your head and pull it upwards so you are now gazing toward the ceiling. While in this motion, try to stretch your body as much as you can without causing strain. If you have difficulty balancing with this, then you can try the balancing position separately.
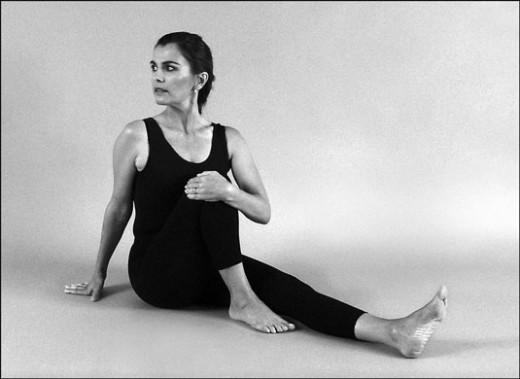
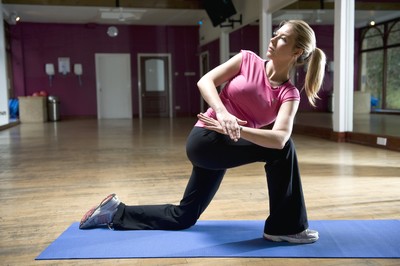
Yoga Sage's Twist Pose
Sage Twist Pose or Marichyasana
This particular exercise involves direct twisting of your back. Hence, you need to be cautious if you insist on performing it or avoid this exercise altogether depending on the severity of your lower back problem.
Starting on a seated position, extend both legs in front of you. Then, begin by bending your left leg. Once your knee has reached your chest area, gently twist your upper torso towards the opposing direction to produce a twisting effect on your lower back. Keep your left knee steady by clasping both of your arms – this will help keep you in position for as long as you want. Be careful when trying to twist your upper torso to avoid overexerting and causing more lower back complications.
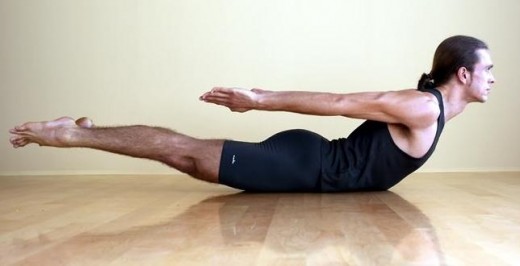
Yoga Locust Pose
Locust Pose or Shalabha-asana
Start executing this exercise with your chest and abdomen facing the floor in a prone position. While your arms remain on the sides, gently lift your head toward the ceiling. As soon as your head is already lifted, allow your upper torso, arms, and legs to follow this motion. Thus, leaving only your mid-abdomen and lower torso touching the floor. Keep this position for at least a minute or as long as your comfort level allows.
Bending Forward Posture or Hastapaddsana
This is one of the most basic positions you will learn in practicing yoga and is quite beneficial for those with lower back pains as well. While on a standing position, begin with a deep breathing exercise. Then, slowly lift your hands up toward the ceiling and over your head. With each exhalation, bring your arms and upper torso forward and in a downward motion in an effort to reach for your toes. Remember: do not force yourself if you cannot reach your toes. Try to aim for the ankles or calves instead. This will effectively stretch out your lower back muscles and adding flexibility to reduce any pain.


")


