10 Tricks for Halloween: Candles

Halloween is the perfect time of year to get craftsy and let your inner creeper come out to have some fun. Who doesn't love all the spookiness of the Halloween season?
If you really want to get into the Halloween spirit, (see what I did there), then follow along with these 10 fun and simple tricks to make your own Halloween candles.
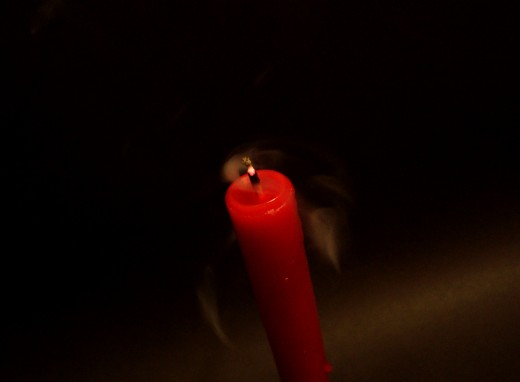
Bloody Candles
Making bloody candles may seem like a daunting task, especially if you want it to look right and not just like you poured something red all over your white candles. It is, however, not a difficult process at all.
Needed:
- A red candle
- Candle Lighter
- White Pillar Candles
- Eye Dropper (optional)
Now, you can easily do this one of two ways. The first way is this:
Take a red candle in a glass case and light it, letting the wax melt and settle into the top portion of the candle. Now, take your eye dropper and scoop up a dropper full of wax. Drip it over the white pillar candle. Repeat this process until the white candle is as bloody as you like.
The second method is this:
Take a long red candle, light it and allow the wax to begin to melt down the side. Turn the candle sideways over the white candle and allow the melted wax to drip over the pillar candle until it is sufficiently bloody.
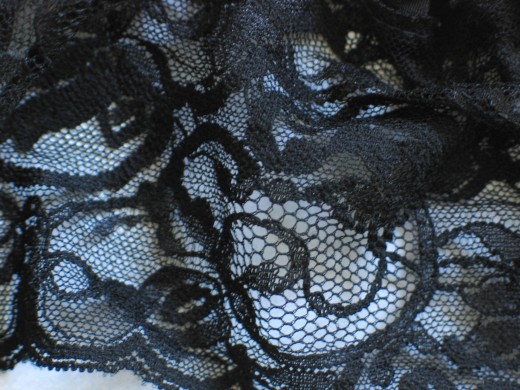
Black Lace Candles
Black Lace Candles are so easy to make you'll wonder why you didn't think of making them sooner.
Here's what you will need:
- Black Lace
- Hot Glue Gun
- Pillar Candles
- Scissors
In case you are unsure of what a pillar candle is, they are long and fatter, generally white, candles. They can be inside or outside of a glass holder, depending on what you prefer.
Measure black lace around the candle and cut accordingly. It is always best to cut the lace a little bigger than you need it to avoid mess ups and so that none of it gets ruined for being too small to use.
After that, wrap the lace around the candle and hot glue the edges of it to the candle. That excess lace you had, now you can simply fold it over and glue it to the rest of the lace. Let the glue dry while holding the lace in place and voila you have black lace candles.
Another cool idea for the lace is to buy it in patterns instead of just straight. Many craft stores carry patterned lace, go and have a look to see what you like. There are so many spooky ideas:
- Pumpkins
- Spider Webs
- Cats
- Witches
- Full Moons
Just look around and see what you can find; especially close to Halloween. Keep an eye out on the seasonal stuff in crafting areas of popular stores as well.
Floating Candles
These floating candles are just like something from a Harry Potter movie, except they are all yours! They seem like they would be pretty difficult to make, and they do take a little bit of work, but they aren't that bad.
Needed:
- Hot Glue Gun
- Toilet Paper or Paper Towel Roll
- White Spray Paint
- Black Thread
- Scissors
Start by cutting the top of the cardboard roll a little uneven to create a used candle look, or skip this step if you want them to look new. Either way works just fine.
Wad up a piece of newspaper or use a piece of styrofoam and push it into the top of the cardboard roll to create something for your tea light to sit on. Make sure to push it down just enough to be able to fit tea light in there snuggly and not too deep.
Use hot glue along the top of the roll to create wax drips. Take a few of them down around the middle and leave some up top, the uneven drips make the candle look more realistic.
Take rolls outside after glue has dried and spray paint white. Repeat this process until thoroughly white and to your satisfaction. Bring in and secure tea lights inside of rolls.
Poke a small hole into two sides of the roll, across from each other. Run black thread through and make a tie on both areas. Stick a tac into the ceiling and wrap the black thread around the base with sharp part of tac to ensure it is sturdy and won't slide off and fall.
Pillar Candle
Spiderweb Candles
These can be so cute or absolutely creepy, depending on your preference and how much work you feel like putting into them.
Here's what you need:
- Crafting Vinyl
- Pillar Candles - color of your choosing
- Craft Knife
- Spiderweb Stencils (optional)
Sometimes the vinyl is cut by using a cutting machine, but we want this to be a simple process that doesn't cost an arm and a leg, so for the purpose of making our spiderwebs out of vinyl, we are going to draw out the spiderweb onto the vinyl and cut or "weed" it out with a craft knife. These are essentially a scalpel for crafting.
So, draw out your spiderweb using stencils if you need or just an ink pen if you can. Use your knife to cut along the outside until you have completely trimmed out your web, then pull it off like a sticker.
Since they are stickers, simply adhere it to your candle, gently so as to not rip your vinyl or put it on uneven or bubbly. And there you have it, spiderweb candles!
Paper Luminaries
Time to have some fun with tissue paper and mason jars!
Needed:
- Yellow or Orange Tissue Paper
- Clean Mason Jar
- Paint Brush
- Scissors
- Decoupage or Homemade Decoupage
- Candle/tea light
- Black Paper
At first glance, this one seems a lot more in-depth than the previous candles. It appears to have more work and more needed supplies, but it really is just as easy as the rest.
Cut paper tissue paper into small squares about two inches around. Then cut eyes and a mouth, or any type of design you want out of the black paper. Next, paint on decoupage in strips and add tissue paper. Continue this all the way around the jar until it is fully covered in paper.
Paint the eyes or designs from your black paper onto your tissue paper, then add another generous layer of decoupage over all of it. Allow it to dry, stick your candle inside the jar and you're all done.
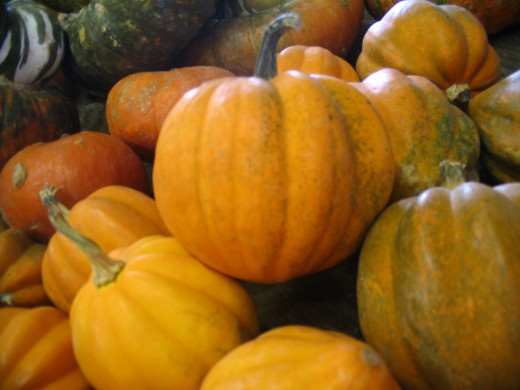
Spider Candles
These were so adorable that they had to be added here. If you have ever carved and gutted a pumpkin this one will be a breeze; if you haven't, it's still going to be easy!
Here's everything you need"
- Jack Be Little "Mini" Pumpkins
- Tea Lights
- 4 Black Pipe Cleaners (per each spider)
- Knife
- Spoon
Start off by cutting the top of the mini pumpkin off, then using the spoon to scoop all the insides out. Now add tea lights to the inside. Cut the pipe cleaners into eight even lines, bend them a bit to look like spider legs and poke them into the top portion and you have a spider candle.
You can draw eyes on if you want as well.
Also, if you prefer, you can use universal glue to attach the legs instead of poking them in.
BONUS: How to Make a Spooky Lantern Candle
Gourd Candles
Much like making the mini spider pumpkins, gourd candles are done basically the same, with the exception of being able to make them as a from scratch candle or simply a candle holder.
Needed:
- Gourds of any Size and Shape
- Beeswax or Paraffin Candle Wax
- Candle Wicks
- Knife
- Spoon
- Halloween Colored Wax Tablets
Start by cutting and carving out the gourds, scooping out all the insides. Mix your wax to the preferred color and add to the gourd. Add in the wick and allow time to dry. Now you have a brand new gourd candle.
Glowing Lantern Candles
Quick, simple and awesome; these guys will light up any party or get together in no time.
You'll need:
- Mason Jars
- Black Sharpie Marker
- Black Acrylic Paint
- White Acrylic paint
- Tea Lights
Make sure the jars are clean and dry. Paint them with the white acrylic paint, allow them to dry overnight and repeat the process. Use the black marker to draw eyes and a mouth or whatever kind of designs you want on your lantern candles, then fill in with black acrylic paint.
Add your tea lights and set along sidewalk or walkway to illuminate in a wonderfully creepy way.
Here is a fantastic tutorial on creating Painted Halloween luminaries:
- Halloween Luminaries: spooky colorful painted jars
These Halloween luminaries are bright, colorful and easy to make! Make different faces for your Halloween luminaries for a fun collection of ghouls!
Decorative Halloween Candles
For these candles, you can also print the design off onto tissue paper if you would prefer over using the rubber stamps. Super quick and easy to make candles.
- Tissue Paper
- Pillar Candles
- Wax Paper
- Hot Blowdryer
- Rubber Stamps
On shiny, smooth side of tissue paper, print or stamp design. Cut out the new designs and stick onto candles. Put wax paper, (wax side down), over your tissue paper and take the blowdryer to it until the wax paper is melted and the tissue paper has it all over it. Allow it to dry and cool and then set up as wanted.
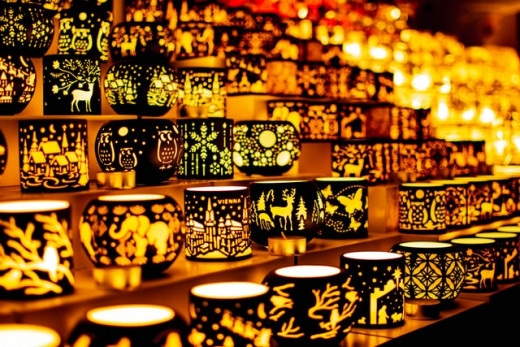
Spooky Silhouette Candles
There is no end to the different things you can silhouette with these candles so let your imagination run wild and spooky.
- Black Scrapbook or Construction Paper
- Stencils
- Mason Jars
- Kraft Knife
- Tea Light
- Glue
Draw or stencil your designs onto the construction paper with a pencil and cut them out carefully with your craft knife. Gently glue them onto the outside of the mason jar and allow it to dry. Add your tea light and place wherever you want to see the silhouette.
© 2017 Rachel Wesley


