Christmas "Kiddie Creation": Puzzle Piece Christmas Ornament
Supplies You'll Need
- One small puzzle (that you don't mind getting painted over)
- Green kids paint
- A red bow
- Red glitter paint (or other colors if you prefer!)
- Red ribbon (to hang ornament on tree)
- Glue gun (rather inexpensive -- some are as low as $3.00!
- A photo of your child (that you don't mind cutting up and using for this project)
That's all!
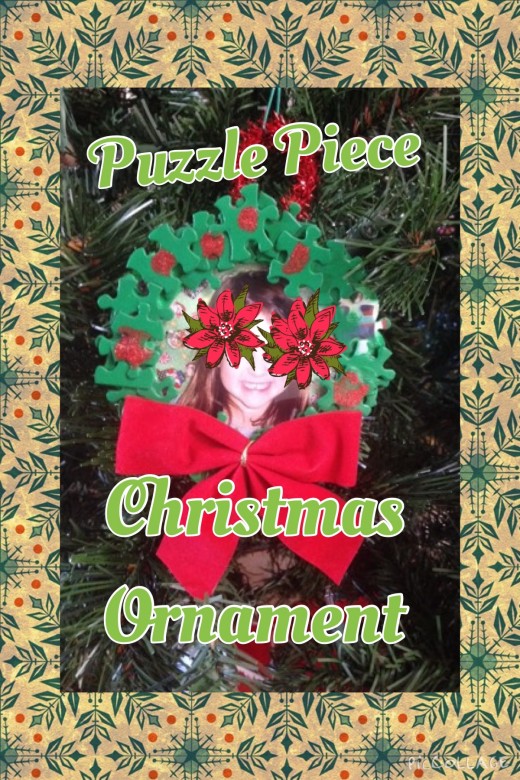
Puzzle Piece Ornament
You've Got Your Supplies... Now Let's Craft!
OK, so you've got your supplies. Now all you need are the steps!
Step 1: Paint your puzzle pieces green. You can allow the kiddos to get in on the painting fun, too! The pieces will make up your wreath for the ornament. Allow the pieces to dry on some newspaper for a few hours until completely dry.
Step 2: Using your hot glue gun (and being careful to keep small hands away!) glue the pieces of the puzzle together in a circular fashion. You'll need to stack some pieces slightly on top of each other to get that "full wreath" effect. Let the "wreath" dry for several hours, or overnight.
Step 3: Next, take the photo of your child that you would like to use, and cut it down to size. Using a glue stick or Elmer's glue, glue the photo onto the wreath so that the image shows through the circle.
Step 4: Using your glue gun, attach the red bow to the front of the wreath, on the bottom (or top if you prefer, but it looks nice at the bottom of the wreath and the photo will most likely show better that way).
Step 5: Take the glitter paints and dab splotches onto the puzzle pieces to create a more textured effect on the wreath, as though it has Christmas bulbs or ornaments inside! You can use red or multiple colors, but red does accent the bow nicely.
Step 6: Glue some ribbon to the top. This will be the way you hang the ornament on the tree. Allow everything to dry, and you're done!

