Creating The Perfect Birthday Cake for An Artist

The perfect cake for the artist..
Birthdays come but once a year....
Birthdays only come around once a year. So, why not make it extra special for that special person in your life. They will appreciate the extra effort you put in and afterwards, you will be proud of the work you did on your own.
When it comes to deciding what kind of birthday cake to make, it is important to look at the person's interests. By doing this kind of brainstorming, you should be able to find someway that you can decorate or design the cake without necessarily having a baker's degree. In fact, all it takes is a little bit of creativity.
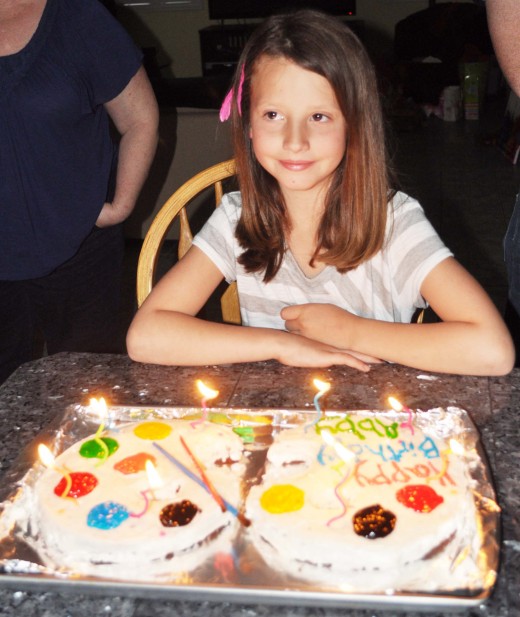
Recently, it was my daughter's birthday. One of her biggest interests is art. She loves to draw, to paint, and to do a variety of crafts. So, I couldn't have thought of a better theme than a cake perfect for my little artist - an artist palette!
Cook Time
Ingredients
- 1 Box cake mix, flavor of choice, additional ingredients
- 2- 9 inch round cake pans
- 1 lb (1 box usually) powdered sugar
- 1/4 cup milk
- 1 tsp vanilla extract
- 1 stick (1/2 cup) salted butter
- 6 tubes Decorating gel, variety of colors
Level off the cake

Template

Preparing to decorate...

Frosting the cake...

Putting on the edible paint

Let's get started...
- First get out the ingredients to make your cake. My daughter wanted chocolate cake, and because I was on a time crunch, I just picked up a box mix, and prepared according to the directions on the box. Feel free to make any kind of cake you please, just make sure to cook them in 2 - 9 inch round cake pans. (Or just 1 - 9 inch round cake pan if you are only interested in doing one artist palette. Be warned that one box of cake is enough for two pallettes and if it isn't separated, it might be too tall and look funny!)
- Once the cakes come out of the oven, cool on wire racks.
- Once the cakes are cool enough, level them off by cutting off the tops. Use a very sharp knife. I recommend the Forever Sharp knife. It easily glided across the whole top and made a very clean cut. Dull knifes will tear and not cut.
- Create a template in the shape of an artist palette with a piece of paper. This step is optional, however, it will be beneficial so you don't cut the cake and make a mistake. Better to redo a piece of paper than to remake the cake.
- Cut the cake following the template guideline. Remember to use a sharp knife so the cake will cut and not tear.
- Get your presentation surface ready. I usually use a cake sheet covered in tin foil. Another option is to use a piece of cardboard covered in tin foil or buy a platter that will fit the cakes.
- Flip the cakes over so the part you cut is on the bottom. (While you don't have to do this, I learned this is beneficial when it comes to frosting the cake. Otherwise, the cake will be crumbly and the frosting won't spread smoothly! I learned the hard way!)
- Bring out the ingredients to make the Buttercream frosting. While this frosting is homemade, you may also use store bought frosting to save on time or if you have a flavor preference.
- Put the powdered sugar, milk, vanilla and salted butter in a large bowl. The butter should have been set out prior to soften. This will make it easier to mix.
- Using a mixer, beat the ingredients until well mixed.
- Frost both cakes.
- Make sure when frosting the cakes that you frost the sides and in the palette hole. All visible parts of the cake should be covered with frosting. If you notice the cake is crumbling and mixing with the frosting, add a light layer of frosting and then refrigerate for about an hour and finish frosting.
- If you would like to make chocolate frosting to make the palettes look wooden, add cocoa to the frosting while mixing.
- Using a small circular cup (I used one off a cough medicine bottle) make marks in the frosting to guide you wear to put the decorator's gel for the paint circles.
- Arrange the decorator's gel around the palette. Feel free to use one cake to write a birthday message to the recipient.
- Add some paint brushes to put on the final touches.
- Present cake and enjoy the compliments!
The Finished Product

Other Cake Recipes to Make!
Make your child's birthday special - How to make a race car track cake - Every kid has their favorite characters. This cake will help you incorporate the characters that young boys love!
Rum Cake Recipe - Looking for a cake sure to please the adults, check out this recipe. Sure to please.
Hedgehog Cake - A Chocolate Cake - Looking for a cute cake to make that the kids are sure to love, give this one a try!
Making and Decorating a Cake Train - Whether your looking for a theme for a kid's birthday party, or just want to have a fun time, check out this tuturial on how to make a cake train.
For just one day...
Birthday's come but once a year, and that means it is a special day to celebrate. Making a cake for your child is a great way to celebrate their birthday. Not only can it be more cost effective, but it also allows you to be more picky about the ingredients that go in.
I will admit, when I was a teenager, I didn't always appreciate the homemade cakes. (Then again, those were the ones in a regular cake pan and frosting and didn't look anything like a birthday cake.) But, with a little bit of creativity, making a cake can not only be a special treat for that special someone, but it can actually be fun and fairly easy. The best part is, it even tastes better than a cake from the store. After all, who knows how long it has been sitting there unless you ordered it especially for the occasion.
These cakes will definitely be the hit of the party, and even with your child. It is especially special because your child's cake will be unique and chance are good they won't be available in stores. Yet, most importantly, it allows you to add an ingredient only available at home - Love!


