How to Make Two Christmas Trees with One Pallet

Know your pallets
- How to tell if a pallet is safe to re-use
Are Wood Pallets Safe for Crafting
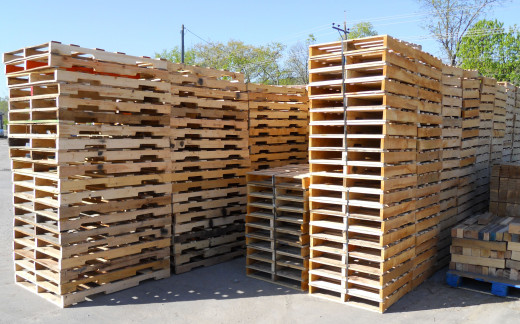
Pallets
Pallets are used everywhere in the United States for transportation of goods. It is estimated that over half a billion pallets are created every year and that in the United State alone nearly two billion are currently in use.
Because pallets are so common it is easy to find them and usually for free. Pallets are great for many DIY projects from planters to decoration to furniture. Recently I build an indoor printer/cat food and water station for our home made out of pallets. If you are searching for free pallets you can always head over to your local big box stores and see if they have any spares you could take. I have noticed they are generally not very receptive. They have a means to dispose or reuse and unless they are in a good mood you might leave empty handed. Another avenue is to periodically check Craigslist. That is how I find 90% of my pallets.
There are a few things you should note before just running out and grabbing whatever pallets you can. You need to make sure your pallets are safe for the type of use you have planned. I have included a link to the right that describes what you need to look for. Our project is an outdoor project so you don't have to be as picky but it is good information should you have other plans for future DIY pallet projects.
In addition I am including a video below on how to dismantle pallets "easily". Our project will require a little dismantling, but in general it will be pretty easy. If you do have other projects in mind though this will help you with ideas for tearing apart you pallets. While the video (and many other videos) will show this process being done quite quickly and easily, I have found that the process is neither quick or easy! For my printer unit I luckily started with far more pallets than I should I would need because I destroyed about 1/3 of the boards I was pulling apart. It is hard work and requires patience. My suggestion is don't go for speed, especially if you have a limited amount of pallets, take it slow and you'll have a greater success.

Step 1 - Pallet
The first step to making our Christmas trees for the yard is finding a pallet like the one above.. Since the pallet is being used for outdoor decoration only you don't have to be to picky about hat type of pallet, or the over all condition, that you use. I would always suggest not using pallets that are chemically treated, but that will be left up to you.
Once you have your pallet, lay it on the ground and with a large ruler or measuring tape make a triangle onto the side that has the most slats. As you can see above, I did not make a perfectly pointing triangle. The reason for this is I want to avoid cutting the center support as that will be our tree trunk. So at the top and bottom of my triangle I cheat the angle enough to avoid touching any of the supports when I make my cuts.
Step 2 - Saw
For the second step I use a hand-held jig saw to cut my pallet. Use whatever saw you feel most comfortable with and make sure you wear gloves as pallets can have many splinters. I start by cutting out my triangle first, then flip the pallet and cut the bottom slats close to the center support (see picture to the right).
Once you are done cutting everything you should be left with three pieces. As you can see you have your main tree in the center, and the other two parts can be combined to create a second Christmas tree.


Step 3 - Remove Extra Pieces
This is the part that will be the most work. Luckily we aren't dismantling an entire pallet, just a few pieces, so there it won't take too long. It is still difficult work though, so be prepared to put some muscle into it. As I said above I will restate here. If you haven't dismantled many pallets before take it slow. In my case I only had one pallet so I had to make sure I didn't damage anything by trying to move to fast. Taking you time will also make ensure you don't hurt yourself as well.
As seen in the video posted above, a great way to dismantle pallets is us a pry bar and rubber hammer. This is the method that I use as well. Starting at the bottom of the pallet you are going to remove all of the boards and nails leaving the bottom part free of anything except supports. If like my your boards break and shatter as you remove them be careful in regards to the nails. Using the pry bar they have a tendency to shoot up in the air. If you don't wear glasses, protective eye ware is recommended. Since it is nearly winter and temps are getting cold, make sure you save the broken pieces and reuse and kindling. NOTE: only do this if you have the heat treated pallets. Never use chemically treated wood and kindling for your home.
Once the back of the pallets are clean, flip each piece over and remove the bottom slat only from the front of your Christmas Tree. When you are done the should look similar to the two pictures to the right.
You can now set the main Christmas tree to the side. Depending on how you are going to place it in the yard or decorate it this one is essentially completed. Our secondary Christmas tree is still in two pieces, so it will require a little additional work to make it yard worthy!

Step 4 - Assemble Second Tree + Optional Step
This step is pretty easy if you have an electric drill and 2 1/2 inch wood screws. I just flipped the two sides over, used a C-clamp to hold them together and put two screws in at the top and bottom. As you can see to the right, once flipped right-side up we have a perfect second Christmas Tree.
Depending on how you decide to place the trees in your yard you may have different ideas for this step. I took a couple of scrap pallet pieces and screwed them to the bottom of each truck making and effective stake to securely hold the trees in the ground. If you have a different way of doing this that you think is more effective please let me know if the comment section, but for me this worked perfectly and allowed me to reuse some of my accumulating scraps!

Step 5 - Place and Decorate
Now comes the fun part, find the perfect place for you new Christmas Trees and stake them into the ground.
As you can see, I painted my trees green for the "realistic" effect ... actually, I did it more so that they would still look presentable in the day light! I then wrapped the trees with some cheap Christmas lights and waited for the sun to go down.
As you can see from the picture below, the trees came out very well. I didn't want to hang lights from the gutter this year, so the addition of these two small pallet Christmas trees really gave me and my wife another option to decorate without going on the roof!
Pallet Trees
Will you give this DIY pallet project a try for the holiday season?
I hope you enjoyed this pallet project. DIY yourself projects like this one are easy and cheap if you do a little research and planning. Pallet projects having been gaining a lot of steam lately and doing a few internet searches you can find many ways to utilize this, generally, free source of wood to make fund improvements to you yard and come.
Please let me know what you think of my project, I hope to have more post in the future!