Easy Craft: Christmas Tree Card

")

Please Rate My Christmas Card, Thanks !
A- Peek- A -Boo Card for Christmas
You may have seen many variations of peek-a-boo cards in stationary or book stores, right? Cute and creative, aren't they?
Have you ever considered of making your own handmade peek-a-boo Christmas card?
It is not hard as long as you give it a try with the helpful tutorial guide provided in this hub.
I am sure you will enjoy the craft making session with your kids, siblings or friends.
What is a peek-a-boo card?
A peek-a-boo card is actually making a big hole in front of the card so that your recipient could see through the picture that is paste or drawn or printed inside the card.
This peek-a-boo card originally came from a peek-a-boo baby book which I saw in the bookstore. It is unique with the background of the Christmas tree colored with shades of color pencil with contrast color.
You could print out a Christmas tree or cut out from a brochure and paste it inside the card.
However, remember to trace out the size of the Christmas tree before you cut out the hole in front card.
Otherwise, the size is not consistent, either you can't see the actual shape of the Christmas tree or too small for the big hole.
Christmas isn't a season. It's a feeling.
— Edna FerberMy Best Substitute for Card Borders
If you are not good at thread braiding, you could substitute it with colorful ribbons, the satin ones.
I usually use colorful satin ribbons for creating bow ties or borders for all greeting cards.
This China made brand ribbon is useful, non fade colors and very smooth satin.
I am pleased with the 25 yards length, I could make dozens of greetings cards with it.
Furthermore, it is very cheap, compare local ribbons sold here.
Worth the price and quality.
Art substitutes
As for the braided threads, you could substitute it with:
-
yarns,
-
ribbons or
-
laces from old clothes.
Besides that, you could also use :
-
crayons,
-
color pencils
-
color markers or
-
water colors to draw simple patterns around the four borders.
Just use your imagination and let it run wild this Christmas!
Here's wishing all kids and everyone a "Merry Christmas" !!
5 Good Reasons Why I Bought Crayola Colored Pencils
1. Crayola colored pencils provided good background colors which are smooth, bright colors and the dark ones give genuine rich colors for greeting cards especially with white background.
2. Most of cheap colored pencils have a big problem with sharpeners. However, Crayola every pencils are sharpen well, no broken nibs and solid, smooth wood that I like.
3. The lead core is solid too. It doesn't break easily like other cheap colored pencils especially local mades.
4. These colored pencils are light weight, easily to grab for both kids and adults and give a comfortable grip.
5. Crayola colored pencils comes in 50 units, all the colors I needed for my art project and my kids even brought them to school. Hence, we shared the colored pencils together since there are various range of green ( from light to dark ).
At such cheap price, it is worth to buy these good quality colored pencils, non toxic and useful.
How to make aChristmas Peek-A-Boo Card
Here is the tutorial of how to make a peek-a-boo Christmas card which I had taken the photos for your simple guidelines. They are simple to do especially for the kids who are much older than the pre-schoolers.
Items you need:
a piece of white card. - it can be a matte card that weighs 120gm or above. The card has to be heavier than normal A4 size paper because it is meant to be the front card, has to be sturdy and firm not flimsy.
some colorful construction papers-use left over projects or art lessons
colored pencils ( or crayons )
a pair of scissors or penknife
a bottle of white glue
braided thread ( or ribbons )
colored markers
pencil

Step 1:
White card: Measure card with ruler 23cm x 17cm ( height x width ). Cut it. Fold into half.
Green paper: Measure paper 15cm x 10cm ( height x width ). Cut it. Paste in the middle of white card.
Step 2


 into half.")


Do you handmade your Christmas Cards?


Step 5


Step 6:
Part 1- Poke a hole on the left-hand upper corner of the white card. Ensure that the hole is big enough to insert the braided thread / ribbon.
Part 2- Use double-sided tape to paste the thread along the border of the card.
Part 3- Poke back the thread into the hole. Tie a knot and cut off the excess thread.
How to braid with threads
Step 7:
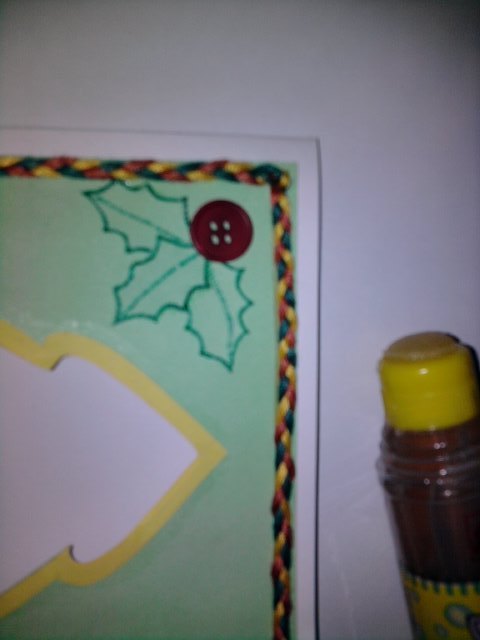
Paste holly leaves on the left hand upper corner of the front . Use double-sided tape to paste the red button in between the leaves.


Step 8:
Part 1: Place the pre-cut Christmas tree on the inner card. Use multi-colour pencils to shade the sides of the tree card.
Part 2- Then, use your thumb to brush the colours outward.
Part 3- This will create a rainbow effect.
Step 9:
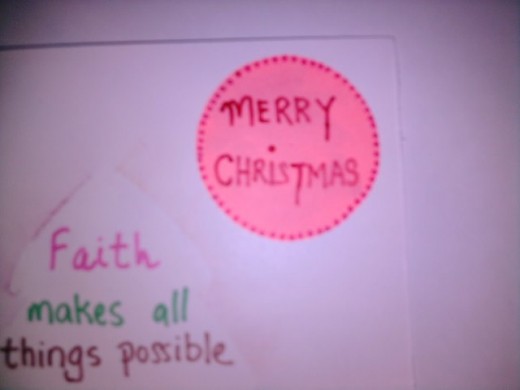
Write Christmas greetings with marker pen.
P/s : I added a pink circle with dots on the right hand corner because I forgot to add the "Merry Christmas"
Christmas Card Quotes
- Funny,Inspirational,Famous,Best Christmas Quotes and Charlie Brown Christmas Quotes
Need a Christmas quote? Try these funny, inspirational, famous, best Christmas quotes and the famous Charlie Brown Quotes for your Christmas cards. Charming and funny.
This content reflects the personal opinions of the author. It is accurate and true to the best of the author’s knowledge and should not be substituted for impartial fact or advice in legal, political, or personal matters.
© 2011 peachy


