The art of Ukrainian Easter eggs
Around Easter, I am often mistaken for a Russian, Ukrainian, or Slav. I don't mind, because I love the cultures. I incorporate different artistic traditions into my holidays simply because I admire the talents other artists bring to celebrations and I try to emulate them with my own. My favorite Easter craft is the Ukrainian art of pysanky.
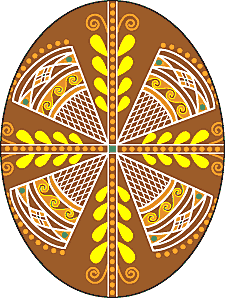
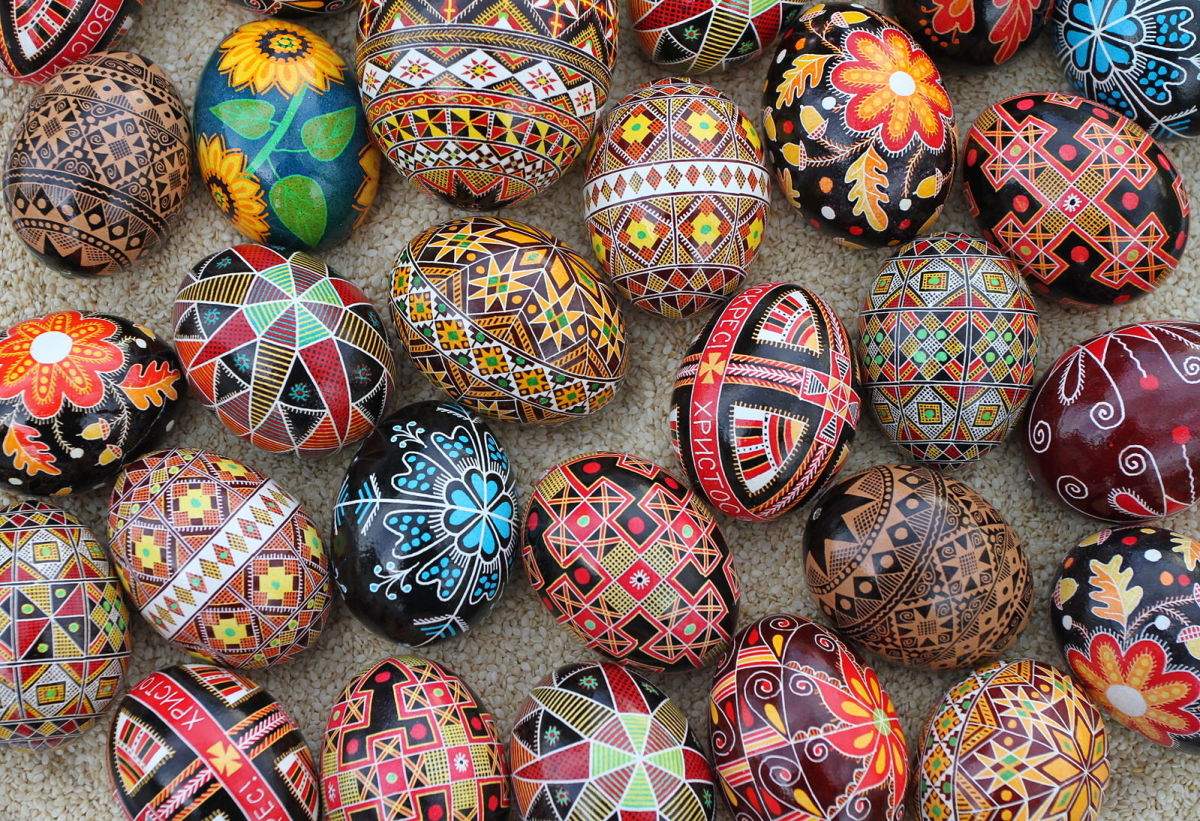
Pysanky (pis-ahn-ky) are Ukrainian Easter eggs. The singular form is pysanka. The design at right, from the Ukrainian Gift Shop, is a basic pysanka. They traditionally have at least three colors and a symmetrical pattern. The front and back patterns are the same. Each design symbol and color has a distinct meaning, so the creator considers the meaning of the whole egg while choosing the pattern. Pysanky are often given as gifts, conveying good wishes to the receiver based on the design chosen.
Raw eggs which have been cleaned in a vinegar solution are the canvas of this art. Special concentrated dyes give each layer its color. Beeswax is used to cover the design, which is then unveiled by candle flame after the egg is done. This process symbolizes the death and resurrection of Christ and the coming of spring to the world.
Creators of pysanky sometimes choose to use whole eggs, but more often now use blown eggs. Whole eggs have a chance of breaking or rotting, destroying the design and the craft. Beginners should start with eggs they have blown, then rinsed in a vinegar and water solution. Be careful not to touch the egg too much, because too much oil from your hands can prevent the dye from covering.
Draw your design with a light pencil. Do not erase. The pencil will be cleaned off later, after the egg is done. "Straight" lines can be drawn easily by wrapping a rubber band around the egg and then tracing it. Some good designs and step-by-step instructions for coloring them are found on Ann's website.
Do not use regular candle wax for pysanky. The dye will seep through it. Light a candle, then use a piece of beeswax to dip your kistka (plural: kistky) into. The wax will turn a smoky color, so you can easily see where you have put it on the egg.
You will be putting the wax where you want the color to stay. Trace the lines you want to stay white. Also fill in the holes where the egg was blown (preventing dye from filling it) if you are using a hollow egg. Then dip the egg into the first color of special dye. Start with the lightest color. Then trace the lines and design elements you want to stay that color. Each consecutive dyeing will replace the color of the egg, but the wax-coated parts will remain the color they were when you covered them.
Repeat for each design element and each color, referring to your pattern to make sure all elements of one color are complete before dyeing the egg. Colors cannot be redone once the egg is dyed. Go from lightest to darkest when dyeing.
The last and darkest color does not need to be covered in wax. Once the last color is applied, hold the egg in one hand and a tissue or paper towel in the other. Carefully hold the egg to the side of the candle flame (not on top of it) and watch the wax. When the wax turns slightly melted-looking, wipe it off with the paper towel. Use a clean part of the paper towel for each wipe, or else you will have streaks of wax. If at any time you feel the egg expand, set it down and let it cool. Continue melting and wiping until all the wax is off. This is when the artwork reveals itself. As each part of the wax is wiped away, the pattern comes out in all its beauty.
Clean your finished egg with oil-based turpentine by rolling it in glove-covered hands with a coating of the turpentine. Do not use water-based products on your egg, or your design will wash off. The oil-based turpentine cleans off the residual wax and the pencil marks. Wipe off the egg.
Varnish your egg with oil-based varnish to create a waterproof, brighter design. Let it dry. I use the plastic "package saver" that comes in pizza boxes as a drying stand.
Now you can display your egg in a stand, in an egg tray, or glue an ornament finding on the top to hang it on an Easter tree.
Pysanky are traditionally created at night during Lent, the 40 days (not including Sundays) prior to Easter. Many churches which have this tradition also have an egg blessing as part of their Easter service.

Links
- LearnPysanky.com: Pysanky Traditions and Legends
More stories and traditions surrounding pysanky - Ukrainian Easter Food
Recipes for Easter bread, flower-pot cheesecake, and other traditional holiday food - EGG DECORATING SUPPLIES-Ukrainian Gift Shop
Beeswax, kistky, and dyes - LearnPysanky.com: Coloring Book Pages
Black and white line drawings that children can color, based on pysanky designs


