Thomas the Tank Engine Birthday Cake - a step by step tutorial

It's every little boys dream to have a Thomas the Tank Engine birthday cake. So when my almost three year old announced that he would please like a Thomas birthday cake, my heart sank. "What about a round cake with a Thomas engine stuck on top" I asked. No that wasn't going to cut it (please excuse the pun). It looks harder than it was to make, and I must confess that if I could do it then anyone can give it a go.
Basic Butter Cake Recipe
Ingredients
- 130 grams butter, creamed
- 1 cup caster sugar
- 2 eggs
- 2 tsp vanilla extract
- 2 cups self-raising flour
- 2/3 cup milk
Method
- Cream butter and add eggs, sugar and vanilla. Mix for two minutes until combined.
- Stir in half the flour, then half the milk. Repeat until all ingredients are mixed.
- Bake cake in a large rectangular roasting pan. Double the mixture for a bigger cake. Grease roasting pan and line with baking paper. Spoon mixture in.
- Bake at 180 degrees Celsius or 350 degrees Fahrenheit for about 25 to 30 minutes or until cake springs back to the touch.
When cooled, place the cake into the freezer to harden. The reason for this is so that it is easier to cut the cake into the various pieces without it falling apart or becoming too crumbly. This also makes it easier to ice the cake without getting cake crumbs in your icing.
Putting It Together
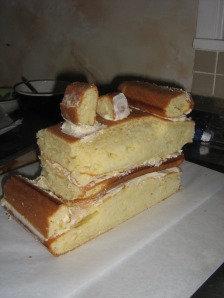
- Cut your cake into a rectangular piece for the base. You might need to be creative and build up the base piece to have it equal all round.
- Cut a smaller rectangle to sit on top of the base rectangle.
- Cut out two pieces to build up the front and the back of the cake.
- Lastly carve out a funnel and a smaller piece for the top of the cake ( see photograph).
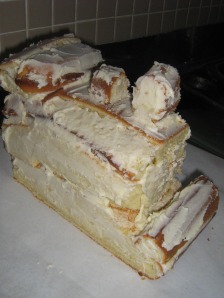
- I used a basic butter icing to decorate the cake and to hold it together. Begin by "gluing" your two rectangles together with butter icing.
- Glue on the front and back pieces and finally the funnel and middle piece.
- Lightly cover the whole cake with a basic layer of icing to keep it from crumbling. Leave it to set.
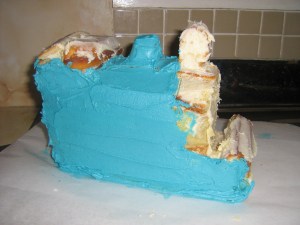
- Mix up some more butter icing and divide it into three bowls. Add blue coloring to the majority of the icing. Make your icing firm enough so that it does not run but also soft enough to spread smoothly and easily.
- Cover the back of the train the top and the sides with blue icing. Leave the top rear piece and the front of the cake for different colored icing.
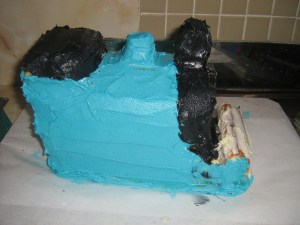
- Add black coloring to another bowl and red coloring to the smallest bowl of icing.
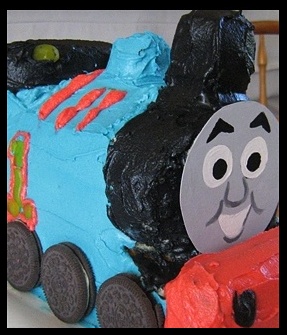
- Ice the top rear end of the cake with black icing, the funnel and the front, where Thomas' face will go. Ice the front bumper of the train with red icing.
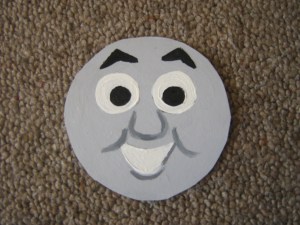
- If I had been a fantastic Mummy I would have made the face for Thomas out of Plastic Icing and molded all his features, but unfortunately I didn't have the time. I simply painted a round piece of card to stick onto the front of the cake as his face. It worked just as well.
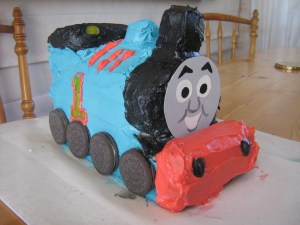
- Use leftover icing to decorate - I put some red stripes on the top and piped the number 1 on each side.
- For the wheels I used 8 Oreo biscuits - four on each side. You can be really creative and decorate the cake with licorice or lollies.

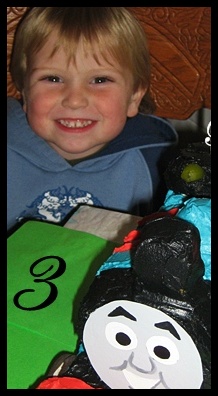
The Result
My little boy was delighted with the result and he still talks about the cake today.Just remember to remain calm as hordes of children dive into your creation after hours of work. Take a photo before this happens and try not to be resentful as they devour your work of art.


