How to Make a Pine Cone Angel

Pine Cone Angels are an Easy Craft
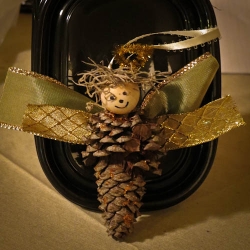
Pine cone angels can be made in less than an hour with materials that are easily obtained.
I work with the residents of my Mom's memory unit once a week and do different crafts with them. I am always on the lookout for a new craft each week and I find many of my ideas from browsing online at Squidoo lenses and various craft sites. Most of my projects are a combination of various projects I find during my search that I have adopted based on supplies that I have on hand.
I need to have easy crafts that will hold the residents attention. I was afraid this pine cone angel might be too difficult for them, but with a little of preparation ahead of time and a bit of help, the residents easily finished their angels in about 1/2 an hour. They seemed to really enjoy the project too!
This angel project could easily be adapted to work with either children or adults. It makes a lovely decoration when finished.
Happy Crafting
Materials Used on Pine Cone Angel
Here are the items I used for making the pine cone angels. They were primarily items I had on hand, although I did purchase the 1 inch wood balls for the heads.
- Pine Cones-look for ones that are long and narrow.
- Wooden Balls- I used 1 inch balls that I purchased from the craft store.
- Pipe Cleaners- I had some sparkly pipe cleaners that worked great for the halo, but any kind would work.
- Ribbon- the ribbon for the wings should be a least 1 inch wide. You will need about 4-5 inches.
- Spanish Moss- just a small amount for the hair
- Ribbon or Pipe Cleaner for hanger- either a piece of narrow ribbon about 8 inches long or a pipe cleaner works for the hanger.
- Glitter paint
- Tools Needed- hot glue gun, scissors, regular glue, fine point marker
Materials Needed for Pine Cone Angel

Step One- Glue on the Head - use a hot glue gun
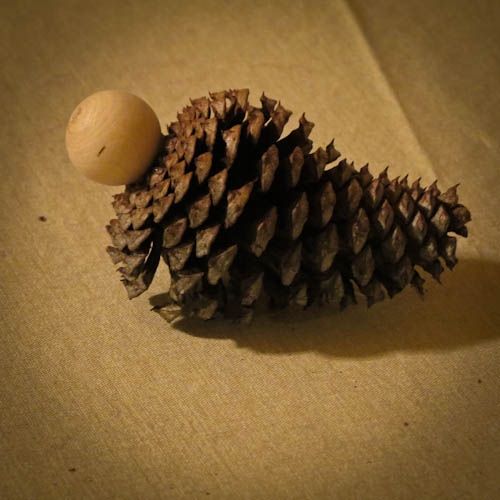
The first step in making the pine cone angel is to glue on the head. I used 1 inch wood balls that I purchased from our local craft store. I looked for the flat spot on the bottom of the pine cone and used a hot glue gun to glue the head to the pine cone.
When doing this craft for my Mom's group, I glued the head on the night before so they wouldn't have to use the hot glue gun.
Materials for Pine Cone Angels
Here are some of the materials needed to make your Pine Cone Angel. I used pine cones from the yard, so the entire project is relatively inexpensive.
Step Two- turn ball into face - add features and hair
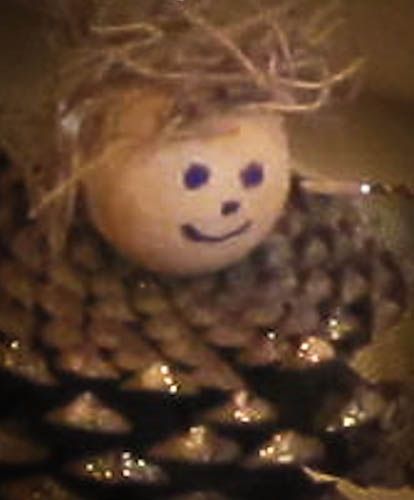
To make the face of the angel, we used a sharpie pen to put dots for the eyes and nose and a curved line for the smile. The ladies then put a dab of white glue on the top of the wooden ball and added a small bunch of spanish moss. They then took a scissors to trim the hair till it looked right.
Step Three- Add wings and a halo
The next step gets a bit tricky and I found that the ladies needed a bit of help. We added a halo by attaching half of a pipe cleaner to the back of the pine cone and then twisting the top of the pipe cleaner into a circle. Where you attach it is different with each pine cone and I just found one of the parts of the pine cone where I could wrap the pipe cleaner.
For the wings, we cut a 5 inch piece of ribbon and tied it in the middle with a small piece cut from the leftover pipecleaner. On some of the angels we used a bit of glue to stick it on the back of the pine cone, but on others we were able to fasten it between the cones easily with the pipe cleaner.
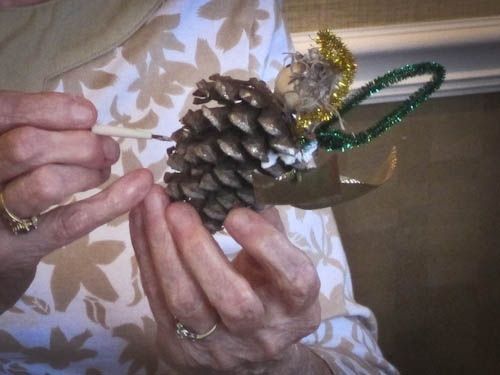
Step Four- Add a hanger

You can use either a thin ribbon or a pipe cleaner for the hanger. They are fastened on the back of the pine cone. In this photo you see my Mom with her finished angel. You can see she looped a gold pipe cleaner for the hanger.
Step Five- Add glitter - the final touch
For the final touch we added a bit of glitter to each of the tips of the pine cone. In this photo you can see a resident painting on some of the glitter.
More Ideas for Pine Cone Crafts - recycle those pine cones
Do you have a yard full of pine cones? Put them to use with ideas from this craft book.
Related

The Angels of Mons - Was This an Incredible Miracle or the Mass Hysteria of Dying Soldiers ?

How to Make Pinecone Fire Starters

Can You Feel the Touch of an Angel? Perhaps After Noticing the 444s...

Be One of Those I Reached: Inspirational Poems of Love and Hope: A Life Circle: About Accepting Angels and Events.
")
Top 50 Pop and Rock Songs About Angels (or With Angel in the Title)


