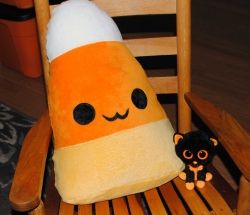
Kawaii Candy Corn Pillow Tutorial

Add a touch of kawaii to a Halloween favorite
Love them or hate them, candy corns have become a well known symbol of Halloween. Personally, I think they taste awful - however that never stops me from buying a bag (or two) at Halloween simply because they are so gosh darn cute! I just love the yellow/orange/white combination that looks so great with my other Halloween decor. I've seen a few candy corn pillows out there and figured they looked easy enough to make. I decided to add a little face to give a little personality to this overly sweet, slightly waxy confection.
all images by chibikitty
What You'll Need
1/2 yard each of yellow, orange, and white minky fabric
Black fabric
Heat n Bond
Thread
Sewing machine or needle (if hand sewing)
Polyester Stuffing
Buy Minky Online!
Personally, I hate the hassle of driving down to the fabric store, searching for the fabric (which may or may not be in stock) and then waiting in a long line to get my fabric cut. On top of that, I usually walk out of the store with a lot more than what I originally intended to get which is why I prefer to buy what I already know I need online.

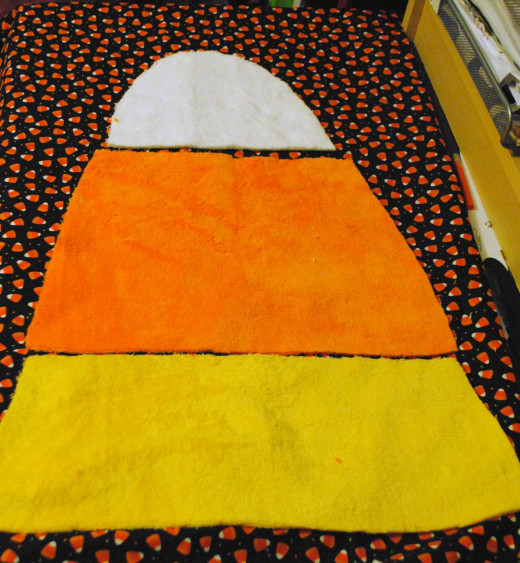
Cutting out the Fabric
1) Find a pattern online or draft your own. My pattern is located here: http://harleyquinne.deviantart.com/art/Candy-Corn-...
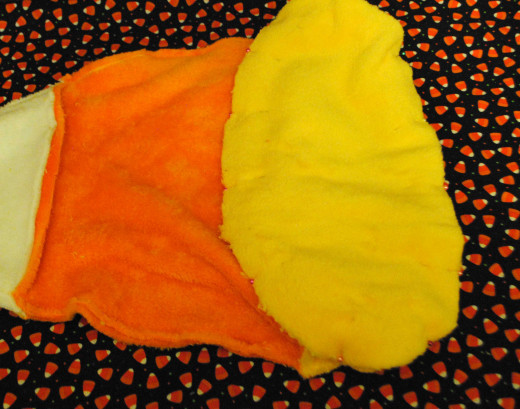
2) Cut out your fabric - you will have two pieces of white, two pieces of orange and two pieces of yellow and one oval of whichever color you choose to use as the base.
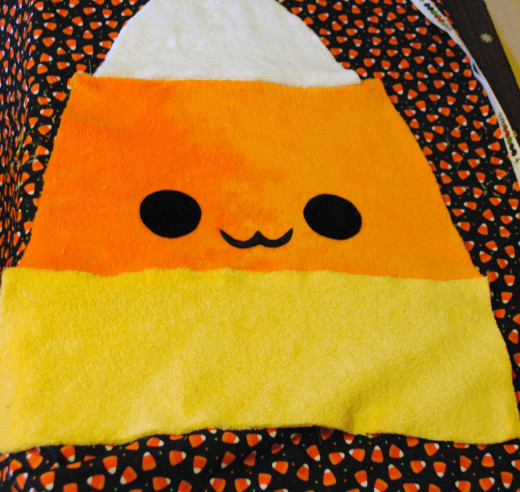
Making the Face
3) Fuse the Heat n' Bond onto a piece of black fabric
4) Cut out two circles for the eyes and one squiggly line for the mouth
5) Arrange the face as you like it and fuse it onto the fabric you are using as the middle layer. Use a pressing cloth between the iron and the fabric.
6) Using black thread, stitch the pieces in place.
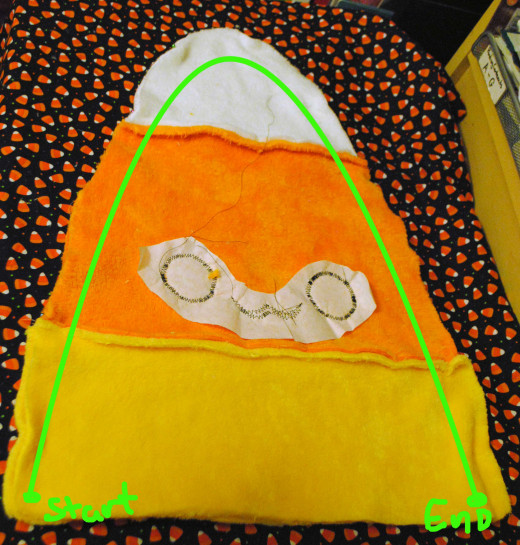
Putting the pieces together
7) Take one set of the white, yellow and orange sections and pin the pieces right sides together so that it makes one big triangle. Stitch each section together. Do the same with the second set so that you have two big triangles.
8) Pin the two triangles right sides together (taking care that the seams of the colors line up) and stitch from one corner of the base to the other corner of the base.
Adding the bottom
9) Pin the oval to the base of the triangle making sure right sides are together.
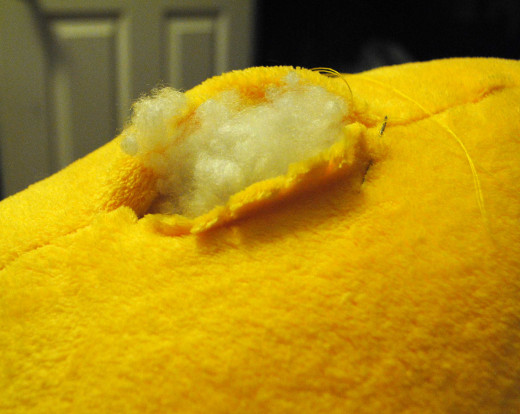
10) Stitch all the way around leaving yourself a small opening so that you can turn it right side out and stuff it.
Finishing Up
7) Stuff the pillow with as much polyester stuffing as you like. I ended up using an entire bag of 16 oz Clusterstuff Polyester stuffing for this little guy!
8) Handstitch the opening closed.
Don't forget the stuffing!!!
I actually ran out of stuffing during the making of this tutorial and had to run out and buy more. Don't be like me and make sure to have plenty of this stuff on hand.

Candy Corn Pillow Rocks!
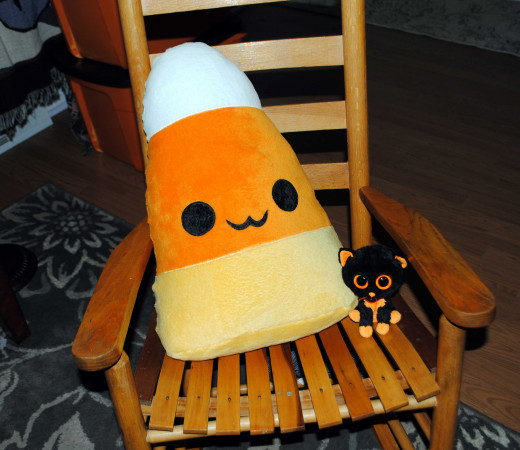
I hope you enjoyed the tutorial. Please feel free to leave a comment and let me know what you think.


