A "Witchin"Halloween of Craft Makin'

Halloween Crafting Ideas: Witches, Witches, and a Few More Witches
Witches are so wonderfully scary, they really make Halloween fun. Let's go and craft a few for our Halloween Party!
Unlike the rest of the Halloween characters, Witches can be beautiful, ugly, short, tall, skinny or fat.
They can cast spells, make magic potions, fly on magic brooms, cook, dance, sing....hmmm,
I can't think of any other Halloween creature that can do all of that!
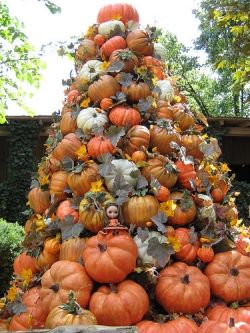
And Witches are really good at camouflage! Can you find the Witch in the Pumpkin Tree photo?
Make Witch Crafts for Halloween! Start Today!

Witchey's Hi Protein Toe Jam Potion
Every Successful Halloween Party Has To Have A Witches Potion
Witchey has been saving up all year to make her famous Toe Jam for your Halloween Party. She is so proud of her prized jam that when you turn out the lights she will be all-a-glow with delight!
To craft your own "Witchey" you will need:
5 oz. of Mixed Green Stained Glass Cobbles
One 4" Tall Clear Glass Bottle with a Cork Stopper
Glow in the Dark Polymer Clay Boxed Set
Copper Wire, 22 ga.
Paper for Potion Sign
Clear Glass Adhesive (E6000)
Wooden Craft Stick
Protected Work Surface
Wire Cutter
Long Nosed Pliers
Wood Dowel for Rolling Out Clay
Ruler, Knife, Toothpick, and Scissors
Oven
Mosaic Glass for "Witchey's Toe Jam Jar"


Instructions for Crafting "Witchey"
Witchey
1. For her face knead one block of pale yellow polymer clay until soft, then form into a ball.
Using the wood dowel, roll the clay into a 1/8" thick circle 4" in diameter.
Cut the circle in half. Carefully form a cone shape with the 1/2 circle.
Press the edges together with your finger tips to bond.
Pinch off the top point of the cone making a small flat top surface.
Using the photo as a guide make Witchey's nose, eyes, cheeks, mouth and hair.
Gently press the pieces on to the cone face to bond. Set aside.
2. For her hat, knead one half of a block of black polymer clay until soft , then form into a ball.
Roll out the clay into a 1/8" thick circle 2 1/2" in diameter. Cut in half.
Carefully form a cone shape using 1/2 of the circle.
Press the edges together with your finger tips to bond. Set aside.
Using the remainder of the black clay, again form a ball then roll into a 3" circle.
Gently attach the black cone to the flat circle to form the hat.
Decorate using the photo as a guide.
3. Carefully place the cone face on top of the uncorked bottle.
Place the hate on the cone face, then shape the hat brim using the photo as a guide.
Bake Witchey on top of the bottle following the manufacturer's directions.
The bottle will help keep Witchey's head on straight.
Let cool then remove Witchey's head and set aside.
Mosaic Bottle
1. Use a craft stick to place a thin layer of glass adhesive on a small area of the clean glass bottle.
Carefully place a Stained Glass Cobble onto the adhesive one at a time, fitting them together as close as possible.
There will be some small gaps between Cobbles.
Allow the adhesive to set before moving on to the next section.
Repeat until the bottle is complete. Set aside to dry. Grouting is optional.
2. Wrap the neck of the bottle with copper wire.
Twist the ends of the wire together to fasten.
Toe Jam Label
1. Knead the remaining scraps of black clay (or another color) then form into a ball.
Flatten the ball with your hand then roll into a thin flat sheet 1/8" thick.
Using your ruler measure and cut a rectangle 1" wide by 2" long.
With your toothpick make two small holes 1/4" from the top of the rectangle for the wire hangar.
Bake the sign backing following the manufacturer's directions. Let cool.
2. Cut a piece of paper 1 3/4' long by 1/2" wide. With a pen copy the signage on to the paper.
Glue the paper to the clay backing.
Cut a length of wire long enough to loop around the bottle neck and attach to the sign.
Place the sign over the neck of the bottle.
Place the cork back into the bottle neck.
Replace Witchey's head!
Boo! You're through! Now go have a wonderful Halloween!
The Secret List of Magic Additives That Witches Don't Want You To Know About!
Have you ever wondered what magical ingredients Witches' use in their delectable brews, potions and chewy delights?
Well, I have the "short list" just for you!
Shhhh... please keep this a secret, we could both be turned into frogs if "they" knew I gave it to you!
I have alphabetized the "additives" and listed what magic each can perform when used in your "families" secret recipes.
You know great Grandma's homemade "Chili Sauce" and great Aunt Lucille's feisty fried chicken!
Okay, so you have lost the family recipes, well, just go up to the Food Network, they have all of them!
Just use the search box with the magic additive typed in and Voila! The family recipes will appear...just like magic!
Here it is:
The Short, Very Secret, Not To Be Shared, Keep It Quiet List!
1. Allspice: Used to promote healing, attract money and bring you lots of luck.
I can attest this additive really works! I can remember one year when I didn't get what I wanted from Santa Claus I got so upset because he (Santa) had encouraged me to be good all year, so I had been good. When I didn't get the present that I knew I had deserved, my stomach started to hurt and then the tears and screaming started, but then my dear sweet mother gave me a plate of cookies made with allspice, and my grandfather slipped me a couple of dollars and another present suddenly appeared out of nowhere and it was just what I had asked for...and I felt so much better...and oh how lucky I felt! And.....what a little witch I was!
2. Almond: Brings prosperity, money and wisdom.
I believe this one is for my dentist. I had to suffer with a cracked tooth from eating a nut, and I paid out big time to get it fixed. Hmm,it may have even been a wisdom tooth! That almond I ate brought great prosperity and money to my dentist but not to me
.
3. Anise: Drives off evil, protects you from bankers and wall street executives, exerts the power of the evil eye on politicians that lie to you, and is used to call spirits to aid in magical practices.
Whoa! We all need to use this one!4. Apple: Love and healing.
I have this image in my head of two young innocents partaking in the Halloween game of bobbing for apples. As they nervously bend over a rusty steel water trough filled with icy cold water and dozens of red bobbling apples, their eyes meet for just a second and in their embarrassment they quickly drop their heads down into the freezing water to catch their prize when a loud cracking noise is heard. The next image I have is of the two star kissed lovers wrapped together in a warm wool blanket, each holding a cold compress against their throbbing head while nibbling on an apple! Love and healing....the miracle of an apple.
5. Apricot Juice: Used in love potions and martinis.
This one definitely works!Now my dears, you may be disappointed that this list was so short (although I told you it was going to be short), but now I need your help! In the next section I will request you to give me recipes that you know are quite tasty that use these magical witch additives and tell me stories about how they positively affected your life and of your loved ones (otherwise I am going to make up some real doozies). In trade I will add to my short list making it a bit longer! Looking forward to hearing from you!
Make and Insert Your Own Little Goblins Photos
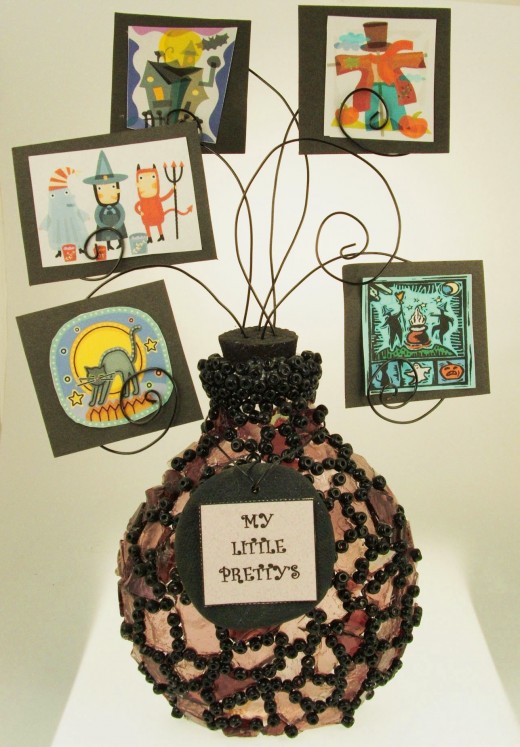
My Little Pretty's Photo Display
Want to show off your "Little Pretty's" in their finest Halloween Costumes?
Here is a "witchey" way of decorating with family pictures.
Put a spell on your party goers with the loveliness of your photos!
And what a cute mosaic bottle!
You will need:
5 oz. of Mixed Rose Stained Glass Cobbles
1 pkg. Black Polymer Clay
1 Clear Glass Bottle 5" Tall with Cork
Black Wire 18 ga
1 pkg. Black E Beads
Permanent Black Felt Tip Marker
Paper for Signage
Clear Glass Adhesive (E6000)
Wooden Craft Stick
Protected Work Surface
Toothpick, Ruler, Knife, Sewing Needle
Wire Cutter / Long Nosed Pliers
Wood Dowel for Rolling Out Clay
Compass for Drawing Circle
Oven
Glass Used for "My Little Pretties"

Easy To Make Halloween Photo Bottle Display
Instructions for Crafting "My Little Pretty's Photo Display"
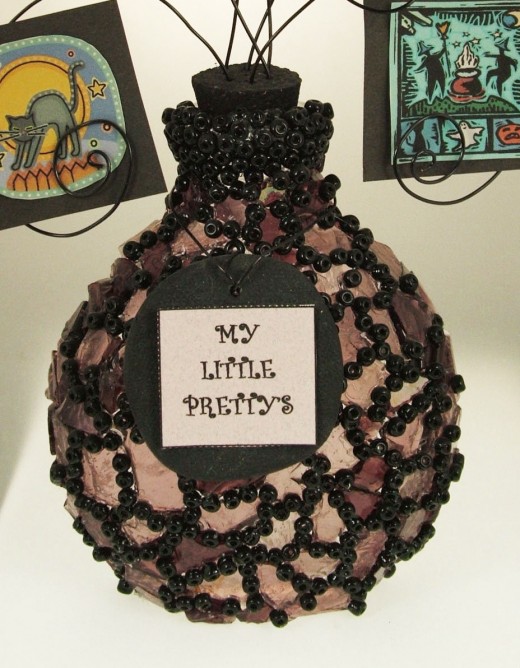
My Little Pretty's Signage
1. Knead 1/2 block of black polymer clay until soft, then form into a ball.
Flatten the ball with your hand then using the dowel roll it out into a thin flat sheet 1/4" thick.
Cut a 1 1/2" diameter circle for the sign.
Using a toothpick, make on small hole 1/4" down from the top of the circle (for the wire hangar).
Bake in the oven following the manufacturers' directions. Let cool.
2. Cut the paper to measure 1 1/4" long by 1 1/4" wide. Print "My Little Pretty's" using a pen.
Glue the paper sign to the baked clay circle.
3. Measure and cut a piece of wire long enough to bend around the neck of the bottle and attach to the sign.
Bend the wire to form a horseshoe shape then stick the two ends through the hole in the sign.
Using the pliers twist the wires up and over the top of the sign to secure. Set aside.
Mosaic Bottle
1. Use a craft stick to place a thin layer of glass adhesive on a small area of the clean glass bottle.
Carefully place a Stained Glass Cobble onto the adhesive one at a time, fitting them together as close as possible.
There will be some small gaps between Cobbles.
Allow the adhesive to set before moving on to the next section.
Repeat until the bottle is complete.
2. Fill the gaps between the Cobbles with black beads.
Using a toothpick pick up a bead, dip it into a dab of glue, then place it between the Cobbles.
Repeat using the photo as a guide. Set it aside when complete.
Photo Display
1. Using the permanent marker, color the bottle cork black. Set aside to dry.
2. Cut six (6) pieces of wire each measuring 8" long.
With your pliers bend the end (just one end) of each wire into a small circle.
Take the sharp needle and make six holes in the top of the cork.
Gently push the wires into the holes.
Using your fingers, continue to bend each wire to form a spiral. Use the photo as a guide.
Finishing
1. Place the sign over the bottle neck.
2. Insert the cork.
3. Place your "pretty's" photos onto the wire spirals.
Now you are ready for all the oooo's and ahhhhh's!


