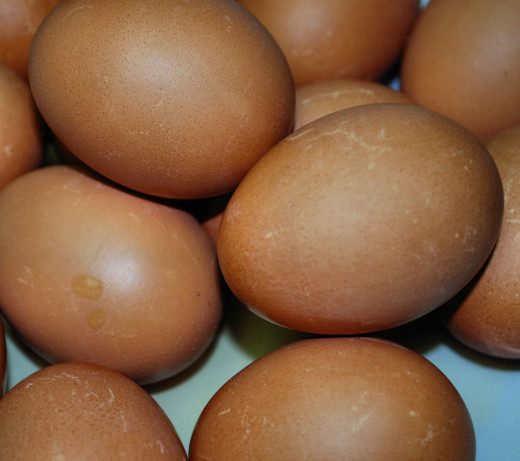
Our Easter Eggs

Dying Easter eggs - the natural way.
This is another lens for those want to learn more about our traditional Polish Easter baskets. I have a more detailed post about the basket we made for 2012, plus another lens for those who would like to see how we bake and shape our fancy Easter bread.
This lens will be about our eggs. We always prepare lots of eggs for our basket - way more then will fit in the basket itself! Over the years, we've gone from making brightly coloured eggs with commercial dyes to naturally dyed eggs. This year, we've done three different types. I hope you enjoy learning about how we do them.
What do you do with your Easter eggs?
What is your favourite way of colouring Easter eggs?
A Peck of Pink Pickled Eggs - Oh, my!! A bright new addition to our basket.
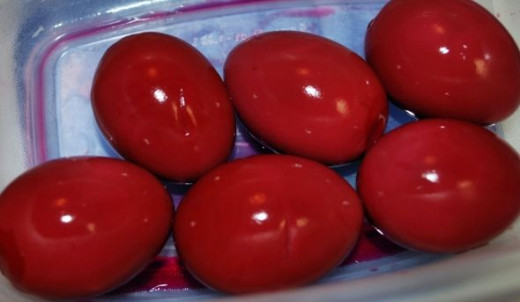
This year, we added a bright, new type of egg to our basket - pickled eggs! I found the recipe at Pink Pickled Eggs Recipe.
We weren't able to follow the recipe exactly, as we couldn't find canned whole beets. Instead, we used most of a jar of sliced pickled beets. It's the juice that's really needed and, as you can see by the photo, the colour sure took! These need to be started several days in advance.
As I write this, it's the day before Easter. We've included these eggs (well, 5 of the six) in our basket for blessing, but won't actually eat them until Easter morning. We can hardly wait to see how they look on the inside, and what they taste like!
update: Well, Easter has come and gone, and we got to try the new pickled eggs. They have a very bold taste of cider vinegar which went well eaten together with other items in our basket. A bit strong to eat on its own, for our tastes, but well worth including in our basket.
Making Kraszanki - Onion skin dyed eggs
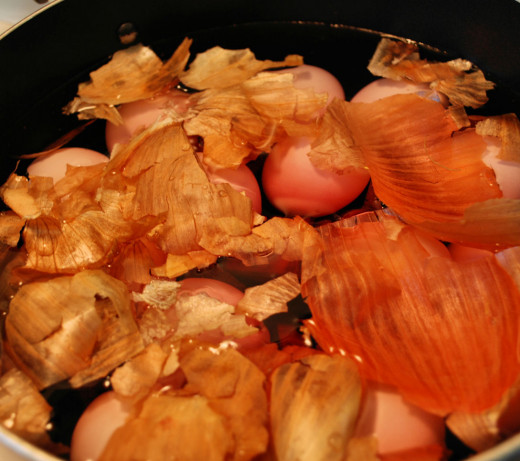
A type of egg we now do every year is called kraszanki. These eggs are dyed by cooking them with onion skins and a splash of vinegar. In the months leading up to Easter, I start to collect onion skins to make kraszanki. This year (2012), our onions were strangely naked, so I had very few skins collected. To add more colour, I chopped up a small beet and added it to the water, along with the little bit of saffron I had left from baking our Easter bread this year. In this photo, it's all put together and ready to start the water boiling.
Time required: variable
Difficulty: easy
Materials:
- eggs
- onion skins
- about 1 Tbsp vinegar
- optional: tumeric or other natural dye materials
Instructions:
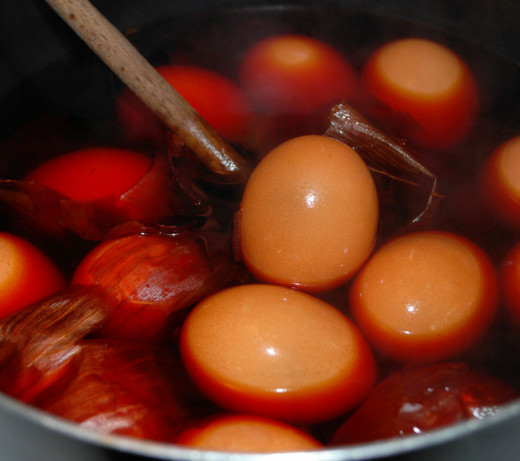
1. Place eggs in a large pot of cold water, together with the onion skins and any optional materials you wish to add for extra colour.
Once the water has come to a full boil, the temperature is reduced and the eggs are left to cook in the onion skins for about 45 minutes, or however long you wish to get the desired depth of colour. This is what they looked like after about half an hour.

2. We left ours in for almost an hour to get the colour you see here.
The eggs can be left as is, for their simple beauty, or designs can be scratched onto them to make drapanki.
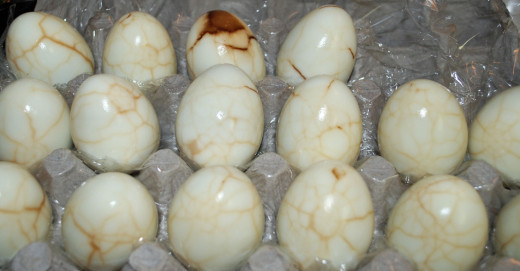
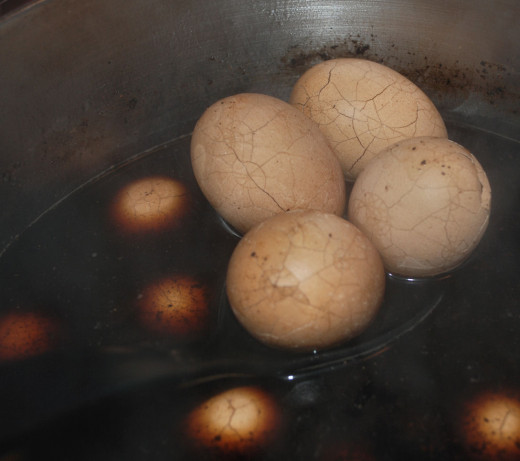
Dragon's Eggs
Our Easter basket always has at least a few peeled eggs in it, as no unnecessary work is supposed to be done on Easter. This way, we have eggs that can be eaten right away, and eggs still in their shell can be enjoyed in later days.
Ingredients
Time required: up to 3 hours
Difficulty: easy
Materials:
- 3 Tbsp black tea
- 1 tsp sugar
- 1 Tbsp five spice mix
- 1/2 cup soy sauce
Instructions:
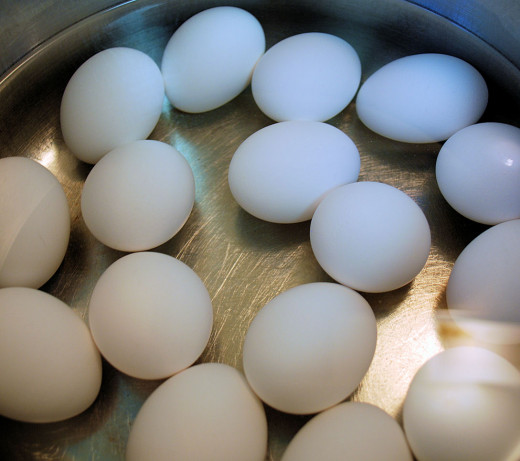
1. At the same time the kraszanki were started, we got another batch of eggs started in plain water and a splash of vinegar. The plain eggs are brought to a boil, then simmered for about 15 minutes.
2. While the eggs are cooking, we measured out the rest of the ingredients. The recipe is one I found many years ago, when looking up recipes for Chinese New Year. They were so gorgeous, we adopted them for our Easter basket.
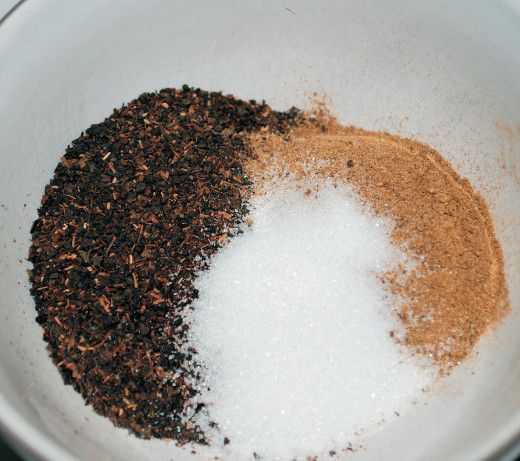
Normally, the recipe calls for Chinese Five Spice mix. Unfortunately, we discovered too late that I was out! Instead, I used a similar spice mix my older daughter came up with for Chai tea. It has more then five spices in it, but that's okay!
In this photo, there's 3 Tbsp of black tea, 1 tsp sugar and 1 Tbsp spice mix. A half cup of soy sauce was also measured out.

3. After the eggs have cooked for 15 minutes, they are drained and put in cold water until they are cool enough to handle. The shells are then cracked all over with the back of a spoon, as you can see in the photo.
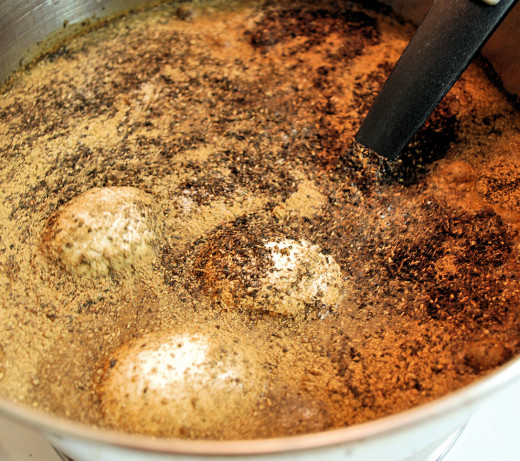
4. Once the shells are cracked, they go back to the stove with more water, the soy sauce and the spice mixtures. This is what it looks like at the start, before the tea and spice mixture has absorbed much water. Bring the water to a boil, then let it simmer for up to three hours.
Yes, you read that right. Three hours.
If the water level starts to get too low, top it up with boiling water.
5. After about half an hour, this is what the eggs look like. As you can tell, the shells themselves don't really take on the colour well, but the tea, soy sauce and spices are soaking through all those cracks and working their magic.
Until then, things look rather... interesting.
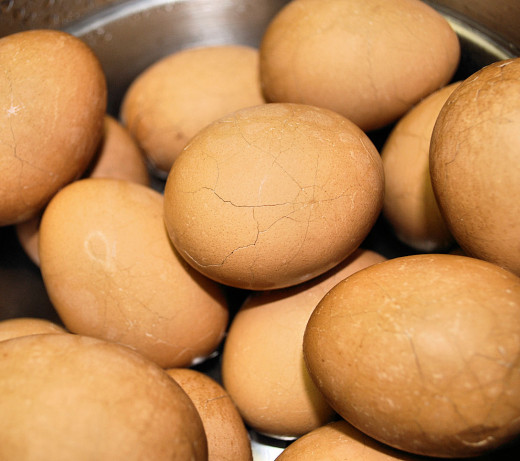
6. Once the eggs have cooked as long as you have patience for (we lasted little more then an hour this year), remove the eggs to a colander and rinse them off. The shells have taken on more colour by now, and you can clearly see the darkened cracks. They look a bit like broken kraszanki at this point!
Leave the eggs until they are cool enough to handle.

7. Once the eggs are cool enough, gently remove the shells to reveal the lovely patterns left by the cracks. The longer the eggs are cooked, the darker and more dramatic the appearance. You can see one egg where a piece of shell had broken right off!
One of the reasons we cook so many extra eggs is because only the best go into the basket. This year, not a single egg was ruined while being peeled! Usually, we lose at least one or two.
To store the eggs, I usually put them into a foam carton. This year, we didn't have one, so I lined the cardboard carton with plastic wrap first. After they were all ready, I covered them with more plastic wrap. There were enough spaces in the rest of the carton to hold all our kraszanki as well.
Into the basket they go
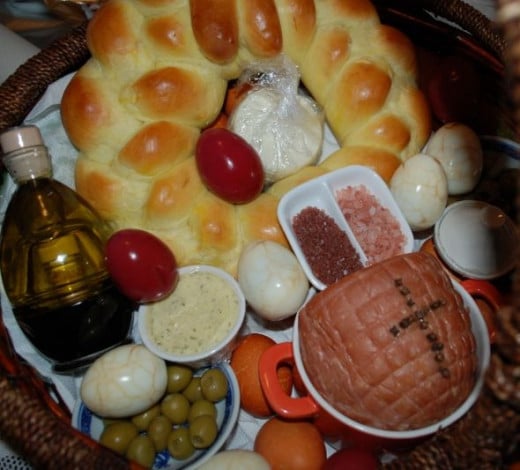
On Holy Saturday, our basket is assembled and readied for blessing. We usually aren't able to fit all the eggs we make into the basket, what with so much other food being included as well. Our basket often has enough food for several days!


