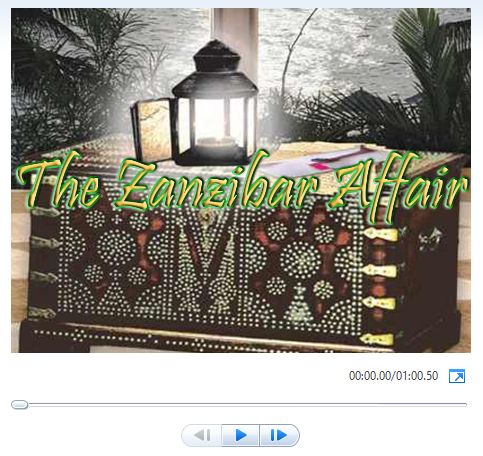
How To Create a Simple Video Trailer for a Book


This article is going to talk you through the process of creating a simple video trailer for a book. Many people are daunted by the prospect of creating a video and the first thing they think about is how awful they will look and sound!
But what if I told you that it isn't actually necessary for you to be the star of your video, although if you have those types of skills it wouldn't be a bad idea. No what I am going to describe is how with a combination of some nice images, bullet statements and a musical overlay, you can quickly and easily create a video trailer/review for your book (or any other product for that matter).
You may be thinking - why would I do that?
Well what if I told you that YouTube was the second largest search engine in the world, behind Google (but actually owned by Google anyway), and that by offering people a review in a format that they love, you are likely to get your book in front of many more viewers. It takes a little effort, but creating a video can actually be done for free and once you have created it you can upload it to YouTube, Facebook and many other online sites where there is a potential to gain some much needed publicity.
The instructions in this article refer to the use of Photoshop Elements and Windows Movie Maker 2012
Tools:
- Photoshop Elements (or a free download like Gimp)
- Windows Movie Maker
- Window Operating System

Instructions:
1. Using a photo-editing program like Photoshop Elements or one of the free packages that are readily available,Gimp is a popular one, chose a standard size for your images and crop your book cover to the size required. A good choice is 1200 px wide by 675 px high for a 16:9 ratio or 1200 px by 900 px for a 4:3 ratio. Make the resolution 300 px/inch for both options.
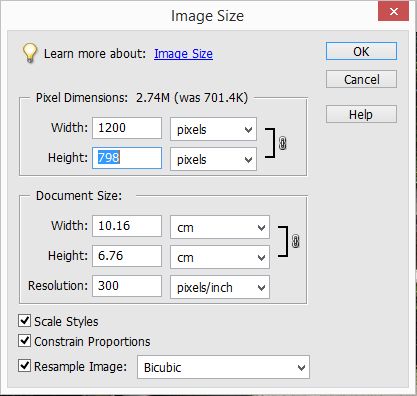
2. Using this standard size means that when you move onto the movie-making stage that you will have all your images appearing consistently from one frame to another and they will already be an appropriate size for the Movie Maker aspect ratio options.
Using the 300 pixels/inch makes the image better for HD video.
Of course the image size can be arranged to suit the camera you use or your desired video format. Mine happens to come out at a different size to those illustrated but because I have access to Photoshop I can easily crop and re-size the images to suit a video format.
Using Photoshop you simply click on 'Image' then 're-size' and adjust the width to whatever you want it to be. Then after you can use the crop tool to define the finished size by cropping the height to suit your preferred aspect ratio.

3. Finding images, if you don't have your own image library or suitable images to use, you can of course download free images from the Internet. You must always of course ensure you have permission to use the images, adhere to the terms and conditions of the sites where you get the images and provide an appropriate credit for any image used.
For example, the next video trailer I am going to make has a story-line based in Egypt, so as a back drop to the text I am going to use I selected this image from www.photoxpress.com. Using Photoshop it is possible to change the opacity of the image to make it less pronounced and you can use a text tool to write over the image to create a bullet statement about the book. You can of course use the caption tool in Movie Maker to perform a similar function, but using Photoshop gives you much more artistic license to get the visual affects you want.
Image courtesy of www.photoxpress.com
4. Once you have created all your images, I would suggest you save them in both the native format of the graphic editing program you are using and as JPG files. Just create 2 directories and call one video files (for the JPGs) and the other source files (for the native format), that way if you want to edit the text you can do so easily without having to start from scratch.
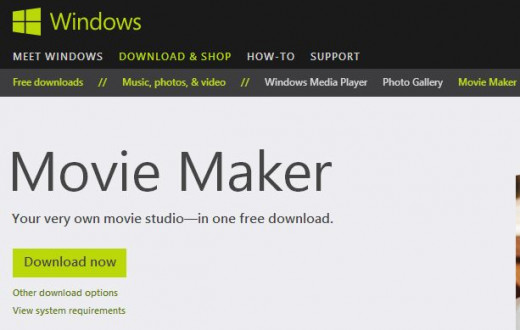
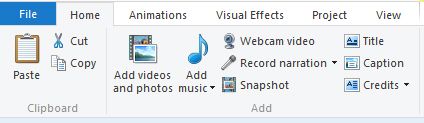
Now it's time to start making your movie. A really good free program is Windows Movie Maker, which you can download and use provided you are using a Windows operating system.

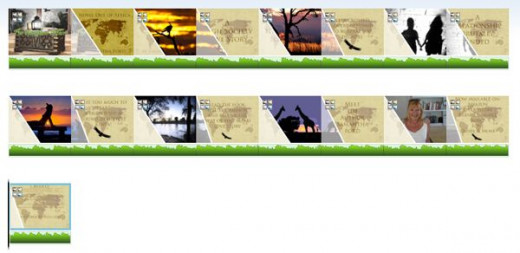
5. To pull your images into Movie Maker, you simply open the program and click on one of the options for adding videos and photos. Navigate to your video files directory and then you can either add them all at once or one at a time. Once they are in Movie Maker, you can click and hold with your mouse to drag them into position and in the order you want them to appear.
6. If you want to use Movie Maker to add Titles, captions or credits rather than creating them in your photo editing package, now is the time to do it. Selecting a Title or a Credit option will generate another frame which you can then edit to change color, font and so on. A caption is added to an existing frame, so click on the frame you want to add a caption to and write in what you want the caption to say.
The title and credits would normally go at the beginning and end of your film, but you can re-position them if you want to using the method described earlier. The credits are a nice feature, because they scroll much the same way as credits do at the end of a film.

7. When you are happy with the number of frames you have and the order they appear in, now is the time to ensure that each frame appears for a reasonable duration. The easiest way to do that is to select 'Animations' and between 'Transitions' and 'Pan & Zoom' you will see the duration editor.
You can either click on individual frames and then assign a duration on a frame by frame basis, or you can set a duration and click on apply to all. What you do need to ensure is that there is sufficient time for a viewer to read the captions and that images appear long enough to be appreciated. More text, in other words, will require a longer duration.
8. The final editing stage for the graphics is to add some animations, this can be done in the form of transitions and/or pan and zoom. Once again the same animations can be applied to all the frames, or they can be added individually by clicking and then selecting an affect one frame at a time. The function for doing this is in the 'Animations' tab.
Alternatively you can go back to the 'Home' tab and select an 'Automovie theme', this applies a standard setting to the whole movie dependent on the theme you choose. This is a great way to get a good affect very quickly and easily. Personally I prefer to do the animations individually, but if that is not your idea of fun, applying a theme certainly does a reasonable job.
Of course you should always play your video and watch it through carefully to ensure everything works and is visible as expected. Any problems can be edited out.
Remember to save your project as you go, so you don't inadvertently lose your work.
9. Now it is time to add some music, again make sure you have permission to use the music, adhere to any defined terms and conditions and give the appropriate credits where required.
Choose a complimentary piece of music and download it to your PC from the site providing the music (I usually put it in the video directory so I know where it is) then click on 'Add music' and 'Add music'again, navigate to the file and click open. The music will be laid over the entire movie (starting from the beginning again if necessary). Once in place you can click on 'Music Tools' to edit the music's parameters, including fade in, fade out and so on.
Movie Maker also provides you with the option to look for music through it's 'Add music' function, but I prefer sites like www.incompetech.com where you can use royalty free music as long as you give a credit to the source.
Save your project after adding the music and play it through to see how it all works. You can of course use any of the other tools Movie Maker provides, particularly as you get more familiar with the program.
But I think you will be pleasantly surprised at how well this simple format works, even using these basic instructions.
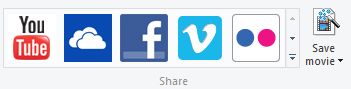
10. All that is left to do now is to share your movie. You can do that using the share facility built into Movie Maker or you can save the movie in a format to suit your preferences ready for upload to an appropriate viewing platform.
To do the latter just click on 'Save movie' and choose your preferred format, the video directory is a handy location to save it to for later recovery.
If you use the share facility, you will be taken through the various log-in screens to allow you to upload the video to your account, you will need to be registered with the appropriate site before you can upload a video.
![Microsoft Windows 8 Pro - Upgrade [Old Version]](https://m.media-amazon.com/images/I/41-15-MtbdL._SL160_.jpg)