10 Small Space Garden Hacks and DIYs

Making a DIY Tire Planter
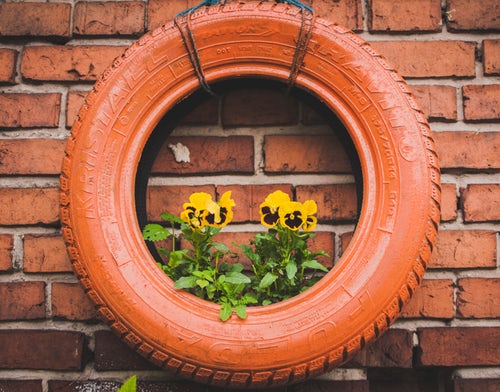
To prepare your vertical tire planter just drill some drainage holes in the bottom of three or four vehicle tires and decorate them any way you want. (I like chalk paint and clear coat personally.)
To prepare the tires for hanging on the wall select two or three feet (for each tire) of strong rope, heavy duty twine, or wire that will hold the weight of a tire plus a few pounds of moist soil. Wrap all but about six inches of your cordage on the side of the tire where you didn't drill your holes, and form or tie that last six inches into a loop to hang it from.
After you have prepared all of your tires for mounting its time to start arranging them on the wall. Hang each planter by drilling a hole in the wall or post that you wish to hang it on and screwing a matching hook into the hole.
Hang the tires by the loops from the hooks, arranged in any pattern you wish.
Tire planters are good for starting seeds and transplanting seedlings, but i like to arrange them vertically near plants that vine in place of a trellis. This makes it possible to save space by growing vertically, but to also have soil in my trellis to root off any suckers that i want to root.
Build a Bug Hotel to Attract Beneficial Insects

Building a bug hotel will help to attract beneficial insects to your garden. This will help pollinate flowers and keep harmful insects under control. They will save valuable time and money compared to hand pollination and pesticides.
The first thing that will be needed for the assembly of a bug hotel is the frame. A one to two gallon plastic storage container will do nicely or one can be built from wood or rocks and mortar, or bricks.
With the frame all set to go the next step is to fill the frame with textures to attract bugs. Layer layers of different textured materials from the bottom of the frame all the way to the top. Rocks, broken pots or mugs, bamboo or reeds, dried grass, pine cones, sticks,burlap fabric, wood chips, or chunks of wood are all good examples of materials to fill a bug hotel. Be creative and give the bugs many different environments to choose from to call home.
Making a Lazy Pallet Garden Bed
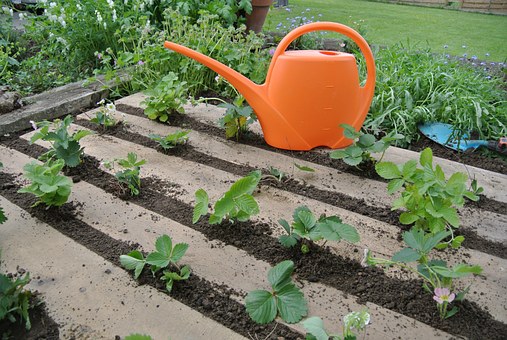
A lazy pallet garden is a very good choice for a growing container when the ground is not allowed to be dug up to plant anything. Also, as the name implies, it's super easy to set up.
To begin the construction of your planter, select a heat treated pallet and decide which side of it better suits your spacing needs. (The other side will be the bottom.) As long as they are not cut from the frame, pieces of wood can be cut from the pallet to better suit your needs or style. Finally, paint or decorate it as you see fit, and its time to prepare the pallet for planting.
To turn your pallet into a garden all you need is some landscaping fabric and dirt.
Stretch and staple the fabric, making sure to cover the whole bottom and any open sides of the pallet. This step isn't absolutely necessary but it does help keep weeds from invading your garden bed. It also cuts down on soil loss.
All that's left to do now is lay your pallet down in the place where you want to use it to grow, fill it with soil, and start gardening.
Making a Bicycle Planter and Trellis
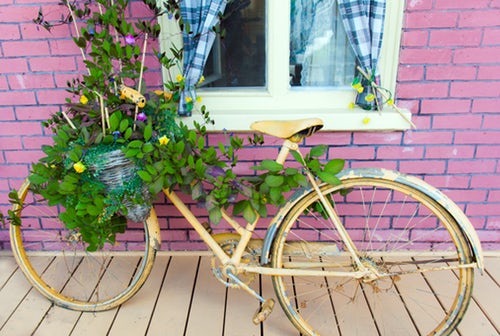
This DIY bicycle planter will make an eye catching addition to your garden, and with such a thin profile, is a great space saver for the small space gardener.
There are only four items you will need to complete this build. You will need a bicycle, a basket, a way to attach the basket to the bicycle, and cloth fabric.
Construction of the bicycle planter couldn't be easier! Just mount any kind of basket to the handlebars of a bicycle. Use some rope or wire to lash it onto the bike if it isn't a regular bicycle basket. Then line the basket with some sort of fabric so none of the soil that you put into it falls out. All that has to be done after that is to fill the basket with soil and plant seeds or seedlings.
To use the bicycle planter as a trellis, just train the plants along the frame and handlebars of the bike by gently tying them in place with twine or strips of cloth.
Build a Worm Tower to Compost Right in the Garden
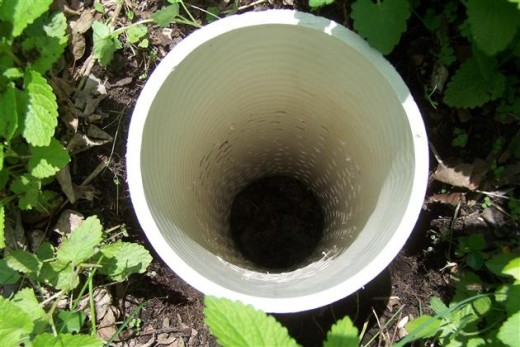
Erecting a worm tower in your garden is a good way to save you money on soil additives by vermicomposting in the ground right next to the plants.
There are only three items needed to construct a PVC worm tower get start attracting worms to your garden:
- 1 piece of PCV pipe that is at least 5 inches in diameter and around 30 inches long.
- 1 5 inch diameter PVC end cap.
- 1 drill with 1/8 and 1/4 inch bits.
To construct your PVC worm tower all you need to do is drill 1/8 and 1/4 inch holes along about 2/3 of the length of your pipe. There doesn't have to be any real method here. Just drill a lot of holes all the way around the diameter of the PVC for the worms to pass through.
The next step in setting up the compost tower is to choose a spot in the middle of, or very close by a garden bed. Dig a deep enough hole to completely bury the drilled section of the pipe vertically. Then lower the pipe, keeping the drilled section down until it rests at the bottom of the hole. Finally, fill the dirt back in around the pipe until all drilled holes are covered. You should be left with 1/3 of the PVC that was left solid still sticking out of the ground.
To invite the worms the tower (and garden) all that remains to be done is to fill the tower.
Carbon sources like wood chips, sawdust, shredded paper or newspaper, cardboard, or dried leaves are great choices for attracting worms.
Nitrogen sources like fruit and vegetable peelings, egg shells, coffee and tea grounds, green leaves, and manure can also be recycled in the tower.
Fill up the worm tower by alternating layers of carbon and nitrogen rich materials until it's full and put the end cap on the end of the pipe.
Check the level of the material in the pipe weekly. Replenish it as needed by adding layers of carbon and nitrogen rich materials and the worms will keep calling it home.
Grow Plants that will Grow in the Shade
Learning what plants grow well in shade can boost productivity and profits for a small homestead. The following 10 herbs and vegetables can be grown in shade. Some may not produce as well as they would in full sun, but will still give you production from a space where you wouldn't normally have it.
- Chard
- Beets
- Scallions
- Carrots
- Garlic
- Potatoes
- Leeks
- Cilantro
- Parsley
- Chives
Start Growing Sprouts
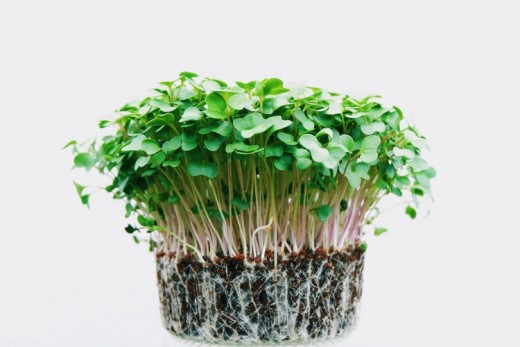
Whether you have a greenhouse, or your "greenhouse" is any free space available , growing sprouts will boost your production in as little as one week!
In order to grow sprouts on a scale large enough to make profit off of you will need a three foot by three foot space in any spare room, closet, on the porch, under the porch.
All you need to do to get your sprouts off to a running start is soak one pound of seeds for every 18 gallon to 20 gallon tote that you will be using. Soak the seeds in a vessel deep enough to keep them covered with water for 12 hours. After the 12 hours is up its time to strain the water back off of the seeds, using a fine mesh sieve or cheesecloth.Then gently spread the seeds in the bottom of a clean, sanitized tote, and put the lid on.
Mist the seeds gently with water once a day for the next 24 to 36 hours and keep a close eye on them. As soon as you can see that most of the plants have germinated and separated from their seeds your crop is ready to harvest. All that is left to do is to gently rinse your sprouts under cool running water and package them for sale.
Start Shopping Your Competition
If you are planning on selling anything from your small homestead then you need to pay extra attention to your competition.
Set aside a day when you can spend time walking around the market. If you can't spend a lot of time there, at least make sure to be able to make two trips. Check what is there when the market opens. Then check what isn't there when it closes. Whatever isn't there is what you need to focus on trying to supply.
Start Buying Garden Seed from the Grocery Section
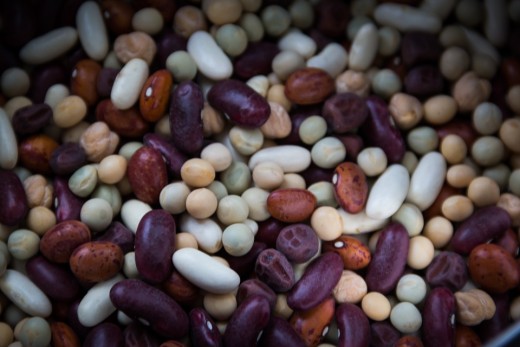
If you are on a budget when it comes time to start planting out your garden then here are three very inexpensive places to get your seeds. You won't even need to set foot in the garden department.
The spice aisle of any grocery store may contain whole seed spices like dill, celery, or coriander. Though they may not be the most viable seeds for planting, most of them will germinate and can grow into healthy plants. Thousands of seeds can be purchased this way, versus the small amount that comes in a seed packet for around the same price.
Dried bean and pea seed varieties are also a good choice for buying seeds in bulk. Here again, viability may not be the best compared to seeds for planting, but these seeds are usually sold by the half pound or pound when sold for consumption. In my local big box store I can buy 2 1/2 pounds of dried beans or about a pound of dried peas for the price of a packet of the same type of gardening seed.
The best source of seeds though is to collect seeds from produce. It doesn't provide as many seeds as the other two places that I have listed here. It is virtually a free source though, because it's from things being bought for the purpose of consumption. Just collect the seeds when you clean your produce and dry them to save or plant them.
Learn How to Garden by the Foot
Turning your garden into a square foot garden is a great idea if somebody wants to increase the yield they get from the space they have available. This method of gardening focuses on how many plants can be placed per square foot, and it allows for more plants in the space available than row planting.
I just was able to try square foot gardening this past growing season and it almost doubled my harvest. I'm no expert with only one season under my belt though. With the results I was able to get as a beginner, I would suggest looking into it to anybody looking to maximize production from a small space.
Thinking Ahead
The homesteader's whole thought process must revolve around successfully being able to think, plan, and save up for the future no matter what kind of space is available.
I hope that this list supplies you with some bit of information that you find useful and applicable to yours.


