Building a Better Building

From beginning to end...
.")


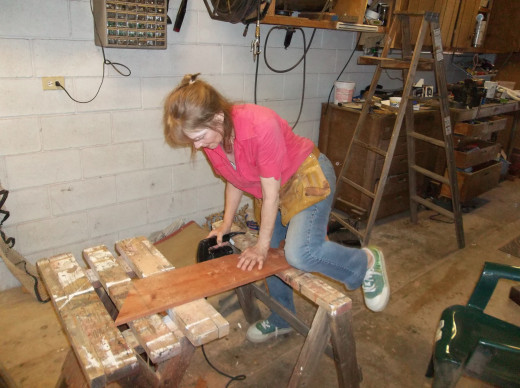
 to remove old tar, paint, etc. We used muratic acid commonly used to clean swimming pools and boats.")


Curb Appeal is all important!
Recently, my dear friend Richard and I put our heads and hands together in an effort to improve the entryway leading into the lower part of my 100 + year old Victorian home. The outside was “ok,” but not very inviting and so, I began to explore and research designs which would make the home more attractive as well as weather tight. Following is a step by step chronology of our work from beginning to end. We had so much fun, tons of laughter and made so many silly errors which resulted in a number of “do overs.” The neighborhood enjoyed quite a show; encouraging us along the way....
How we did it
Most of the construction was done in Richard's shop and then installed to the house. Before doing this, we replaced the unattractive solid door with an antique, appropriate for the period, door I had brought with me in my recent return from Kansas to California. I knew that the proportions were very close to "just right" for this purpose.
Image is Everything, too!
We began by replacing that solid, nondescript, front door with a nice “15 light” solid, antique entryway door. The space w/which we had to work, along with the expected settling of the house, required creative sanding as well as intricate adjustments to the size of the door so that it would fit properly and swing with ease. This is a common concern when working on older homes; they tend to settle and sink over the years and this causes quirky problems and delicate, precision changes to both door and framing.
As anyone who has read my hubs about restoring old homes and decorating interiors knows; I love working on old, 'period' homes. Demolition is right at the top of my most favorite steps in this process. Design is also something I truly enjoy; it is such a challenge and a great exercise in imagination, and the end results are always so satisfying.
A caveat:
If we don’t like what we’ve done; we back up a few steps and re do it.
Caveat #2:
Measure TWICE, cut ONCE! Remember this, oh intrepid home improvement people! Measure twice, cut once! (you might want to repeat this as a chant a few times...take it from me!)
Additional preparation:
Always try to make sure you've lined all your ducks in a row! First, assemble all tools, nails, screws, different sizes of bits as well as drills for your power drill, sand paper, long electric cords, ladders of several sizes, hammers, saws, levels, chisels, tape measures, and the more exotic electric equipment such as portable jig saws, power sanders of several kinds, routers along with (the always useful) clamps and vice grips together in one, useful and convenient location. Then arrange all essential, larger items such as table saws, reciprocating saws, skill saws, etc. (I'm sure I've forgotten a thing or two!!) near electric outlets.
Word to the wise: If you plan to paint your beautiful addition; consider priming prior to construction. This saves so much time and effort and you'll be able to apply the primer evenly.
Also:
Try to think of all the construction materials you'll need, too. This includes plywood, 2x4's, 4x4's, "finish" fascia and ceiling woods, shingles, tar paper, metal flashing, mortar (if building w/bricks), water, etc.
We gathered bricks from the old, unused chimney; some of which are over 100 years old! We also did a "smash and grab" from a demolition site where the remnants of a chimney were scattered on the ground so, we gathered the good, usable bricks and added them to the few we already had. The size (since they were of the same era) was perfect.
And then, in order of necessity:
1) We measured to dead center above the doorway
2) We used 'snap' string to create exact lines from the center to the outside edges. This presented a bit of a challenge in that there were obstacles in our path. To the right of the door is the framing for the up-stairway and, to the left is the framing for the large, display window. Also, we had to work around the casement of the door, itself.
3) After outlining our outer framework perimeters, we determined our measurement(s) from the face of the home to the walkway in front. (Sadly, due to ADA requirements, I lost about 2 feet of my, already miniscule, front yard). We had to take into account the area that would be needed for the brick structure which we'd laid out for esthetic evaluation. Voila! We loved the effect so, this had to be calculated into the final measuremen meaning that, we'd have to set the front support lumber several more inches in from the sidewalk in order to accomodate the additional space needed to lay the bricks.
The reclaimed, redwood 4 x 4 posts which support the front of the entry roof, have metal footings which set into cement. We dug the holes, poured quickrete (fast drying cement/concrete), and, after it hardened to just the right point, set the posts into the still moist cement. We used levels and tape measures to assure that the distance of both posts was equal to the sidewalk as well as from the front of the house. Later, we set the bricks around the posts.
4) We had to determine the height and grade of the roof line to allow enough of a rise to dispel rainwater while having to work within the room available which was limited due to the windows just above the door.
5) We also had to figure for the shingles, fascia and any "gingerbread" we hoped to add.
6) I love beadboard! God's gift to those of us who like the appearance of fine craftsmanship without actually having to DO it! Must have: beadboard ceiling for the entry way.
7) And we took it from there!
To finish the charming changes we’d created; I pulled out some old, rusty/white wrought iron ‘fencing’ (well, don’t tell but…it’s really window security ironwork!! This was meant to be attached to the outside of windows to keep the bad guys out!), to enclose the tiny boutique garden in front of the house. This finishing touch was just right!
A little history about this ongoing project...
When I first purchased the home,, the first thing I did was to strip centuries old layer after layer after ugly layer of old paint from the entire home. The newly exposed redwood was beautiful! I almost had the home "varnished" rather than painted so that the beautiful grain and quality of the wood would be, forever, shown. Obviously, I decided against that and, in stead, drove around town to get an idea of others' paint choices. I found a wonderful, subtle, pale yellow; "Roman Candle," which I fell in love with. So, I chose that for the body of the home and "Whisper White' for the woodwork.
To the left of the work area, there are two solid doors into the garage entry. One day, I decided to check garage sales, at older homes in the area, which advertised construction materials. Luckily, I found the original style garage doors typical of homes like mine. I scooped them up and brought them to the house. They were in poor condition but, nothing that couldn't be repaired. After cutting, splicing, applying dowling and reconstruction...they were installed and, much to our glee and surprise!, they fit perfectly!
Everything that you see was done by me and my friends. We scalloped the fascia, laid the bricks, built and installed the roof. Much of the materials we used came from recycled and reclaimed sources, such as the 4 x 4’s which are set in the bricks; the bricks themselves, and the redwood moldings. We had a great time


