- HubPages»
- Home and Garden»
- Gardening»
- Landscaping
Build Your Own Dry Stone Wall

Introduction
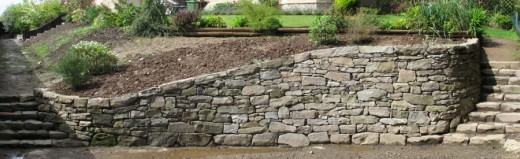
Home projects are usually left in the hands of the professionals, but a little bit of garden landscaping is often one that most people can tackle on their own. One way to add a real touch of class to any yard is with the addition of a dry stone wall. It can serve as protection for flowerbeds, or simply as a landscaping addition that takes away from the band look of a large backyard. Whatever reasons you may have for adding a dry stone wall to your home, you’ll be glad to hear that it is a project that can be completed on your own.
List of Items You'll Need
Tools
| Quanitity
|
|---|---|
Stones
| Ask your stone supply store for the amount, each project varies.
|
Stone screenings
| 1
|
Soil for filling
| 1
|
Tools for removing embankment
| 1
|
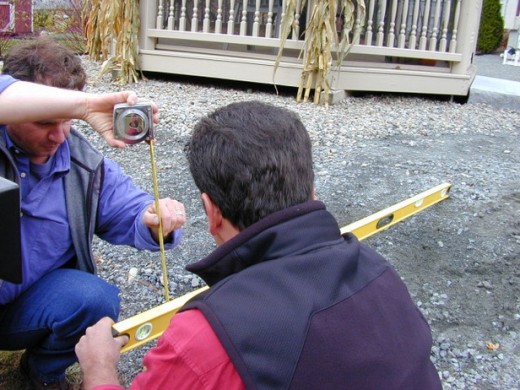
Level
| 1
|
String
| 1
|
Wooden stakes
| 1
|
Long-handled shovel
| 1
|
Hammer
| 1
|
Chisel
| 1
|
Wheelbarrow
| 1
|
Gloves
| 1
|
Step 1
Like any type of home improvement project, this is not one you will want to begin without any type of prior planning. Decide exactly where you would like the dry stone wall placed, and measure both height and length to be certain that you have adequate space to build the wall.
Quick Poll
Have You Ever Built a Dry Stone Wall?
Step 2
The measurements are critical when it comes to selecting the types of stones for the project. Head down to the local stone supply store and hand them your dimensions, as it affects the amount and size of rocks you’re going to require. Dry stone walls can normally be built from 3 kinds of stones: round fieldstones, moderately flat stacking stones and uniformly cut dressed stones.
Each of these stones will give you a different feel and look, so remember to look at photos to figure out which one would be best for your backyard. Also, remember that working with flatter stones tends to be simpler than round ones as they’re easier to stack on top of one another.
Step 3
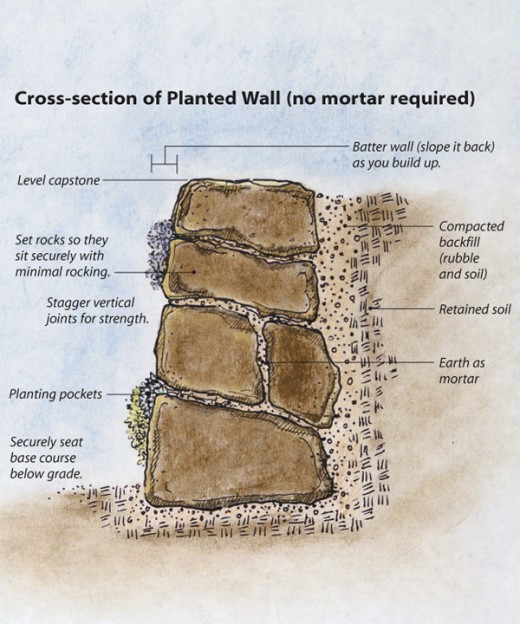
The course and wall area must be laid out. This is done bye either removing away a bank or constructing the wall and back filling as you go, which will produce a walkway result. In order to define the front area of the wall, you must have a string ling and pull it the distance of your wall (about eight inches from the ground level).
Step 4
This step will require you to dig up a trench that is the length of your wall. Make sure that your trench is about one foot in width and eight to twelve inches from the ground. The trench will perform as the footing of the wall to avoid rocks from descending onward due to gravity.
Quick Tip
Make sure to ask for help if a rock is to heavy, you could pull your back!
Step 5
Pile the bigger rocks inside the trench. Place the smooth side facing frontward, and slanted about 7-8 degrees. These rocks shouldn’t touch the string line (although not by much), and the dirt filled behind it should support it. This must be done for the entire distance of your stone wall and each big rock should be next to one another.
Step 6
Scoop the dirt right behind the big rocks and pat the soil securely, while having the 7-8 degree slant to firmly grasp the rocks.
Step 7
Search for corresponding rocks to occupy the voids left amongst the big rocks. Also, these rocks could be tinier, but they need to fill the space between the larger rocks. Next lay the rocks flat side facing outward and support it by filling soil from behind. Lay these rocks by about 7-8 degrees.
Step 8
Keep adding another layer of large rocks and make sure that spaces amongst the 1st layer of rocks are packed in. Do this for the entire length of the ditch. If you need to make it stay just add water to help it (Source: M&L Construction).
Step 9
Place smaller stones at the top of the stone wall to provide an even, flat, and straight appearance.
We are finally done putting together our dry stone wall and our mission is complete. Make sure to take pictures and share them with us in the comment section below.


")


