Build a Ship-Lap Wall for a Fraction of the Cost!

So, if you have been a fan of the show “Fixer Upper” (or your wife has), then you must have a room that requires ship-lap. Ship-lap can be quite expensive, but I will share my experience with creating a ship-lap wall very inexpensively.
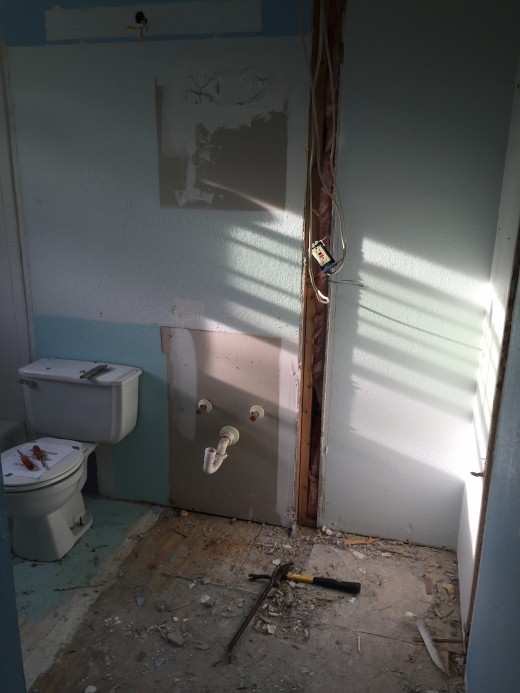
We bought a “fixer upper” and my wife decided she wanted ship-lap in our master bathroom. The wall she wanted it on was in really bad shape. It actually worked out well for me, because it meant I didn’t have to spend a lot of hours patching and finishing drywall holes and unevenness (which isn’t my favorite thing to do).
Here Is What I Was Working With
Materials List
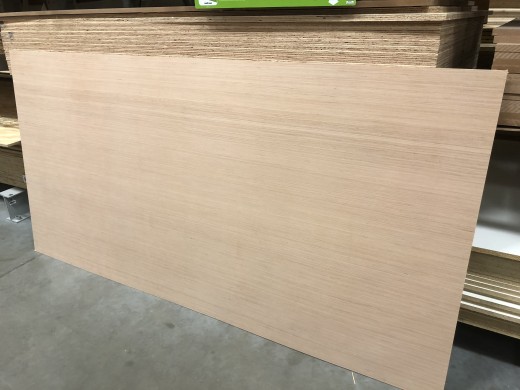
2 - 4 x 8' sheets of 1/4" luan plywood
White Latex Primer
White Latex Semi-Gloss Paint
6D finish nails
1 1/2" nails for finish nailer
1 piece polystyrene flat molding
1 piece polystyrene corner molding
1 Tube White Tub and Tile Caulk
1 Tube Construction Adhesive
Tools Used
Table Saw (used at store by store employee)
Circular Saw
Level
Finish Nailer and Compressor
Utility Knife
Caulking Gun
The Process I Used
Instead of buying pre-cut ship lap boards, I opted for 4’ x 8’ sheets of 1/4” luan plywood or underlayment, as it may be known. It is smooth on one side. It is about $13-14 per sheet, a far cry from what real ship-lap boards would be. I bought 2 sheets from Lowes and had the lumber department employee rip them into 6” strips. You could have them cut to whatever width you think looks best for your project. Having them cut them in store makes transportation a lot easier if you don’t have a truck or van, and eliminates the need for having access to a table saw. If you have a table saw, it saves you from having to wrestle the sheets of plywood by yourself on the table saw.
After I got them home, I quickly rolled a coat of primer on them and then one coat of the latex white semi-gloss trim paint we were using on our other trim. I opted for only one coat to give it just a little less glossy feel and to still be able to see a little wood grain. You could easily put a second coat on if you prefer a shinier, more smooth finish.
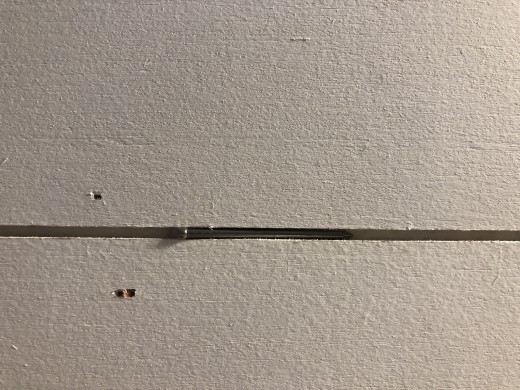
I installed mine with a finish nail gun, but you can also tack them up with finish nails by hand. My wall area was less than 8 feet, so I didn’t have any joints; each row was one piece. The one advantage of working in a small space. :) I left a ¼” inch gap between the end of the board and the shower tile, so that it lessened the contact with moisture. I started at the floor and made sure the first piece was level as a nailed it up. I then put 6d finish nails on top of the piece as a spacer for the next one, leaving just about an 1/8” inch gap between boards. I used 3-4 for each length of board and reused them as I added another board. Some people opt for more or no spacing between the boards, depending on the desired look.
6D Finish Nail Spacer
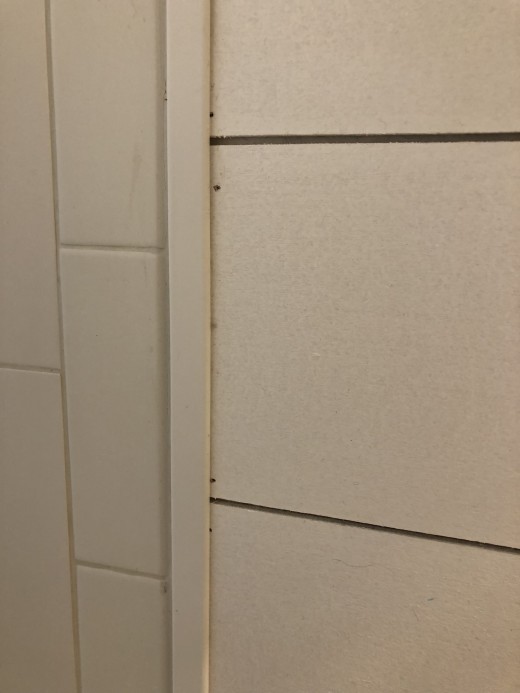
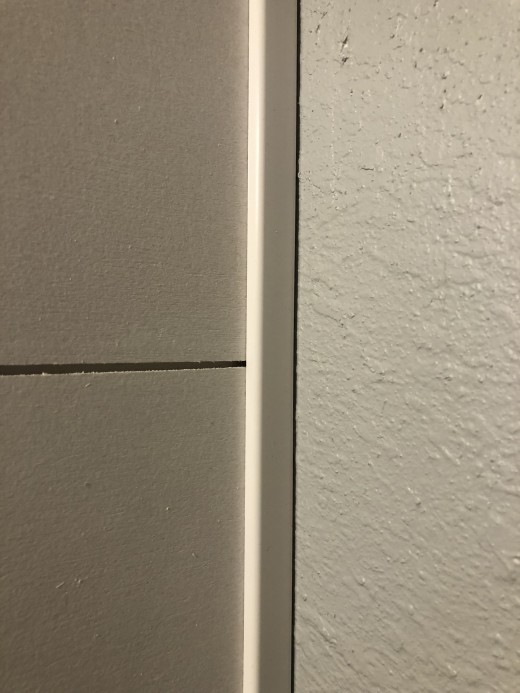
As it got to the top row, I did have to rip the width of it a little bit and cut around a notch in the ceiling. On the ends I used polystyrene molding . I used a flat piece on the right end about 3/4" wide, and next to the tile on the left side, I used an outside corner. The ¼” gap I left allowed the molding piece to fit in next to the bathtub and create a little bit of a moisture barrier to the plywood. I had to trim the backside of it with a knife to get a good flush fit. I used construction adhesive to attach them so there were no nails in them. I then used tub and tile caulk to seal the edge to the tile.
Trim Pieces
We chose to leave the nail holes on the boards exposed, but you could fill and paint them as well.
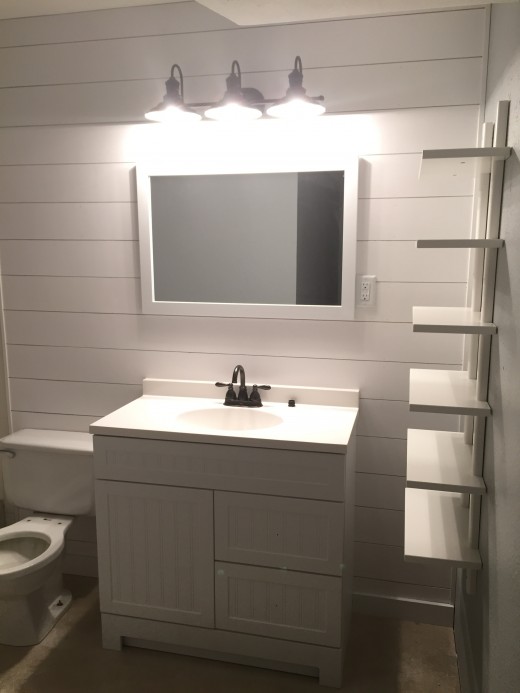
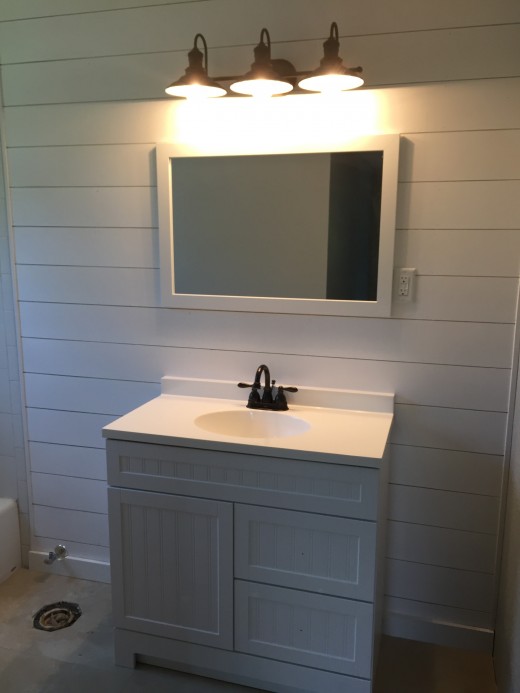
I hope you find this helpful, and I did notice in my finished project picture, that I had not yet installed the toilet seat. The shelves are now far too cluttered to clear it out and take another. :)
 To Install Hardiplank And The Like")


