How to Make a Train Chalkboard for a Little Boys Room


This tutorial will show you how to make a chalkboard shaped train to hang on a wall, perfect for a little boys room. Not only is it inexpensive to make, It's very easy and does not take long to complete. My little boy is crazy about trains so he loves this train on his wall but what I love about it is that it's functional and decorative at the same time.
I was originally just going to hang up the first part of the train and use it as the chalkboard but then I thought about it and figured it wouldn't be much of a train if it didn't have train cars attached and since chalkboards are elongated anyway, it sounded like a great idea.
You will see in the photos that the locomotive was cut out of cardboard but the reason why is because I had already cut it out when I decided to add the train cars. I already had some rectangular pieces of foam board so I just used those for the train cars.

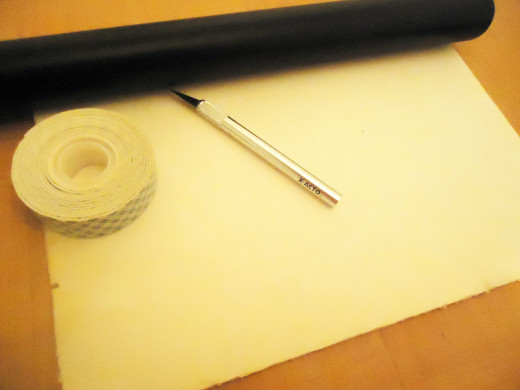
What You Need:
- foam board or cardboard- 3 pieces 15" long by 10" wide for the train cars and 1 piece 16" long by 11" wide for the locomotive
- box cutter or sturdy craft knife
- chalkboard contact paper
- sturdy double sided foam tape


STEP 1
You should have one foam board/cardboard rectangle that is a little larger than the others. This is for the locomotive. To make it I cut a locomotive template out of brown kraft paper from a file I found online with my Cricut die cutter and then put the locomotive template onto the board and traced around it. I then took the template off and used an X-Acto knife to cut out the train shape out of the board. If you don't want to deal with printing or cutting a template, you could easily just look at a locomotive silhouette online and free hand it onto the foam board and then cut it out. The rest of the rectangles will be the train cars and won't require any more cutting.
***Helpful Tips***
- There are free train templates online that you can download and print out or look at and draw onto your foam board. HERE is the one I used for the locomotive.
- I didn't put a formal caboose on the end of the train but you could if you want. The link to the template I shared above has matching boxcars and a caboose, too. I chose to leave the train cars plain so my son would have more room to draw with the chalk.
- If you use a box cutter to cut the locomotive out and the edges are all jagged, those heavy duty kitchen scissors work great to clean up jagged, messy edges on both foam board and cardboard.
- If you want to use cardboard, you could always put a layer of poster board before adding the contact paper to help smooth out the surface so lines won't show through when the kids write on it with chalk.


STEP 2
So now you should have one locomotive cut out 3 rectangles of the foam board. It is time to cover the pieces with the chalkboard contact paper. You will need to cut rectangles of the contact paper a bit larger than the pieces, peel the backing off the contact paper and very carefully adhere it to the fronts of the pieces, being careful to keep it from forming wrinkles while covering each piece.
The rectangle train cars are pretty easy, just adhere the front and wrap the excess and around and adhere all the sticky edges down in the back. To adhere each corner down neatly you can cut out a square or part of a circle out of each corner. I found the best way to adhere the contact paper without creating any wrinkles is to first peel the backing off and lay it flat on the table, sticky side up. Then take your piece and lay it onto the sticky part right where you want it but then immediately flip the piece over to the front and smooth it down, pushing out any bubbles. Then turn it back over and adhere the back pieces tightly and evenly.
For the locomotive, once you have the front covered with contact paper and wrinkle free, you can make several snips (like the corners of the rectangles above) around the edges so that you can wrap each piece around the back for neater edges or you could just cover the front and instead of wrapping it around, carefully trim off the edges of the contact paper overhanging the front. I preferred to wrap it around as I think that gives it a more finished look.
***Helpful Tips***
- Be very careful when you peel the backing off the contact paper. Do it as smoothly as possible. I found if I got into a hurry and bend it while peeling the backing off that it would cause little marks and folds that I could not smooth out afterwards.


STEP 3
It's time to put the double sided foam tape on the backs of each piece. This is what I used to adhere the trains snugly to the wall. For the locomotive, I put strips in several places just to make sure every edge would stick to the wall. On the train cars, I put strips of tape in each corner of each piece and one piece in the middle.
You can use whatever you feel is enough for your pieces. When you are ready to hang the train on the wall, peel off the other side of the pieces of sticky tape and stick each piece on the wall. Each piece should fit firmly and snug to the wall.
I may have overdone it with the sticky tape but I wanted to be sure that they stayed put and so far, so good :) If you are leery about using double sided sticky tape for fear of not being able to get the tape off the wall later, I heard that the product Goo Gone works great for taking it off or you can use a hot blow dryer to melt what remains of it and peel it off.
All in all, I am happy with how this project came out. If I attempt this again in the future, I would like to try and use some sort of thin, smooth wooden board instead of the foam board or cardboard, at least for the train cars. I think they would have been just as easy to cover and would have been a bit of a better writing surface. Although, the foam board worked just fine for a play chalkboard for my son. Have fun making your train chalkboard :)


 To Install Hardiplank And The Like")


