Dryer Vent Cleaning to Improve Dryer Efficiency
Vent Cleaning Tools
Cleaning Dryer Vents Saves Money
Did you know that an eighth inch build up in your dryer vent can reduce your dryer's efficiency by 20%? The longer the dryer vent run, the lower the efficiency. Most dryer manufacturers recommend a vent run of no longer than 12-15 feet with no more than one 90 degree bend.
With the location of laundry appliances in a variety of places in new construction, the laundry is rarely located in a mud room/laundry room anymore with access to the outside. Dryers now have to vent through walls and ceilings, and through layers of floors and through rooms to reach the exhaust point.
It is more important than ever to keep that vent clean and working well.
Low efficiency, slow drying, higher heat, combine to cost you a lot of money and takes it toll on both clothing and the dryer. Proper maintenance of the dryer and the exhaust system is essential for the safe and trouble free operation of a dryer.
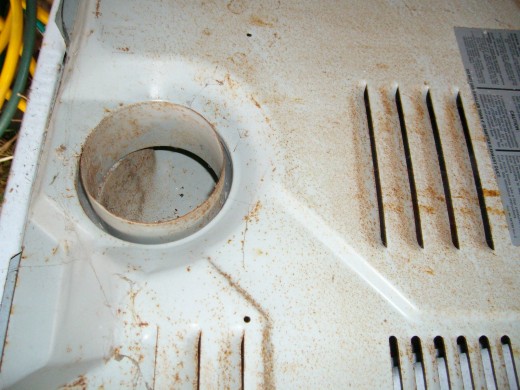
Dryer Vent Cleaning
It is important to inspect and clean each part of the airflow exhaust. Start with the exterior exhaust point. This should be located outside of the house at least a foot from the ground, a foot from the corner of the house, and not located under a window.
Go outside and inspect the exhaust point outside the house. It is normally a louvered vent or a vent with a closing door. The system or venting may be different depending on climate. In very cold climates, it is more important to have a airtight closure that in a warmer climate and a floating ball or stack may be used. Inspect these exhaust points for lint and debris. Some of these have screens fitted to them to prevent birds and other small animals from nesting in them. The screen must be kept clean for proper air flow out of the dryer.
In extreme cold or hot climates, other measures may have been taken to prevent air infiltration. Be sure to inspect your system to see if it is other than a normal vent. An enclosure or modification may be used that requires additional attention for optimal operation of the dryer.
Through the Wall Vent Cleaning
If you have a dryer that vents through the wall, you are lucky indeed. Your vent cleaning problem is practically solved for you. Simply move the dryer so that you can gain access to the back. Disconnect the dryer vent from the dryer and the wall. Inspect the dryer outlet and the through the wall exhaust venting system. A through the wall application is only about 15 inches of travel and is generally direct and easily cleaned.
Look through the vent that goes through the wall, It should be clean and free of all lint and dirt. If is dirty, vacuum it clean and wipe it with a dry cloth. Next inspect the connecting vent, this normally looks like an expandable foil colored 4 inch tube that has a connector for the dryer and the wall.
If the venting is folded over, crimped, flattened, or otherwise out of shape, it may not be performing as designed. Replace it. Almost all hardware stores carry venting material, make sure that you select venting that was specifically designed for a dryer application. Do not use the white plastic stuff, it is not rated for fire.
The proper installation of vent for a dryer calls for it to be as short as possible. Sometimes to achieve this in a cramped installation, you must move the washing machine out of the way so that you can gain access to the back of the dryer.
If it is necessary to have a longer run of vent, make sure that it is not obstructed, folded, pinched or in any way reduced so that it restricts air flow.
Dryer Vent Cleaning for Long Run Installations
Sometimes the dryer vent is routed from a location near the middle of the house. This vent may go through the ceiling, walls, floors, or down and under the house. Sometimes the vent takes turns. Most manufacturers recommend runs of no longer that 15 feet with one 90 degree turn, less than 10 feet with two 90 degree turns and never more than two 90 degree turns should be used. Now we all know that these recommended installation guidelines are not followed by a large percentage of all the installations.
A longer than usual run, or too many turns may in fact work fine for some time, but sooner or later these goofy installations will cause problems.
Rant #1: Did the architect have his head up his posterior? Does he not know that he is designing a problem installation for laundry that will always be a problem?
Okay, got that off my chest. Where was I ?
The only way to handle this kind of an installation is to be vigilant and have cleaning tools and a easy to follow plan handy for a 4 times a year cleaning. Yes, 4 times a year. This will insure that you have an efficiently operating dryer that will last a long time.
Must Have Lint Removal Tools
The Bare Necessities For Vent Cleaning
A cleaning kit. Order one today. You must be prepared for this and a cleaning kit is necessary.
A ShopVac.
Drill to drive the auger.
Dryer lint brushes.
NOTE: Most lint cleaning systems are made with plastic parts, the auger, blockage removal tool and various parts are made of plastic. Although they are safe to use, you should use great caution, applying too much force with the drill or pushing on the rods could cause damage to the tool and the brush could break off in the vent.


