Easy Decorating With Peel and Stick Tile

Just Peel and Stick
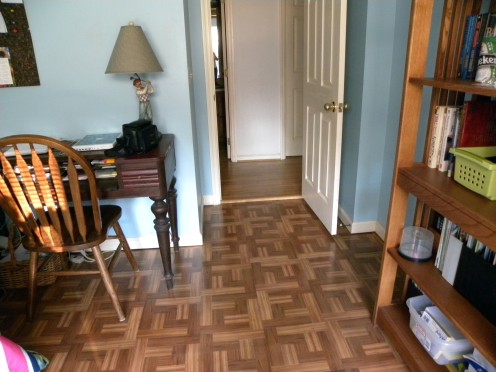
Recently I redid the floor in our spare bedroom. This room had old, stained carpeting. We had been planning on replacing it since we bought our house six years ago. Company coming, and needing to use the room finally got me going on the project.
As with most of my projects, I had limited time before my company came, and also a limited budget. I decided to rely on my old friend, "Peel and Stick" tile. It was not the first time this friend has helped me out.
"Peel and stick" tile is a very easy way to have a new floor. The tile can also be used for many other projects. I will show you some of these here.
Peel and Stick Floor
A floor can easily be redone in a day, using peel and stick tiles. Measure the length and width of your room, then multiply to find out the square footage of your room. Shop at your local home improvement store to obtain the tiles. They can sometimes be found for as low as 68 cents a square foot, and are usually sold in boxes of twenty.
- Remove old carpet, linoleum, or other material you no longer want. Be sure to remove all tacks and nails.
- Clean the subfloor well, and let dry.
- Lay a row of tiles down without removing the backings, to see how they will look. My floor tiles were a parquet, so I matched light to dark with each tile.
- Starting at the right corner, (or see below for instructions for starting in the center of the room) remove the backing, and place the tile on the floor. Align them as you go, so that the tops and bottoms are even. Tiles can be removed, and realigned when first put down. When satisfied with your results, press each tile down hard to seal. Using a roller will assure a good bond.
- If there is a space at the end of the wall length, the tiles can be cut with scissors. Measure the width you need and draw a line on the paper backing.
- Continue around the floor until finished.
- Enjoy your new floor.
Floor Pic
Tile Instructions from eHow
- How to Install 12 by 12 Self Stick Floor Tiles | eHow.com
How to Install 12 by 12 Self Stick Floor Tiles. Self stick 12 X 12 vinyl floor tiles are a standard size tile often used in kitchens and rec rooms. They come in a variety of colors, patterns and grades. The price of an individual tile ranges...
Table Pic
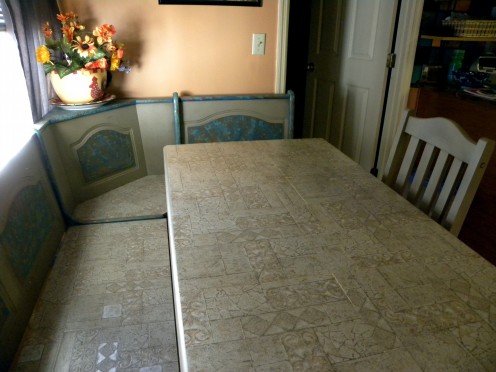
Peel and Stick Table and Bench
Peel and Stick tile is a fun way to update an old table. I had a kitchen table that had been painted many times. If scratched hard, a rainbow of colors would appear. I wanted a more durable surface on it, so decided to try tile.
- First I cleaned the table well to remove grease and grim.
- Next, I painted the legs of the table and bench. I used an antiquing kit. If the finish on your table legs is okay, you could skip this step.
- Measure your table and benches length x width to find out square footage. Purchase tiles that you like. My table was small, and inexpensive to cover this way.
- Lay the tiles out with the backing still on to see how they will fit. Arrange and cut tiles as necessary.
- Remove backing and press down to seal as you would with a floor.
- Enjoy your new table, ( and bench).
- *Save a few extra tiles incase you want to replace one in the future.
Staircase Pic
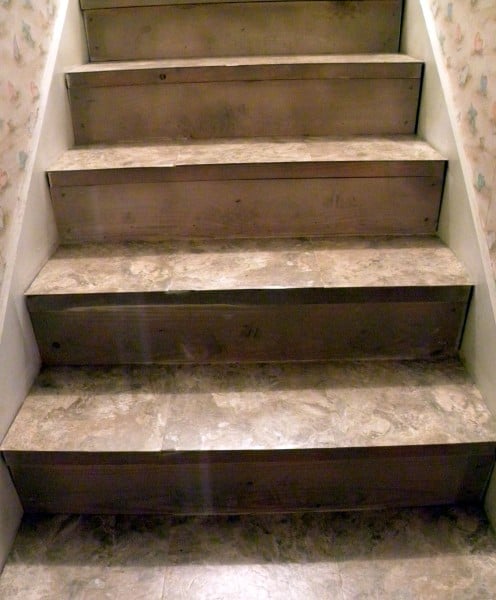
Peel and Stick Staircase
I also used Peel and Stick tile on a small staircase that went from our laundry room to the bonus room. This staircase was covered with old carpet that was stained and constantly loose. The wood underneath the carpet was uneven and not in good enough condition to just paint.
This project was done with the same routine as previously. Most important is to clean well so that the tile will stick. I laid a few old tiles down to judge how many I would need for the staircase. I purchased inexpensive tiles for the stairs. You could use left over tiles from a floor or other project.
Work from the top step down when placing the tile. Be sure to press down well to seal. My steps were warped in places, so I had to work to make sure they would stick.
These stairs are much easier to keep clean then carpet.
More Ideas
You will find yourself thinking of more uses for these tiles once you start. I am planning on trying some on one wall of my bathroom. Here are some other ideas to consider..
- Covering scratched or cracked shelves.
- Backsplash areas
- Porch floors or ceilings
- Desktops
- Cut remnants into pieces to use to make a mosaic
- Children's craft projects
- Cover a box for pretty storage
Most of all, have fun with your project.
Related

Update Your Kitchen Economically with Aspect Peel and Stick Backsplash Tile

DIY Decorating Ideas for Lime Green, Apple Green, and Yellow Rooms

Turquoise & Green Room Decorating Ideas

Redecorating on a Shoestring: Inexpensive Decorating Ideas for Any Room in the House
Gray/Grey Living Room & Bedroom Walls Décor | Plus, How To Use Furnitures & Colors In Your Grey Rooms