Easy Garden Decorating Idea Garden Tool Art

Common yard and garden tools add beauty to landscape.

Garden Tools Become Show Stopping Décor
Busy gardeners know how quickly rakes, shovels, trowels and other common garden tools can become weathered and worn looking. And for most people, having all the tools picked up and put away at the same time can seem like a pipe dream. You start to rake up a corner of the yard and before we know it, the phone is ringing, a child needs attention, or a neighbor comes to call. So the rake or shovel leans against the fence while you do the other things you need to do.
Before you know it, you have a rake here and shovel there, and a Wal-Mart bag with two tomatoes and a green pepper sitting in the vegetable garden waiting for more bounty to be added to the harvest.
This easy project will solve the problem of having unsightly tools detracting from the beauty of your landscape.
Water Fountain and Garden Rake

Colorful Lawn Rakes

Weathered Garden Tools

Small Plastic Garden Spade Becomes Decor
 was purchased at the local dollar store and painted in copper and metallic finishes.")
Shovels Make Good Decorator Tools

Paint and Primer in One

Remember to Check the Label on The Can
Not all spray paint will stick to any surface. Choose a type of spray paint that will stick to plastic, metal, and wood.
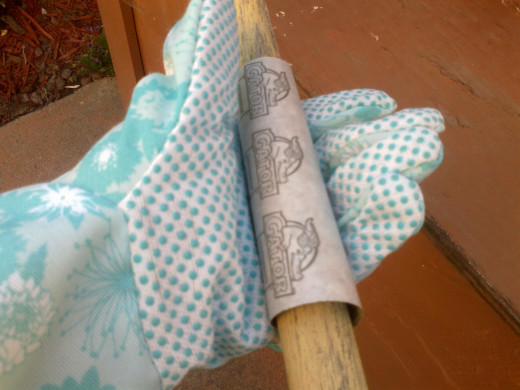
Wear Garden Gloves While Sanding Tools
Preserve and Protect Your Garden Tools

How to Decorate Your Garden Tools
Create your own decorated tools using these guidelines. As you work through each step of the process, allow inspiration to come from your surroundings. This project is something everyone can do, so do not worry if you are not especially artistic when it comes to painting designs. You can use stencils, swirl the spray paint in different colors, or let it drip down the tines.
Choose The Garden Tools to be Decorated
Shovels make good canvases because they offer a wider space for your design. For this project we selected three rakes and one spade. The finish on the rake handles, after two years of use, was flaky, and small splinters from the wood handles was becoming a painful problem while using these tools. The shovel is an old one that is being retired. Because it is a cherished family shovel and not ready for the dumpster, it was a great candidate for using it to create some garden art.
Assemble the Spray Paint and Other Equipment
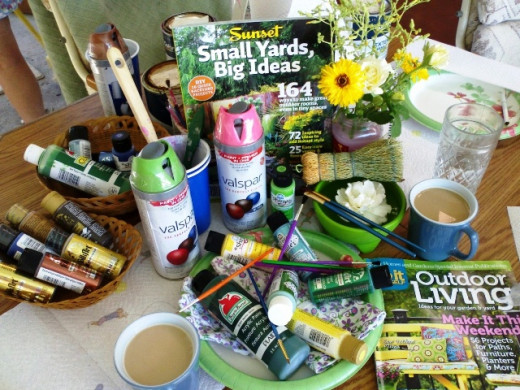
Gather everything you will need for cleaning the tools and applying the base coat. For this project we used Valspar paint and primer in one. You may want to use up spray primer that you already have. Doing this will make the cans of spray paint go farther and the project will cost less. The image at the right of the screen shows the items needed to begin.
Clean the Shovels and Rakes and Sand the Handles
For this stage of the project, we gathered the tools to be painted, found a good piece of medium coarse sandpaper, collected the cans of spray paint, and remembered to use those pretty garden gloves. To clean the shovel spade and tines of the rakes, we used a garden hose and a plastic bristle brush.
Primer and Spray Paint the Garden Tools
Using an empty cardboard box, we laid the tools out to be painted. When painting, hold the can about 6 inches away from the object, and proceed in medium slow, but steady strokes until all of one side has been coated with the paint. Let that side of the object dry until you can touch it without paint sticking to your hands. This can take several hours depending on your weather and humidity levels. After it is dry to the touch, flip each object over and paint the other side. Let dry.
Assemble the Decoration Paints and Supplies
This is when the real fun begins. Grab a friend or family member and settle in with your favorite cup of Joe. Flip through some garden magazines for color, pattern, and design ideas. Go through your craft stashes searching for craft paint and even crystals and beads you can use for decorations.
Decide on a color scheme for your project. Stick with about three to four colors per item. Use one or two of those colors as accents, or color pops, and the other color or colors as the main body of your design.
If you need to purchase paint, you may want to choose acrylic paint from the craft department of your local big-box store. This way, you can purchase a wider variety of color for the same amount of money that you would spend if you had small cans of exterior semi-gloss latex paint mixed up.
Decorate Your Garden Tools
After you have selected your colors and assembled the paints, paint brushes, and any other supplies, begin to experiment with applying the paint. Small designs in repeating patterns work well on the rake and shovel handles. Painting the tines a solid color is easiest, but you might want to consider creating a rainbow of colors by painting each rake tine a different color.
Enjoy the process of decorating the tools while visiting with friends and family over a cool beverage. When others join in, the fun really begins.
Garden Inspiration
Using and Caring for Your Decorator Garden Tools
These painted rakes can be used to work in your garden. The handles hold up well under normal use, but can be expected to wear with time. The tines of the rakes may need an annual touch up with a can of spray paint. Shovel spades will wear mainly on the lower third part of the spade, depending on how deeply you dig. Keeping your design to the upper third or half of the shovel spade will help to preserve the design so that you only need to touch up the lower portion with spray paint.
Color for Your Garden

Garden Cheer

Rate This Garden Hub
In Conclusion
In Conclusion
Stripes, poka-dots, swirls, drips, or tiny flowers are just a few ideas for easy-to-do painted finishes. This is a project that you can walk away and come back to when you have time. You can choose to spray the base coats of color, and then come back to the project a week later when you have a little time. It only takes about an hour or so to decorate each tool once it has received its base coat of spray paint.
The most important part of this project, however, is that it is relaxing and fun. The entire family can contribute something to this kind of artwork. Tiny tots can apply their own brand of squiggles and swirls to a handle, and older children and family members can create their own artistic vision.


