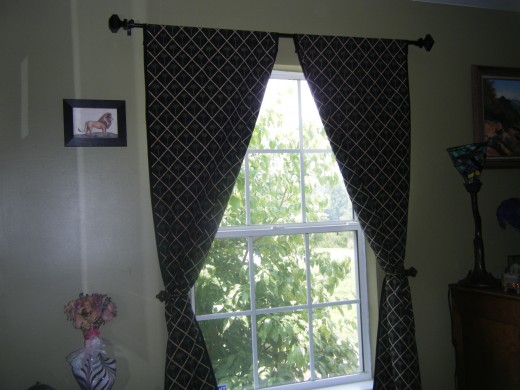
Easy to Create Homemade Curtains for Windows and Glass Doors

Curtains are an essential part of the home for privacy, security, temperature and decoration. If you have ever gone shopping for curtains, it can get quite pricey depending on the quality and the brand. Also, sometimes you just can't find that special fabric, design or color to go with the rest of your home décor. Some people opt for blinds instead but adding some fabric design can make a room pop and it's just so much fun. The curtains I am presenting are very basic and anyone can have a go at it. If you're not big on sewing or don't think you have the time, this hub will make it super easy to create your own handmade curtains in an afternoon.
Step 1: The first step would be to measure your window or door to determine how many yards of fabric you will need to buy. 1 yard equals 36 inches. The width can be anywhere from 45 to 65 inches. Now you can go to your local fabric store to look at fabric. Take some photos of your home décor and take them with you for color and design matching. You might have something in mind already, or you may want to look around to get ideas, something may pop out at you. If you're looking for heavier fabrics, fabric stores usually have an upholstery section specifically designed for curtains. I sometimes just use basic cotton, it's cheaper and easier to work with. This depends solely on what you are wanting. Obviously, upholstery and heavier fabrics are going to be better quality. But if you're looking for a quick inexpensive curtain fix, cotton may be your best bet. If you are going to work with cotton or other light fabrics, they might be a little see through which doesn't help when trying to sleep in when the sun comes up. There is a heavy fabric called "blackout fabric." And it does just that, sewing it behind the cotton will block out any light and it is very inexpensive. Fabric stores also carry this in the heavy fabric section for curtains. Make sure when using any heavy fabric that you have a heavy duty sewing needle. And make sure to use your coupons if your store has any. You will also want to pick up a curtain rod to fit your curtain width, and also a pair of curtain holdbacks so you can let that sun in when you're not sleeping.
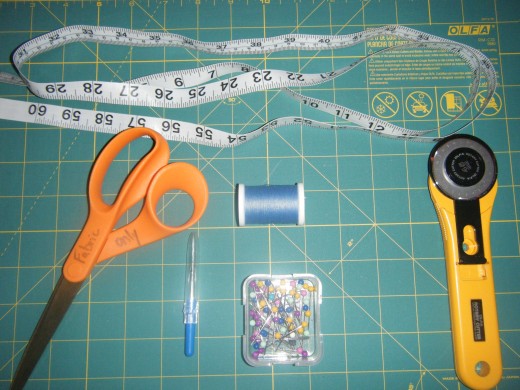
Step 2: The next step would be to make sure you have all the right equipment for curtain success. You will definitely need a sewing machine. Now I'm not saying that you should go out a buy a sewing machine if you don't have one for one project, however if you plan to sew a lot more, it is a great investment. If you just want to try a few home projects, ask your friends if they have one and are willing to let you use it. Again, make sure you are using a heavy duty sewing machine needle to get through the layers of the fabric. You will also need some thread. Try to match the color of the thread to the colors of the fabric for best results. For the curtains I made, I used all purpose thread which works just fine. You might want to use a heavier thread for heavier fabrics. You will also need fabric scissors, a measuring tape, pins, seam ripper, ironing board and iron. A rotary cutter and mat is optional. When making long curtains, a rotary cutter can be difficult to use. I love it because it gives you a perfect cut and measurement. I cut mine a little at a time on a table, this can be tricky so you have to make sure you hold the fabric down to get that perfect cut.
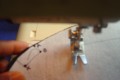
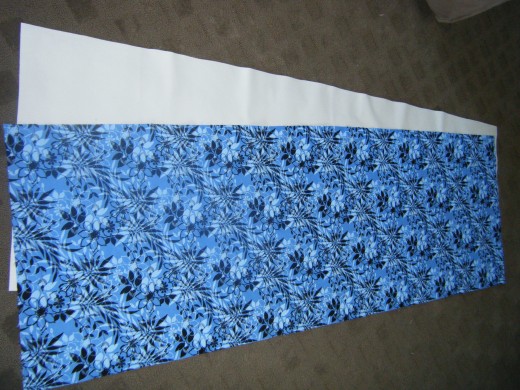
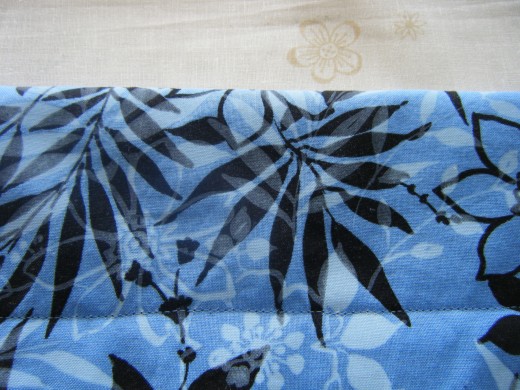
Step 3: Now that you have your fabric and equipment, it's time to get started. Cut out your fabric and also blackout fabric so they are exactly the same size. You should have 2 separate panels that are exactly the same size. That's 2 main and 2 blackout fabrics. Next, work on one panel at a time so you don't get confused. Make sure that the main fabric and the blackout fabric pieces are lined up together wrong sides together, just as the photo depics. That means the right side of your main fabric is facing up and the right side of your blackout fabric is facing down. You will then need to flip over the whole panel so that the blackout fabric is facing up.
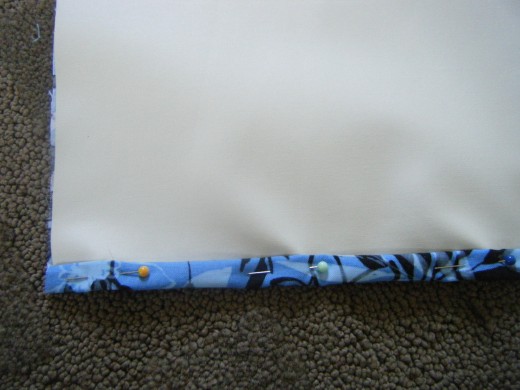
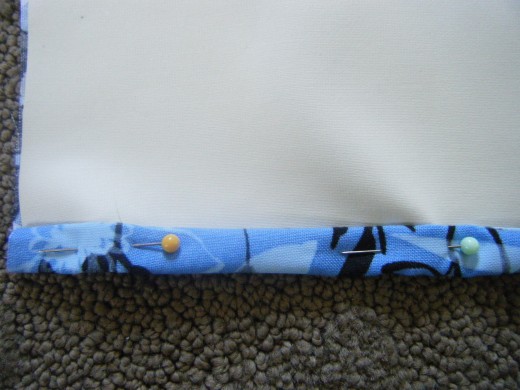
Step 4: Now it's time to get rid of that raw edge. Get your pins out and start with the sides of the panels. Fold your raw edges over twice and pin to hold in place. You can pin them like I have them or you can pin them vertically. I don't like to pin vertically with long curtains because I always stick myself when it comes time to sew. I'm not into fresh blood on my curtains. ;) I also feel like they hold the heavier fabric in place better. Just be careful when sewing in the machine, be sure to remove the pin when you get to it.
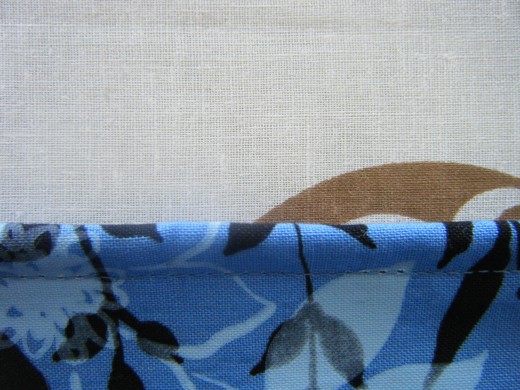
Step 5: Now that you have your sides pinned, it's time to sew them down. Try to sew close to the edge but not too close. As you can see in my photo, I am sewing about 1/4 of an inch towards the raw edge.

Step 6: Now that you have your sides sewn, turn the panel over and iron on the right side of the main fabric.
Step 7: You are now going to fold over and sew the raw edges at the top and bottom of your panel just as you did the sides. After you are done with that, it's time to create a space for your curtain rod to go through at the top of your panel. Make sure to measure how thick your curtain rod is. If it's 1 inch thick, I suggest making your space about 2-3 inches. You are basically going to take the top of your panel and fold it over 1-3 inches depending on your rod size. Fold it so that it lays on the blackout fabric. Start sewing on top of the stitches you already created from sewing the raw edges. This will create a cleaner straighter look. Turn over and iron. Make sure you finish your other panel and you're ready to hang your curtains.

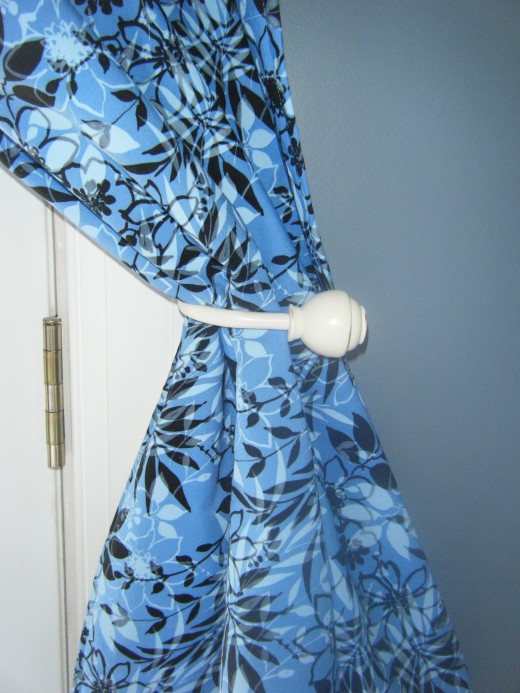
Step 8: Measure where you want your curtain rod brackets to go and drill them in. Also measure, drill and screw in your curtain holdbacks. Take the rod and pull it through the fabric space and hang. And you're done!
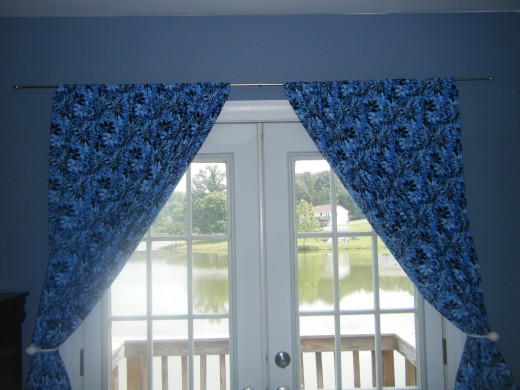
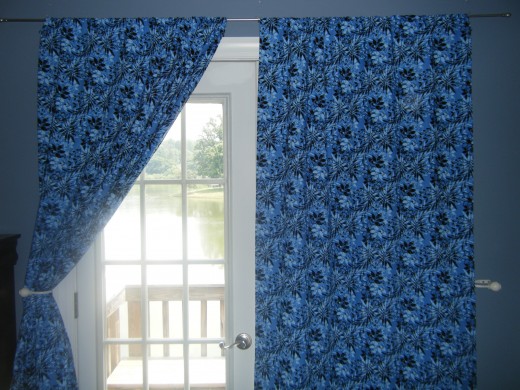
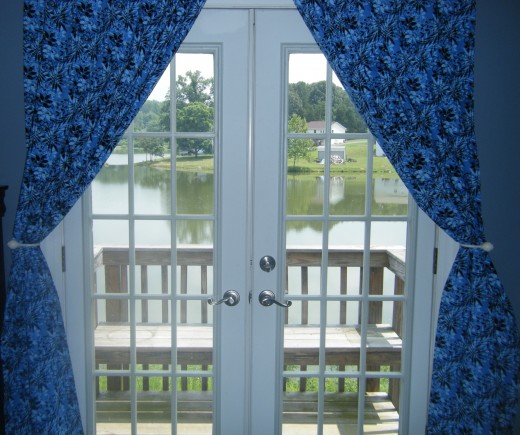
Here are another set of curtains I made for my guest room.