Garage Floor Epoxy - Epoxy Like The Pros

What does it really take to get a good epoxy coated garage floor that will last for years, look like a dealer’s showroom, and not chip, fade, or peel away after a few years? Well, the answer isn’t always what most people want to hear. It takes work and quality products. It’s the reason why most people who know what it takes for a good epoxy floor hire a professional instead of tackling a project like this by themselves.
The market has been flooded lately with epoxy floor kits that promise the above but in reality leave a lot of people unhappy with the initial results or become disappointed when it starts to fail a few years later. Many of these kits won’t protect your surface from hot tire marks or chips from dropping something on the floor. While these kits have upgraded from the concrete paint of yesterday to actual epoxy paints, they are still lacking in many steps and required processes for a quality, professional looking job. While they do serve a purpose for some people, my aim here is to educate you on epoxy coatings and what a professional job and product actually entails.


Concrete Floor Preparation
The proper preparation of your concrete floor is the most important part of any epoxy coating. Most people don’t realize the amount of work that must go into this. If this part is not done correctly, failure of the floor is almost certainly guaranteed. The first step is to determine that you don’t have a moisture problem. If water vapors from the soil underneath are coming through, it will cause most epoxies to delaminate. Once moisture is ruled out, all oils and contaminants must be removed with a quality degreaser. A floor buffer with the proper nylon pad is the best way to do this.
After proper cleaning the next step is the preparation of the actual surface of the concrete. The pores of the concrete must be exposed in order for epoxy to properly adhere to it. If the surface is too smooth or has any type of sealer on it, it will not bond properly and will peal or bubble sometime afterwards. Acid etching is one way to achieve this; however the preferred method for the best bond is to grind the surface of the concrete. The grinding exposes all the surface pores and cracks that might need repairing as well as smooth’s any trowel marks or high spots in the concrete. Power wash to remove the remaining dust in the pores and you are ready to patch any surface cracks that need attention.


Epoxy Floor Application
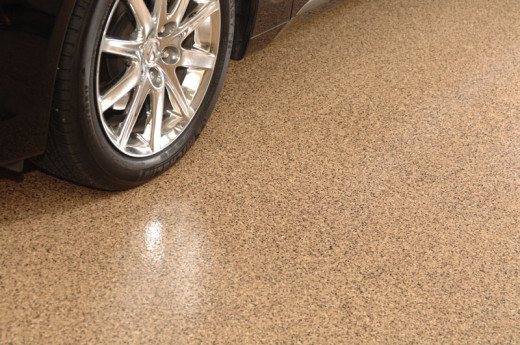
This is where the home kits just don’t measure up to a good epoxy coating. They are usually done in two steps where a professional job takes five. The first step in the application process is to apply an epoxy primer coat. This is usually a clear epoxy and provides the best bond to the concrete. With some good quality products it will also provide a moisture barrier to eliminate any moisture problems that could occur later with the foundation. Next, a colored epoxy coat is applied along with color flakes to full refusal. When that has cured, the remaining flakes are scraped then swept up from the floor.
The next step is two coats of clear. This is what gives the finish depth and protection. While some people use epoxy for this, it will yellow if exposed to sun for any length of time. If you have a garage exposed to the sun that you like to keep open for various reasons, or if you have a window that lets the sunlight in, this will happen. To avoid this, your clear coat should be done with a two-part polyurethane coat. It provides the sunlight protection you need along with a glossy finish. A non-slip can be added during this stage if additional grip is needed such as in snowy climates.
It takes two full days for this application process. Once the final coat is applied, the surface can take general traffic after 48 hours and vehicles after 72 hours.
Learn more about epoxy coated floors plus other garage flooring options here
- Floor Options For Your Garage
Learn about all the garage flooring options available today, including epoxy coated floors. You can even do tile, mats, sealers, and paint.
Epoxy Flooring Costs
As you can see, this is a process that takes time and some hard work to do it the right way. It provides a much thicker layer of protection which will also hide surface imperfections as well. The cost you ask? Most professionals are going to charge $4.00 to $4.50 a square foot for an installation. A typical two car garage is 400 square feet. Anyone charging less is skipping a step somewhere. If you choose to do it yourself, materials will cost you $500 - $600 dollars depending on what kind of product you choose, plus approximately $150 for the tool rentals. There are other systems such as polyaspartic epoxies that can be installed in one day and driven on the next, but they are more expensive and should be left to the professionals.
Concrete Coating Suppliers
- Concrete Solutions - Decorative Concrete Resurfacing Products
Concrete Solutions manufactures superior decorative concrete resurfacing products like Ultra Surface® Concrete Polymer, concrete acid stain, concrete dyes, and epoxy coatings. - Westcoat
Concrete coating manufacturer supplying contractors with quality products.


")

