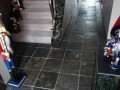
Laying Out Floor Tile Installation Instructions for Bathroom and Kitchen

Laying out floor tile indoors in the bathroom and kitchen using slate, marble, granite, glass, porcelain or ceramic tiles can seem easy at first glance - just spread the mortar, lay out the tiles, grout and seal. But irregular floor layouts, the need for special treatment of certain tiling materials, and long-term maintenance considerations can make the project challenging.
Sourced by a finish carpenter (my husband) with years of experience installing floor tile, these instructions describe, step by step, the general process of laying down tile on concrete floors in bathrooms and kitchens, and even entryways or basements. This guide is designed to help you prevent mistakes and avoid future problems. However, you should always read and follow the instructions on the box of tiles you have and on the labels of the tiles, mortar, grout and sealant.
Note that this set of instructions is for concrete floors only. If you have a wood subfloor, other steps must be taken.
List of Equipment Needed to Lay Down Tile on Bathroom & Kitchen Concrete Floors
Special Equipment You'll Need for Floor Tile Installation on Concrete
- Tiles (plus the box they came in with instructions)
- Safety Goggles
- Floor Scraper
- Vacuum Cleaner
- Concrete Patch
- Measuring Tape
- Chalk line
- Tile Breaker
- Wet Tile Saw
- Diamond Grit File
- Mortar (tile adhesive - with manufacturer's instructions)
- Notched trowel
- Grout (with manufacturer's instructions)
- Rubber Float / Trowel
- Bucket of Water
- Grout Sponge
- Knee Pads
- Rubber Gloves
- Sealer / Sealant (with manufacturer's instructions)
Tile Installation: Prepare the Room for Laying Out Floor Tile
Get the room ready to lay down tile. Clear the bathroom or kitchen of all furnishings. Remove the door from its hinges if it opens inside the room. When laying out tile in the bathroom, remove the toilet. Remove the current floor covering and any hardware fastening it down to the concrete.
Do the Prep - Clean the Floor Very Well
With a floor scraper, scrape off the concrete floor any stray bits of sheet rock residue and drywall mud, or any loose adhesive left over from the previous floor covering. Then vacuum the floor thoroughly.
Examine the Concrete Floor for Loose and Uneven Parts
Check the floor to spy out any sections that are broken, crumbly or not flat. Patch low areas; repair broken spots. Using an angle grinder, grind down any bumps. Vacuum once again.
Caution: Flatness is important. When the floor varies from flat in a particular location by more than about 1/4", this can make laying down tile a nightmare. You might want the floor repaired professionally or to abandon the idea of installing floor tile in a bathroom or kitchen with a severely uneven concrete floor.
Choose a Reference Line for Tile Laying
Enter the bathroom or kitchen whose floor is to be tiled and look at the walls. Pick the wall that is the most prominent and obvious, where the eye tends to focus - that is the wall to line up your tiles along. Important: When you lay down tile in a bathroom, never start behind the toilet area. Remember, the reference wall is where you'll begin installing floor tile, and where the results will be the most perfect.
Make a chalk line in the middle of the room parallel to the reference wall. You'll use that line to line up your tiles. The chalk line will be between the tiles when you lay them.
How to Cut Curves in Ceramic Tile for Irregular Floors
Convex curves in the tile, irregular lines in a bathroom, entryway or kitchen floor, and even the fine tile slivers mentioned above can be cut using a wet tile saw.
How to Cut Floor Tile
Some tiles will need to be cut to make a perfect fit with the room. A tile breaker is an ideal tool to use to cut ceramic tile. Now, it's easier to use a tile breaker to cut a tile in half or thirds than a thin slice of tile. To determine the best way to cut tile for your project, lay a single row of tiles on the floor from the reference wall to the opposite wall. If the last tile needs just a thin slice cut from it to fit, rather than go to the trouble of cutting it finely with a wet tile saw, plan to cut the tiles at either end with the tile breaker, thus absorbing the difference in larger cuts.
Cut the tile with the tile breaker beforehand - you'll need to do a test layout first - or have a partner do the cutting while you're laying out tile on the mortar. After breaking the tile, with a diamond grit file file off the sharp cut edges.
Mix and Apply the Mortar
Mortar is tile adhesive, used to affix tiles made of ceramic, porcelain, granite, etc. to the concrete floor. Whatever adhesive you use to install floor tile, read and follow the package instructions carefully. Generally, you'll mix the mortar, then let it rest for five minutes before stirring it around once again. (Don't skip this step.)
Using a notched trowel, spread the mortar according to the notch size specified on the tile box. Work fast when you lay the tile so that the mortar doesn't set up too fast and require you to start all over again (after you laboriously scrape off all the dried mortar).
Set Up the Floor Tiles for Installation
When laying down tile, you'll need to space the tiles on the concrete floor with room for grout (which is the stuff that's packed between tiles) between them and orient the tiles properly.
Using plastic tile spacers, which come in measurements such as 1/4", 1/8" and 1/16" (you should get the ones that match the recommended size on the instructions that come with your floor tile), space out the tiles evenly. Orient the tiles according to the ridges that are running on the underside of the tiles - for uniform tile laying (with no floor pattern), keep them all going in the same direction.
Laying Down Tile Instructions
Set the tiles firmly one by one in the mortar along the tile spacers. Work toward yourself, not away from yourself, to avoid your being boxed in and having to walk on the tiles before they're set.
Do yourself a favor and don't walk on recently laid tile! That will most likely mean repairs in the near future. It's better to do half the room today, and half tomorrow than to walk on the tiles.
How to Grout Floor Tile
The day after the floor tile has all been laid, it's time to grout. Remove the tile spacers. Vacuum the floor tile joints of debris. Then mix the grout. Follow the manufacturer's instructions for mixing and using the particular kind of grout needed for your project. Water-based grout should be stirred twice, as in the mortar preparation instructions above.
Grout swiftly. Spread the grout with a rubber trowel quickly into the spaces between the tiles (joints), filling them up. You'll need to spread the grout over the tiles themselves, but try to scrape it as thinly as possible, to make cleaning it later easier.
How to Clean Grout off Tile
The layer of grout left on the tiles must now be removed. Immediately after grouting, wearing rubber gloves to protect your hands, use a grout sponge and water to clean the tile.
Dip the sponge in the water, wring it out, make one stroke on the tile, turn the sponge over and make another stroke using the other clean side, then clean the sponge in the bucket and repeat. Use the sponge in this way to make the grout look neat in the joints.
Now leave the kitchen or bathroom floor alone overnight to dry. Be sure not to walk on it or get water on it.
How to Seal Floor Tiles and Grout
The grout must be sealed - made waterproof - and in many cases, so must the tiles (check the instructions on the tile manufacturer's box). Grout can be sealed with acid or a silicone grout sealer. Follow instructions and use a sponge, brush or mop, then let it dry and cure. Now you're done laying tile on the concrete floor of the bathroom or kitchen, and hopefully there were no problems along the way.