- HubPages»
- Home and Garden»
- Gardening»
- Garden Design
Garden Gazing Craft Project | How to Use a 'Bowling Ball' in the Garden

Gazing Balls Beautify and Add Interest to The Garden
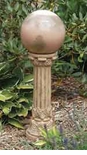
Gazing balls originated in the royal gardens of Europe to accentuate and add interest to the garden experiences made from various luminous elements to glass as well as having a pottered look. The balls usually sit upon a Victorian globe stand or Tuscan column or can simply lay in the garden upon rocks or mulch. The ball glistens during the daylight hours from the sun and can be displayed using a spotlight in the evening for additional interest. Many colors are used to compliment the garden and surrounding grounds. Be unique or conventional that is your individual prerogative.
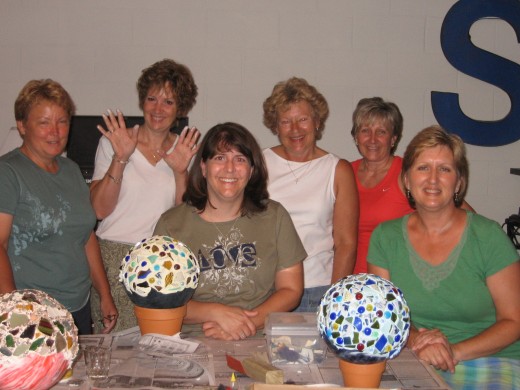
Gazing Ball Project at Girl Night
Click thumbnail to view full-size


Got Any Extra Bowling Balls?? Make a Gazing Ball
If you have an old bowling bowl laying around, you can put it to good use in the garden. Sometimes you can get a few from a local bowling alley that have been cracked and deemed unusable. My girlfriend used a big flat rock as a project piece.
It was girl night at my house, time to eat, drink and make gazing balls for the garden. The girls brought their own supplies and the bowling ball or rock of choice for an evening of fun. We feasted and had a lovely glass of wine and headed for the workshop.
List of Supplies
- Bowling ball or Rock
- 1 quart (RTU adhesive and grout)
- Tube Adhesive all weather
- Shells, glass pieces, ornamental rocks, glass beads to cover the ball
- food coloring dye
- very rough sandpaper
Made From a Rock
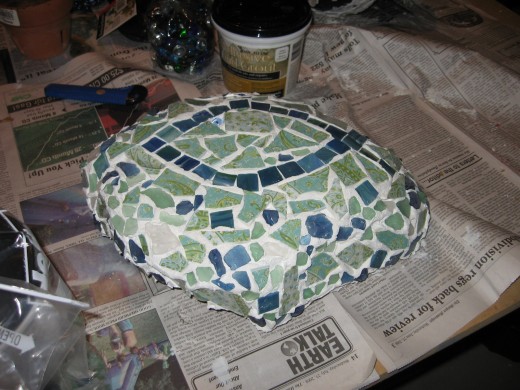

Creating a Garden Gazing Ball
The newspaper covers the table, each person has a spot to work and a spackling tool of some kind along with rough graded sandpaper. The bowling ball needs to be roughed up so it holds the grout. The first step is to rub the bowling ball with sand paper until the smooth surface is gone. The rock is fine the way it is, so if you want to skip this step, choose a rock.
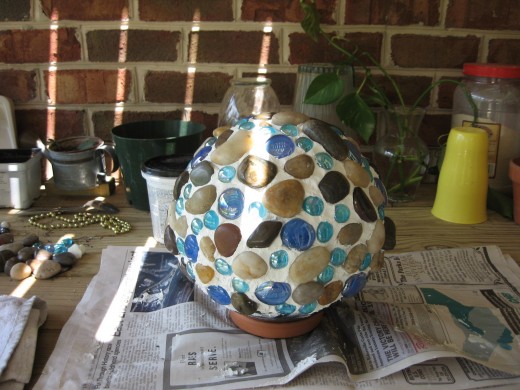
Once the ball is ready, apply the grout all over the surface except the bottom where it is rested, you will finish that area in a couple days after the grout has dried. Some of my friends used egg dye to tint the grout blue or orange. That was very interesting indeed. It will be like frosting a cake so put enough grout on the ball to hold the items for the surface. Begin placing the items on the surface of the ball in the design of your choice. Old bottles can be broken, old mirrors for reflective fragments, glass beads or shells are very pretty. Old pottery especially painted pottery is very nice. Whatever you want to use to add color to your garden can be used, the sky is the limit.
You don't have to be very particular with the grout as it will be messy and uncooperative. The key is to put enough grout on the ball. Try a small area first to get the feel. As the grout begins to dry, it firms up and you can tamp it with your fingers and the spikes will flatten out around the objects you have selected very smoothly. This will put a good bond around those bigger items, so when placing items on the ball, push a little to deepen them into the grout. You can also wipe off any grout from the items with a damp cloth, or Q-tip if small area, as it begins to stiffen to remove any unwanted grout on the items (shells, glass beads, etc.) If you have more grout on yourself and less on the ball, you may to get more grout to finish the bottom, and remember, no licking the fingers.
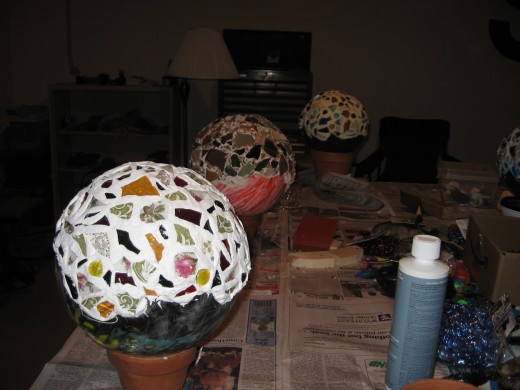
Once the items have been placed, the ball has to dry before flipping over to finish the other side. This will a take a day or so to fully complete. If you do not want to complete and put into the garden this way, that is fine too. However, do seal it regardless.
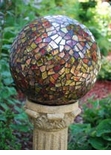
Various Examples and Colors if Purchasing instead, but that is no fun
Click thumbnail to view full-size


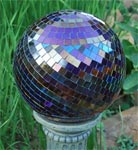
Sealing the Grout is Important
Once the gazing is complete and fully dried, sealing it is very important. When in the garden, the items will fall off if not sealed properly. Some items may need additional adhesive if heavy like small rocks. Once the grout is dried, apply sealant to grout. Allow the sealant to fully dry and then apply an additional adhesive around the larger items for protection of the elements.
If you do not want to seal the ball, just enjoy using it in the garden outside when you have special events or keep it in a covered patio area to avoid exposure to elements like rain and freezing temperatures.
Other Projects to try
27:30


