Hardwood Floors "The How to install Guide"

Some tools Needed


Tools and other things Needed
Tools Needed
Tape Measure
Hammer
Razor Knife
Small Pry Bar
Powered Flooring gun
Nail Set
Miter Saw
Rubber Head Hammer
Flooring Nails
Drill
Wood putty
10p finish nails
Getting Started on Your Floor


Getting Started
The first thing that you want to do is measure the room to figure out the square footage. Also figure out what you are going to need around the different edges that you will encounter. See Photo. I found that sometimes a lot of the different pieces that you will need have got to be acquired before you begin. Sometimes I have to buy unstained pieces in order to make it work right. When you have to do that it is better to buy them before hand and have them stained before you actually start the job. Always make sure that you have enough, I always try to buy a few extra. Sometimes they have small defects that you don’t see until you start the job. Also bring the material into the room and let it sit and become acclimated a few days to the temperature and humidity of where it is going to be installed. Also buy a small can of stain that matches the color of whatever you are installing. I recommend if it is prefinished flooring to use Minwax Wood Finish it Penetrates, Stains and Seals all in one. Also if you have to face nail any pieces then you can putty the hole and apply a small drop. Face nailing is not something that you want to do unless you have to.
Next remove all furniture from the area that you intend to install flooring.
Remove all baseboard from the edges and return any nails that happen to be in them. (Foot hazard) lay to one side or discard. Remove any carpeting and nail strips that held the carpet sometimes carpet installers like to staple in some places try to remove or pound in flush. Remove any other nails, staples etc. Mark so you remember where they fit and remove any doors and jams. I always like the hardwood to go under the jams because it is almost impossible to cut around the jams and get a nice finished job. Remove any furnace ducts. Sweep floor and vacuum all dust. I have even mopped the floor trying to get a clean surface. If you do make sure it is dry before continuing.
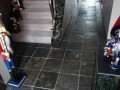
Next you want to install underlayment it is the blue material it just lays on the floor. You must Tape all seams. This is a moisture Barrier and somewhat of a sound barrier. See photo.
Installation Pictures


Starting the Hardwood floor installation
The first thing you want to do is determine which way you want to run the hardwood. In the case of this small landing I had to run it the way I did because of the angle of the floor (one end is longer than the other) and also I had to have nice even cuts along the Bull Nose by the step. The Bull Nose or the piece that overhangs the step has to be installed first. Getting the angle right where it hit the wall, I then Pre Drilled a hole (I predrill all holes because of the chance of splitting the wood) one size smaller than the 10P finish nail that holds it down. I then nail it every 6 inches using a nail set be careful do not hit the wood or it leaves a big ding... To set the nail then applying some putty in the hole I next installed a piece of ½ quarter round under the Bull Nose to give it support again pre drilling then nailing. One that is done then you can start to install the rest of the Hardwood Floor. I usually cut a full piece for my first piece because it’s going to have to go between the doorway. Starting with the Tongue facing out this is the side you use the nail gun on. See Photo.
Next start installing the floor making sure that no 3 rows match up seams. To get a tight fit use Rubber hammer to make sure the seams and flooring stay tight. Once you start using the nail gun it will pull the boards tight, but it is better to use the rubber hammer first. Also because it is so close to the wall you have to make a choice of rather face nail the first couple rows or pre drilling a hole through the tongue and using flooring nails. The reason is the Flooring nail gun will not fit against the wall till it is a few rows out. When you can use the Flooring Nail gun, nail it every 4 to 6 inches. Also cut the pieces that go up against the Bull Nose FIRST. Nail it first on every row. In a box of flooring there are various lengths to choose from I always stack them into the various lengths so it is easier to alternate the seams. I always cut the pieces against the walls to within a quarter inch, because the wall trim will cover. See Photo’s
If you are doing a landing then again you have to install the Bull Nose first on all sides then fit the pieces against the Bull Nose edge first. See Photo. When I get to the wall I again cut it within a ¼ inch.
When you get to the back wall then you will have to hand nail the last few boards (because again the Hardwood Floor Nail gun will not fit). Rip the last board against the wall and face nail it.
Finishing
Next trim and reinstall door jams so they fit into their respected spots. Then Rehang the door checking to see if they are short enough to fit. If they are not measure the hole where you are putting them and trim ½ inch off the bottom of the door then what the size is.
Next install the Door trim making sure you trim off enough of the bottom sides of the trim to correctly fit in the hole.
Finally reinstall the floor trim.
© 2014 Bill
Related

Golden Select Laminate Flooring Review

A fabulous new floor could be hiding right underfoot, when you consider terrazzo restoration.

Home Improvements - Hardwood Flooring Decorative Designs and Borders

How to Install a Stone Tile Floor With Slate Stone Tile Flooring

How to Install an Epoxy Garage Floor
")

