Help and Advice on How To Repair Patch Plaster Work, Plastering Holes In Plaster

How To Patch and Repair Loose, Crumbling, or Blown Plaster at Home.
You do not need to be a professional plasterer to perform simple plaster-work. After a little bit of practice patching plaster will become second nature.
Local plastering and construction companies will do you plastering work in the same way, but may charge you a small fortune.
Tools Required
Float / Finishing Trowel - This is the rectangle piece of stainless steel with a handle on it. This is used for spreading and smoothing the plaster onto the wall or ceiling.
Buckets - At least two, one for mixing and one for cleaning.
Brushes - One small one and one at 6". The 6" brush is for the constant cleaning of your tools whilst you are using them. Normal paint brushes would suffice.
Hawk - This is the cheapest plastering tool, and although you could get away with not using one for small bits of plastering, it will make life easier. You only need one and it will last for years.
Trowel - Used for getting the mixed plaster out of the bucket and onto the hawk, although you could use the float to do this.
Wall / Ceiling Preparation
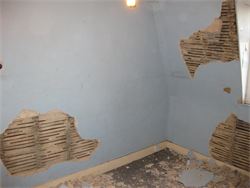
Remove all crumbling plaster. If your wall has laths in it, like the picture above, loosely brush the laths with a wet brush to remove as much debris as possible.
Remove any wallpaper that is around the area to be plastered. New plaster will peel off within days if you plaster over any paper.
Using a 50% PVA and 50% water mixture, generously coat the area to be plastered. Ensure that even a few inches around the area to be plastered is covered.
Repairing a Small Hole in Plaster
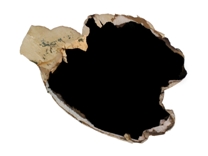
This applies to holes in ceilings and walls. Put your hand or fingers into the hole and remove any debris or paper from a few inches around the hole on the inside of the ceiling or wall.
Cut a piece of plasterboard ( any thickness ) so it can fit into he hole one way, but be approximately 5 -6 inches longer the other way. This means it should be in a rectangular shape, so once it goes into the hole, it could rest against the back of the hole without falling through.

In the center of the piece of plasterboard, make a small hole and thread some string through it. Tie one end of the string to a nail or screw and pull the other end until the screw or nail is tight against the plasterboard. This will act as a handle whilst the bonding is drying.
Mix some bonding and apply on the inside of the hole, where the rectangle piece of plasterboard will be. Place the piece of plasterboard into the hole and once in position pull slightly tight. This will begin to form a bond between the new and old plaster.
Fill in over the rest of the hole with bonding, ensuring that when you have finished, the new bonding plaster is slightly recessed against the existing plaster.
Allow to dry for 4 hours or overnight. Cut the string as close as possible to the ceiling or wall.Then mix some finishing plaster and lightly skim over the hole.
Free Link To: Help with Skimming
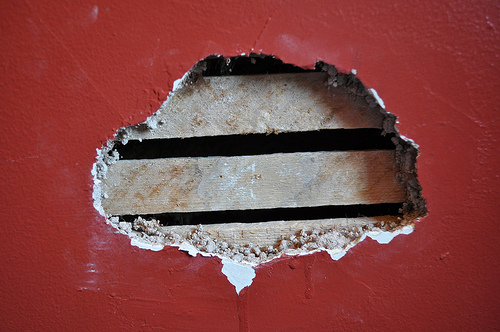
Repairing A Hole With Internal Laths
If the laths are in good condition, cut a small piece of plasterboard to fit into the hole. Screw into place ensuring that the screws do not pierce the paper on the plasterboard, but just sit on top of it.
If the cut piece of plasterboard sits just below the surface of the existing plaster finish, then simply skim over with finishing plaster. If the depth is more than 5mm between the new plasterboard and the old plaster finish, then fill with bonding prior to skimming over.
If you require assistance with plastering repairs, please leave your problem in the comments below and a professional plasterer will respond to you free of charge.
Free Links To:


