How To Improve an Outside Shed Storage Alcove
Understanding the Need
I received a call from a client that found they had a few small animals living in their small shed enclosure over this past winter season. They began to explain that as they began to clear the alcove out, the smell of urine became more distinct, machinery was a mess and they just were not happy with the overall situation with this storage area. Due to the alcove being open on one end, there were only a few solutions to help with this situation. There was no real way to absolutely keep neighborhood cats, mice, skunks completely out, but there was some ideas I had about how to help keep their tools and equipment from being harmed.
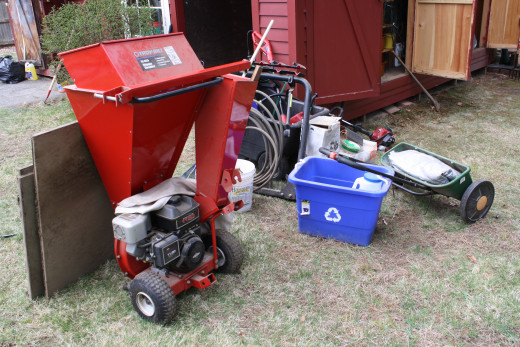
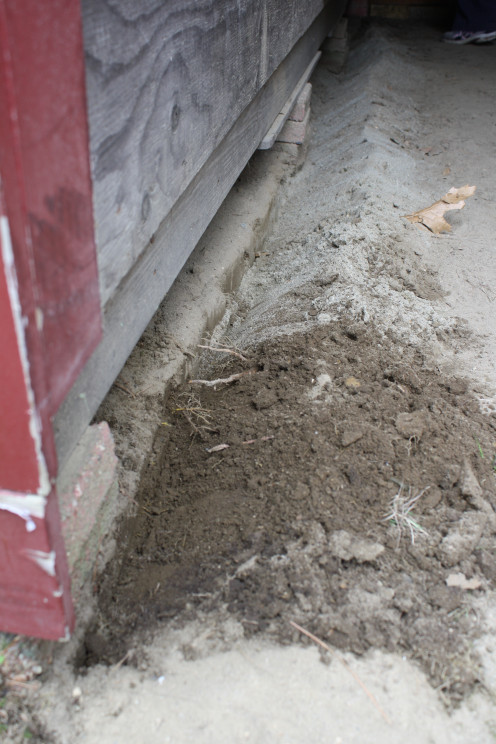
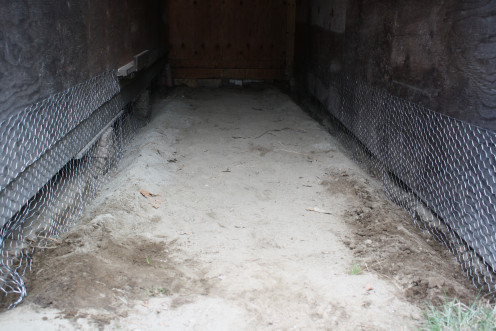
I began the job by unloading the area to see exactly what tools and equipment was stored in the open ended alcove. A chipper, trimmers, mowers, rototiller and ladders was the bulk of the contents now spread over the lawn. The ground in the recess was covered with sand, old leaves and acorn caps. Both of the side walls had a gap that ranged from two to eight inches above the ground. The back wall had supporting gray cap blocks obstructing any entrance form that side. To the left of the alcove was the outside wall of the enclosed wood working shed. The right side was the back wall for a set of outdoor cabinets for the entire yard working tools (shovels, rakes hoes, etc.) garden fertilizers and bagged compost.
Project Difficulty
TIPS
- Always use a face mask when spreading powdered lime. Lime can be and irritant to your respiratory system.
- Protect your hands from sharp points of the chicken wire by using a heavy pair of leather gloves.
- Use eye protection when cutting metal and hammering in staples.
- Make sure you have all of your measurements needed before heading out to purchase supplies, especially when needing square and cubic feet.
Fencing to Discouraging Small Animals
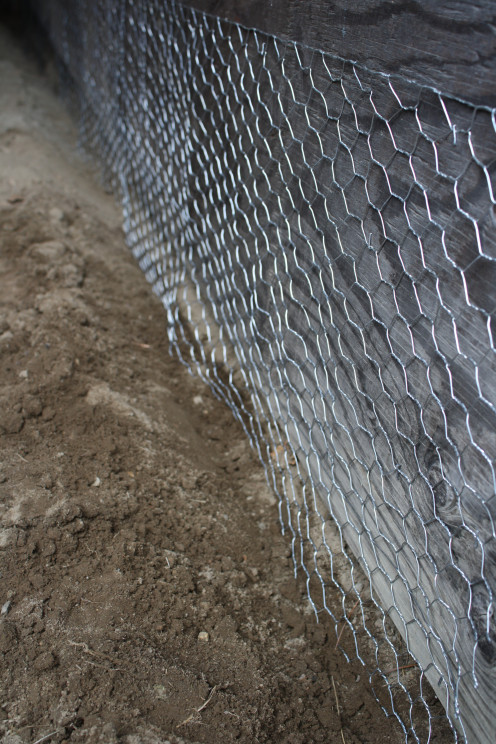
Due to the varying height of the gap between the ground and wall, I chose to use a small holed (7mm) chicken wire. Though many companies now make a plastic chicken wire, I selected stainless steel. It has an excellent longevity and small critters like voles, chipmunks or skunks, cannot chew through the mesh. The roll I purchased was 25 feet long and thirty six inches high. I began by rolling out the chicken wire on the grass and secured either end with a couple of stones from the yard. I cut down the middle of the roll with metal shears to make two pieces. I measured off eighteen feet on each piece and cut the wire to this length. I now had the two pieces needed to block any gaps. Also, each piece of the fencing would have a solid top that I could staple to the wall and a sharp, pointed bottom that I could place into the ground.
I used a flat shovel to make a four inch deep trench along each of the side walls. I flipped the sand/soil into a small pile right in front of the cut to use as back fill once the fence was in place. Using an electric staple gun, I placed the solid top of one cut fencing length along the wall and began to staple it in place. I began at the end of the wall that had the largest gap to ensure total coverage. After securing the top, I then added staggered rows of staples down the wall to finish securing the fence in place. I repeated this method to the other wall. By using a hammer, I made sure all staples were tightly holding the fence. I then back filled the trench and tapped the sand/soil into place with an iron rake. With the fencing in place, I could go on to the next step.
Did You Know . . .
For a yard that has areas with a dog urine smell, I recommend a half cup of powdered lime for a three foot square area. Just sprinkle the powdered lime on the affected space, usually every two weeks, and then water the lime in to the ground.You can save yourself the watering if you do it on a night rain is expected. The dog can return to this space the next day.If there is a bit of lime still showing, add more water. The lime can hurt or damage your dog’s pads if he/she stands on the lime over a long period of time.
Get Rid of the Odors
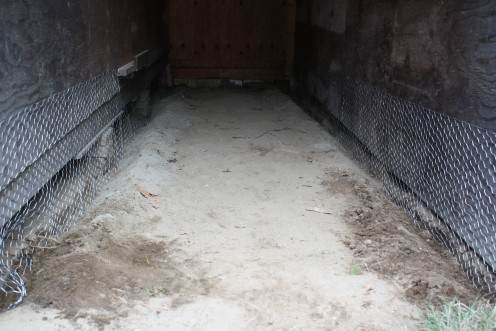
To get rid of the animal urine and other odors, I use powdered lime. Powdered lime kills the odors that are deep into the ground. I tend not to use any chemicals unless absolutely necessary. Many of my clients have outdoor pets or livestock and the chemicals can have adverse effects on them or their gardens.
In this situation, I had a seventy two square foot area to treat. I applied a 40 pound bag on top of the debris cleaned sand. I did not have to water the lime in due to the sand being damp from the ground. Instead of using a hand spreader, I used a coffee can. The walled in area would allow lime dust to fill the air that I still needed to work in. I mixed the damp lime in with the sand/soil mix while evening out any low spots with an iron rake. Next step, add crushed stone.
Square or Cubic Feet?
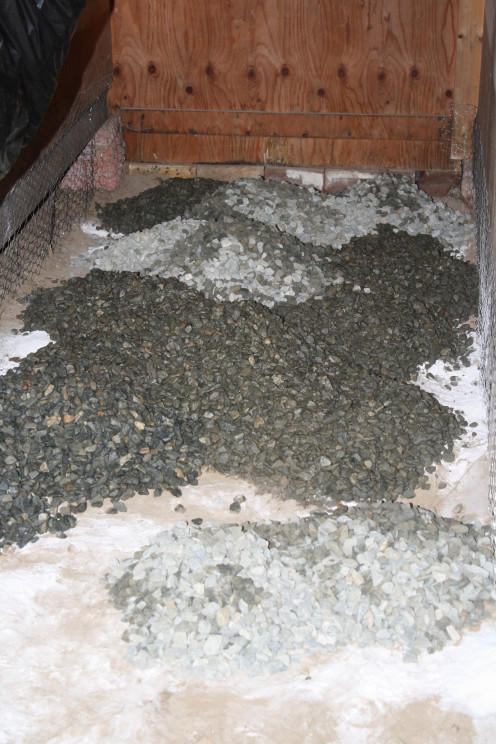
Depending on where you purchase crushed gravel, you will either need to know square footage or cubic feet. When buying by the bag, which I did for this job, usually square feet is all you need. They will have a chart that will assist you in how many bags will be needed for the job depending on how deep you want the stones (cubic feet total). If you have the crushed gravel delivered by the truck load, you will need to have the cubic feet so they can deliver the yardage needed to fill that space.
Install Crushed Gravel
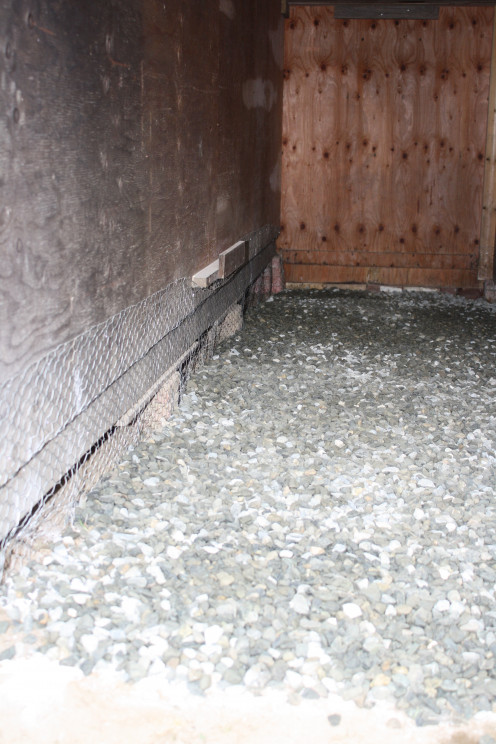
The client had used pallets to stack heavier equipment on. These pallets had rotted out on the bottom from sitting on the ground. Instead of repeating this, I chose to solve the clutter and storage issue by using crushed stone and a wall/rafter hanging system. The crushed gravel would prevent dust from the sand/soil from getting into engines, allow rain water to flow through stones at the opening and give the client a much better surface to stand on.
To begin lying in the crushed gravel, I started at the back of the alcove with three bags. I cut open the bags; spread the pile just a bit with my feet to make the width of the space. Once they were down, I would add the next row of three bags. I continued this till I was two feet away from the front opening. I used the iron rake to gently spread all of the stones along the ground and up against the chicken wire. At the front I cut an edge, like you would for a garden, between the grass and front edge of the alcove where the stone should meet the grass. I filled in the edge with sand they had on hand and tapered the stone to meet the sand. This would help keep the stones from washing out into the grass. I went back and tamped the stones in the alcove down to compact them. One of the advantages of using varied size of crushed gravel is that they will lock together and not spread out while doing this step.
Organize With Wall Storage
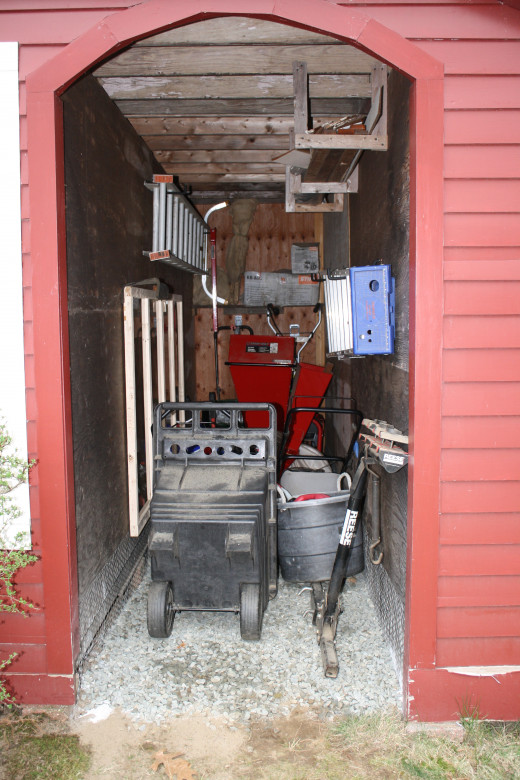
While at the Big Box store, I also bought many different styles of hook systems in order to hang trimmers, ladders, storm windows, and a shelf for accessories. Due to limited space, I had to look for systems that would allow access to engine equipment without having the client bang their head on the tools hanging on the walls.
I began to measure off the walls to place all the tools. Ladders were hung by use and length. Trimmers were hung down to fill in the spaces left by the ladders. Rototiller and spreader were hung under the shelf I installed along the back wall. A hose reel was added for all of the soaker hoses. The mowers were pushed in, items that would be placed on vehicles placed at the end for easy access and there was enough room to bring out garden carts and buckets.
This job took a total of eight hours including a run to the store for all supplies.
Tools Used
Hand Tools
| Electric Tools
| Accesories
|
|---|---|---|
Flat Shovel
| Drill
| Screws
|
Iron Rake
| Stapler
| Drill bits
|
Box Cutter
| Screwdriver Bits
| |
Pliers
| Heavy Gloves
| |
Leaf Rake
| Face Mask
| |
Staples
| ||
Coffee Can
| ||
Debris Bucket
| ||
Trash Bag
| ||
Measuring Tape 25'
|
© 2013 Susan McLeish


