How to Make a Concrete Garden Statue at Home

How To Make A Concrete Garden Statue At Home
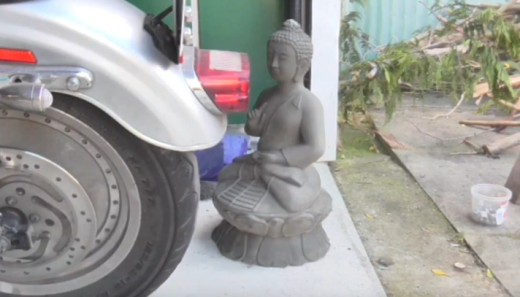
A few years ago I decided to order a Buddha garden statue mold online because I wanted to start making these statues and selling them. They are fairly easy to make they just require a little hard work and there are a few things that you can do which help to improve the quality of the finished product. Firstly though I will tell you the things which you will need to make the statue. You will need a mold which you can buy online or you can make your own. I will be putting a hub up soon which shows you how to make your own. You will also need some cement, some sand , some pea gravel, water, a container to mix your concrete in, a spade or something that you can mix your concrete with, a rubber mallet, some silicone spray and some carpet. You can also find a product which is called concentrated plasticiser. I have found that this product helps to reduce air bubbles and also makes the statues stronger and less likely to crack.
Materials Needed
-Cement
-Pea gravel
-A spade
-A container to mix your concrete
-Sand
-A rubber mallet
-A statue mold
Step 1
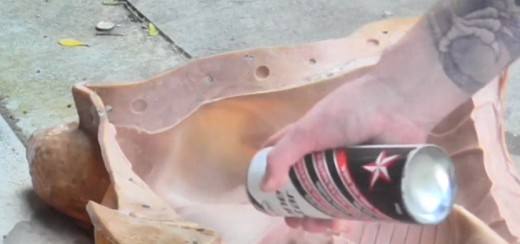
The first thing you want to do is spray the inside of your mold with silicone spray so that it is easy to remove the mold from the concrete statue. You also want to make sure that your mold is nice and clean before you do this. Make sure that you cover the every part of the mold on the inner side. The silicone spray also seems to help to reduce air bubbles.
Step 2
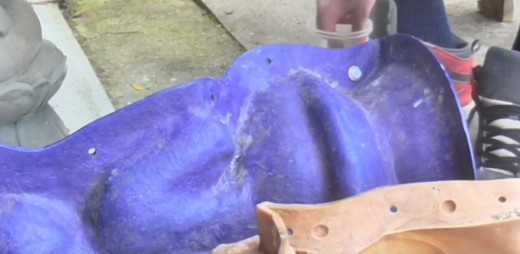
The next step is to put your mold together so it is ready to go once you have mixed your concrete. If it is a large statue you will probably have a fiberglass backing which you will need to put together with your latex mold on the inside of it. My mold has holes in the fiberglass part which you can bolt together. Some molds may not have this so you may need to use clamps to hold the mold together.
Step 3
The next step is to mix your cement, pea gravel and sand together. The ratio I use is 1 part cement, 2 parts pea gravel and 3 parts sand. I then like to give it a mix before I start to add water. Next you want to add water. I like to start adding water slowly until I reach the correct consistency. I would say a thick pancake mixture is the right consistency. If you make it too wet you can always add more sand, pea gravel and cement to dry it out a little.

Step 4
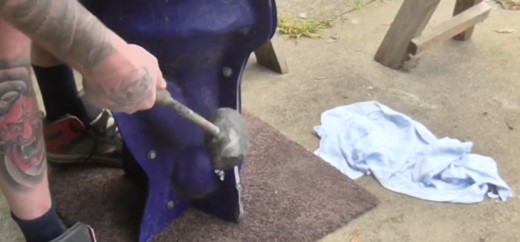
Now that you have mixed your concrete and you have the right consistency it is time to start adding your concrete to your mold. You want to start by adding a little bit of concrete to the mold and then vibrating the mold against the ground with a piece of carpet or something soft so that you don't damage your mold. I also like to take the mold with a rubber mallet. This is so that the air bubbles move away from the surface of the statue and give it a cleaner look. Keep repeating this until you have filled your mold with concrete.
Step 5
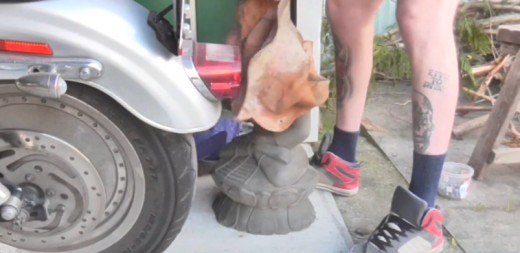
Now that you have put your concrete you need to wait for the concrete to set. This can take up to 48 hours depending on the weather. I usually like to leave mine for at least 48 hours even in the summer. The longer you leave it the less likely it is to crack when you remove the mold. When you remove the mold all you have to do is undo the bolts holding the fiberglass mold together and take the fiberglass mold off of the statue. Now that you have removed the fiberglass mold you need to remove the latex mold by pulling away from the concrete statue. You may need to use a little force to do this. I also have a video below which shows you step by step how to do this process. Thanks for checking out my hub.

")


