- HubPages»
- Home and Garden»
- Gardening»
- Planting Flowers
How To Plant Perennials


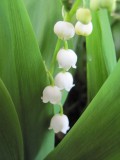
 adds height to an early summer garden and bees and humming birds love them.")
Digging a Large Enough Hole is the key to Success
Planting perennials correctly will ensure you'll have years and years of beautiful foliage and flowers. It's fairly easy if you plan and prepare.
There is a saying about perennials, ‘the first year they sleep, the second year they creep and the third year they leap.' Many nurseries sell baby perennials that may take several years to mature and bloom and this often causes people to think the plants aren't healthy and give up on them. If they leave them alone they'll be pleasantly surprised, but if they yank them out the second year, they'll be losing their money and wasting their time. I purchase the larger, more mature perennials. This means I can afford fewer, but I know they're going to bloom that year or the next.
What you'll need:
Your plant (of course)
Shovel or spade
Compost: If you haven't started your own compost pile - star now. In the mean time you can buy bags at the local nursery - look for 'organic'.
Bone Meal
Water
Mulch
1. Make sure you plant your perennial in a spot that gets the recommended sun exposure. Full sun is at least six hours of direct sun per day.
2. Dig a hole twice as large big around as the container your plant came in. dig it several times wider than the roots. I put the soil on a tarp or trash bag to make it easier to fill in around the plant once it's in place.
2. Sprinkle a handful of Bone Meal in the bottom of the hole. Bone Meal is simple pulverized animal bones that break down very slowly into the soil and release nutrient. It's used mostly by people when planting fall bulbs, but I give all of my perennials this treat to help them grow healthy roots. Again, look for organic.
3. On the tarp mix the compost, manure and half of the soil.
4. Take the plant out of the pot and gently loosen the soil from the roots at the bottom to encourage them to seek nutrients from the ground and grab into their new 'bed'.
5. Place the plant in the middle of the hole.
6.. Fill in around the plant with the compost, manure, soil mixture and tamp it down gently with hour hands as you go.
7. When the soil fills the hole half-way, water it well.
8. Finish filling the hole with the soil that is left and tamp down gently.
9. Water again until all the soil is evenly moist.
10. Cover the top of the soil with a layer of mulch (I like cedar because it repels insects and pests). Evenly spread about 3 inches of mulch.
You're done! I know it may seem like a lot of fuss, but after you do it a couple of times, it's like most gardening activities, it will come naturally. You'll have beautiful flowers or foliage, and in a few years you can divide the plant and have more or give them to friends and family.