How to Fix a Basement Leak With a Weep Pipe


Water Proofing
Water leaking through the walls of the basement foundation leads to flooding. Depending on the size of the openings, you may have a small puddle or a complete loss of a furnished lower level. Many waterproofing fixes talk about installing a weep pipe to relieve water pressure in a basement. But what is a weep pipe anyway? This is something you make to fix a leak. You can’t buy a weep pipe in a store. But with materials, tools, and instructions you can perform the repair yourself. Here's how.
The difficulty of these steps is moderate. The list of materials and tools are below. You can find all these items in a hardware, department, or home improvement store.
PVC pipe (diameter depends on leak size)
Handsaw
Waterproof patch or mortar
Hammer
Chisel
The average person may have never even heard of a “weep pipe". There are instructions in the Internet the reuse this term without explaining this fix in any details. It is frustrating that the online information assumes that everybody knows this repair method for the basement. Rarely can you find pictures to describe it. When you have water coming through the walls of the basement, a weep pipe is used to drain the excess water pushed from the hydrostatic pressure on the outside of the basement wall.
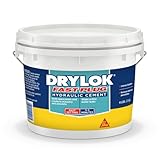
First find out where the leak is coming from and eliminate the source of the problem if possible. Troubleshooting and repair is a subject for another article. Attempt to patch up the wall with a waterproof mortar such as Drylok (see Fig 1). If not of these methods work, then using the weep pipe will be your next choice. This repair can be temporary or permanent. Having a pipe stick out of the basement wall is not elegant but it does save your basement from hundreds or thousands of dollars of water damage.
Assess the size of the crack where the water is coming out through the walls. Buy a pipe to match the approximate diameter of the crack. The pipe will only need to stick out the wall about 6 inches. PVC will be suitable since it is sturdy and waterproof.
Using a handsaw cut the pipe to a desired length and stick it in the crack. Judge the length by determining how deep the pipe goes into the hole and then mark the pipe about six inches out from the surface. The mark is where you make your cut.
If the hole is slightly small, use a hammer and chisel to widen an area for the pipe. If the hole is too big, get a bigger pipe. The hole must not be too short, too long, too wide or too narrow.
Once you cut a piece of pipe that fits into the hole satisfactory, mortar the pipe in with waterproof mortar (see Fig 2). Drylok is a suitable product and can be found in home improvement stores. You can apply the product even while the leak is occurring. Make sure the pipe is angled slightly down. You will need gravity to help the carry the water out and down.
After the mortar has dried, check if the leak has slowed the water down. You could just remove the pipe and plug the hole with the waterproof patch or mortar. If there is still lots water coming out you will need to add more piping to divert the water to be drained elsewhere such as a sump pump or some existing drain in the basement. Check your local building authority to determine the approved drainage system.
You can use a hose, flexible pipes, PVC from the home improvement store to add more pipe to an approved drain. Depending on what hose or pipe you use, find the appropriate coupler to let the weep pipe sticking out of the wall to mate with the other pipe.
If you prepared such a pipe system coming out of the weep pipe, check for any leaks and eliminate them. The home improvement stores have many products to remove leaks from pipes even while the pipe is wet or while the leak is occurring.


")

")
