How to Install Tile over a Concrete Slab Foundation

After

Before

Cleared Out

Living Room

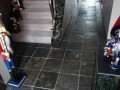
Boards Removed

Scraper

Compass for Scribing

Scribing a Line

Spacer

Tile Spacer on Edge

Square Corner

Grouted Floor

Tile Saw

Tiling a Kitchen Floor
My kitchen still had its original vinyl flooring from 1984 and it was time for a change. Vinyl was a good product and modern vinyl flooring is no joke, but I considered alternatives. I’d done wood, wood laminate, and tile before. I weighed the costs, installation difficulty and the aesthetic appeal against the durability of the materials themselves and I chose to go with tile.
I found 18 inch "Made in USA" porcelain tiles at a clearance sale and that gave me a great break on the price. I also got a break on the thin set mortar adhesive and grout. It was definitely the right choice.
The task of getting all that tile home in my truck, unloading it, was a real workout. 12 boxes of tile, seventy pounds each. Had to handle them gently because tiles break easily. Dropping a box of them from a height as low as the width of a finger can crack one of them or leave an entire box with all the corners of the dropped end broken off. Useless. I handled them as though they were sheets of glass. I set them in my garage on top of three sheets of cardboard, stacked them no more than four boxes high and had no problems.
The next big job was getting everything in the kitchen out of the way so I could get to the floor. The laundry room adjoined the kitchen on the way to the garage and I planned to tile that area as well. I moved the dining table, the refrigerator, the trash can, the washer and dryer, the wife…
She decided to go visit relatives for a couple of weeks so I could get the work done. The kitchen would be out of business for at least ten days because I’d have to let the thin set mortar dry for five days before it would be dry enough to roll appliances around on it; let the thin set adhesive dry for three days, then do the grout and let it dry for two more days. Plus patch, prime and paint the kitchen walls and then install molding and trim. All the while, that stuff from the kitchen sat in the living room and made things a little too cozy for more than one person.
The next big step was removing the molding all around the kitchen and laundry area. Much of it was rotted, some was still good, but I wanted it all to match so I decided to go with all new baseboard molding. But I saved the scrap to serve as a template for when I’d cut the new molding. Particularly, to make sure I’d get the angles and lengths just right for the area under the bay window.
Getting the old flooring removed was a chore. I’d seen a few fix-it articles and shows where they hinted that it might be okay to install tile over existing vinyl flooring. Certainly would save some time and effort. I did a little research and found out that it is a horrible idea to install tile over vinyl. The thin set mortar won’t stick properly and the binding agent may also dissolve the vinyl over time. Things will shift and move, tiles will crack.
That old flooring had to come up. It was necessary to see what was under there anyway, to check for cracks and mold and stuff. Even on my concrete slab floor, it was an opportunity to see the condition of the concrete. The vinyl and its backing were installed properly by real professionals. Meaning, it was a pain in the ass to remove. I tried using an old spatula to scrape it up, that didn’t work. I had to go buy a professional grade floor scraping tool. Had to apply an enormous amount of elbow grease, had to get fired up and motivated. It was not easy work. I spent six hours scraping away and wondered if I was just dumb crazy, but when I finished I saw that it was worth the effort.
The slab was in great shape but there was a bit of a musty odor so I mopped the bare concrete with a 1:10 mixture of bleach and water to get rid of the smell, mopped on a thin film of concrete sealer and let it dry. I’m so very glad I did. Maybe no one else will know, but I’ll know the job was done right. And I’m sore all over. But it’s done.
Next up was laying out the tile. I laid it all out dry, to check for proper fit. I started in the center of the kitchen and worked out to the edges, made marks and cuts as I went. For some of the more complicated cuts, I scribed the edge of the tile. I laid the tile down and slid it as far as it would go toward the obstruction and then used a compass with an art pencil in it to scribe the line for where to remove material. I set the width by measuring from the opposite end, getting the distance from the tile next to it. The reason I didn’t use a regular pencil was because the water of the tile saw would spray away a pencil mark. The art pencil was more like a crayon and left a mark that would not rinse off.
I had a cheapo $45 tile saw set up on my back porch and it worked just fine. I was amazed to see on the data plate that it was made in America; Milwaukee, in fact. I had to change the water after every four or five of cuts, but that’s okay. I also used tile nips as well. Saws can’t do it all.
While laying out the tile I used spacers that look like little plastic plus signs. On all the fix-it shows on TV, they show the spacers inserted upright. That is okay, but they tend to fall over if the tiles aren't jammed up tight against them. Tiles aren't exactly square and the aren't all exactly the same length and width. I needed some leeway. To get it, I stood the spacers on end like plastic Xes instead of plus signs. That way they would lean a little but not fall over when I shifted the tiles around.
Then I stacked the tiles in piles no more than five high, making paths between them so I could get around and start applying thin set mortar to the floor. I used pre-mixed thin set and I had my reason for that. Same reason I used pre-mixed grout, which I’ll explain later.
I started at the end of the floor where the garage leads into the laundry room so that I could work my way back to end up in the living room when I was done. I applied a thin coat of mortar to a two foot area, then plopped on a lot more and used a notched trowel to put grooves in it. A good rule of thumb is to use a trowel with notches that are about the same as the thickness as the tile.
After I pressed in a tile, I used the spacers to keep the corners straight by pressing them flat into the joints at the corners. I pressed them down into the mortar with a flat tip screwdriver deep enough to cover with grout later. They came in a big bag and they were cheap; I could not think of a reason to save them for later. They became a permanent part of my floor.
I kept the corners straight and square because that makes everything else straight and square. Tiles aren't perfectly straight and square, individually, but they are rigid and inflexible. So instead of trying to space the sides and then wiggle and twist to get the corners right (the way they show on TV) I spaced the corners. Also, I checked for proper height at the corners to make sure the tiles were level. The corners are where mistakes show.
I let the floor dry for three days and then applied the grout. I used pre-mixed grout. It’s more expensive than dry mix. Mixing grout is not hard to do but I had my reason for choosing pre-mix. It has to do with the water. Tap water may contain certain chemicals or minerals that could affect the final color or strength of the grout. Chlorine, fluoride, lime, and any number of other trace chemicals that are at levels low enough to be fit for human consumption. But still, tap water has enough contaminants to possibly screw up grout. With pre-mix, I know exactly what I’m getting. It is important to note that grout and thin set mortar does come in a variety of colors and thickness. It is very important to read the label of grout and mortar before moving through the check-out line.
I then used the grout float to push grout into the spaces between the tiles. I like to plop a gob of grout onto a corner and then press it into the cracks outward each way, then go back across to slide the excess to the next corner. Then put another dab in the next corner, and just keep going like that. Then scrape way the excess with the grout float, scrape it back into the grout bucket. After doing about ten square feet, it’s time to run a sponge across the tiles. Wring the sponge until it’s just damp, then lay it on the tile and gently wipe across. Just smoothing out the grout, not pressing down, trying not to remove very much, if any. Then wring the sponge out in a bucket of water, leave it wet but not enough to drip, and wipe the tiles without touching the grout joints between the tiles.
With that done, I moved on to applying grout to the next area. Although there was still a haze on the tiles and some lumps and bumps in the grout in the cracks, that was okay. I let that dry for half an hour to an hour. Then I went back over the entire floor with a sponge holding enough water to drip and wrung it out frequently. Then I went back over the floor again, this time wringing out the sponge so that it was not dripping at all. I let the floor dry for a couple hours and the haze came right off with a dry towel. The sponge took away all the grout’s binder on the surface so all that remained was just a thin film of dust.
The next day the floor was dry enough to walk on so I installed the base moldings and I was done. I let it dry one more day and moved the appliances and furniture back into the kitchen.
It was some seriously hard work but well worth the effort.
Done

 To Install Hardiplank And The Like")