How to Install a Lattice Privacy Screen - Method 4 Using Frames

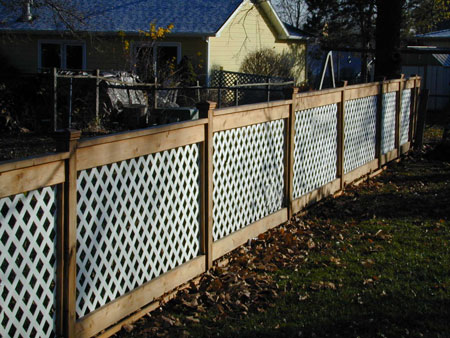
An example of framed lattice screens
In my article, “How to Install Lattice Privacy Screens - Method 1 Direct”, I explained how a lattice screen can be installed simply by attaching the screen directly to a fence with post and top and bottom stringers. There were no frames within the posts and stringers involved. For those that do not know what a stringer is, it is basically a horizontal piece of wood supporting vertical posts.
In, “How to Install Lattice Privacy Screens - Method 2 Using Stops”, the lattice screen is installed with a type of framing within the stringer and posts. The frame is placed on both sides of the fence to hold the screen. Either side of the screen will look sharp.In the technique described in, “How to Install a Lattice Privacy Screen - Method 3 Moldings”, the instructions are similar to using stops in method 2 except that we made frames with 45 degree cuts on U-channel molding. Butt joints can be used for framing but the 45 degree cuts make the frame look more attractive.
In, “How to Install a Lattice Privacy Screen - Method 4 Framing”, method 2 is used in conjunction with a larger frame. This instruction is more work that the previous techniques but it is the most aesthetic. There is literally, a frame within a frame within the stringer and posts.
Once you are familiar with all lattice-building methods, you can adopt them for you own design.
Method 4 is also a moderately easy project. The materials are the same as in the previous methods: Lattice screens, pressure treated wood, screws, nails, other attaching hardware, and tools for cutting and screwing.
Again, existing posts with stringers will be required and describing how to install posts is not within the scope of this the article. These instructions are based on 4x4 posts and 2x4 stringers attached to the posts. Other sizes can be used as long as they are within the local government building codes.
To do method 4 we will need to build stops mentioned in method 2. In Fig 1, the drawing will give you a guide in cutting the stops as butt joints or 45 degree angles. Attached the stops to the posts and stringers for one side. Do not attached the stops on the other side or you will not be able to add the larger inner frame.
The stops used in this example are 1 x 1 inch pieces of pressure treated wood. Once the 1 x 1s are measured, cut, and fitted, the stops can be assembled and attached to the frame using screws or nails. Fig 1 will give you an idea on how the fasteners should be attached. The stops should be fastened with the nail or screw driven from the top of the stop to the stringer and posts.
Once the stops are made, fit the stops for the other side but do not secure to the posts or stringers.
Now we are ready to build the inner most frame.
Using 1 x 4 pieces of pressure treated wood, make cuts that will fit between the posts and stringers. Again, use the butt joint or 45 degree cuts for joining the corners. Make frames for both sides of the screen. The lattice will be sandwiched at the edges.
After making the frame and testing that it fits within the posts and stringers, set the pieces down and glue, screw, or nail the lattice to the first half of the frame. Make sure that the glue is for outdoor use. Attach the other half of the frame with 1 x 4s to the secure the lattice.
Shown in Fig 2 is an example of the frame joined by butt joint.
Using screws and nails, install the inner frame to the stops within the posts and stringers.
Add the other half of the 1x1 stop to the completed inner frame assembly to hold the frame in place. Again, use screws or nails to secure the stop on the posts and stringers. This will hold the inner frame in place.
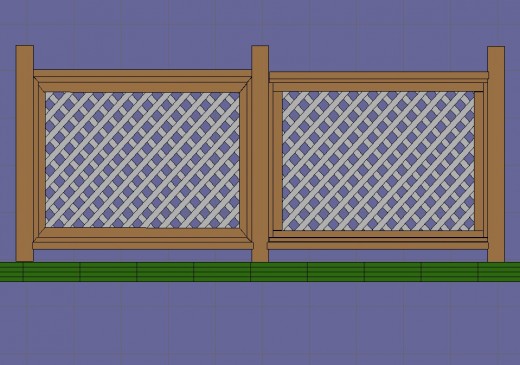
Shown in Fig 3 is an example of the completed project. The left side uses 45 degree cut stops and frame on the corners. The right side shows the butt joint method.
Fig 1 - Locations for Fastening Wood
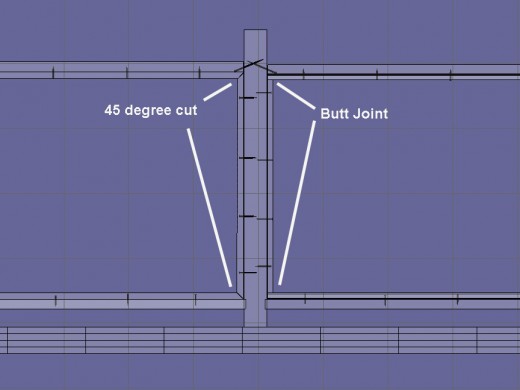
Fig 2 – Example of Joining The Frame Components
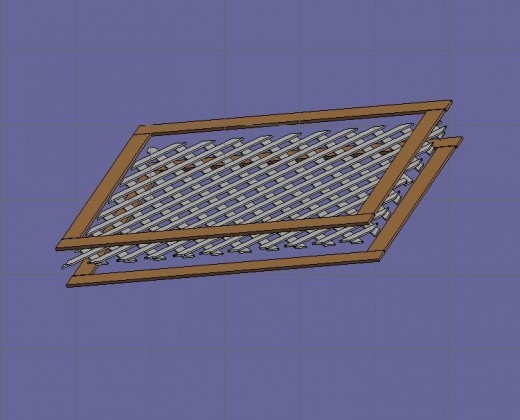
Fig 3 – Completed Project


 To Install Hardiplank And The Like")


