How to Organize a Craft Space

A Great Space to Create
The Creative & Crafty Mind Requires An Organized Space
Organizing one’s craft room can be a very personal endeavor. Basically, it depends on which and how many crafts you enjoy. Crafting/DIYing can be anything from painting and upcycling large pieces of furniture to crocheting and/or sewing and the size and type of crafting one is involved in will determine the amount of actual space required; however, with any craft or DIY project as with any other area of your life…organization is the key.
A disorganized craft space of twisted ribbons, loose buttons and spilled glitter can take the fun out of your craft projects. To prevent this from happening to you, plan to make your craft room well organized, fun and pretty space. Once you have your space divinely organized the next step is to maintain it.
Whether you have a space in your house dedicated to your hobbies or not, you can get your craft materials organized and make them look good as well. If you do not have a different room allocated for creative projects, think about sectioning off part of a room to store your crafts in one place rather than scattered all over the house. Also, if you have a room that is pulling double duty as, let’s say your dining room/craft room, you will need to find a way to make that work without leaving crafting projects out in a disorganized fashion.
Decisions, Decisions
Getting Started - Select a room. You need to find a room, or if there is no room available, you can make your craft corner either in your bedroom, dining room, attic or the basement. However, having a different room is much better, because you will avoid the chaos of having the project spread throughout the rest of your home. A room with a window is an added bonus, as natural light is always a pick-me-up and can make the space happy and cheerful and improve your creativity.
Make the Room Beautiful - Paint the walls in a nice color. Even if you don't have natural light from a window, a bright color will lift your mood and make the room happy. Light colored walls also make a room look larger.

Adding the Necessities
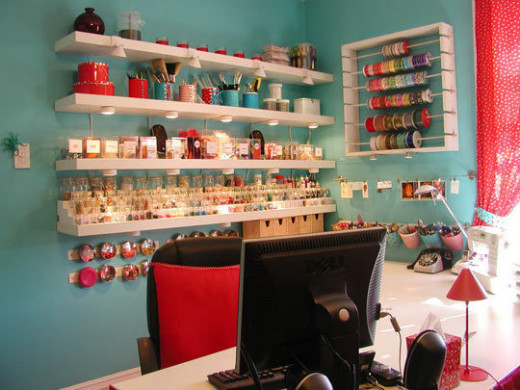
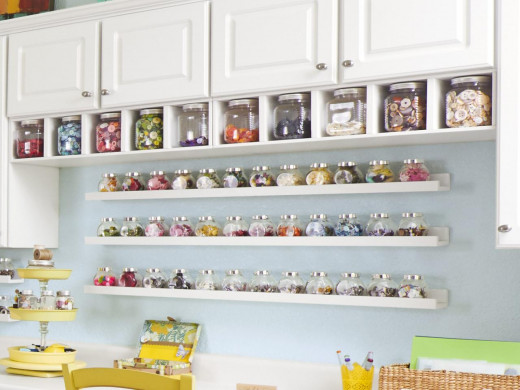
Buy the furniture - You need a big and long table to put the materials you use most. I would suggest adding shelving above the table or add a wall of shelves if you have the space. The more vertical storage the better. A cabinet is great for larger supplies and a table in the middle of the room will be useful for putting your materials and working on new crafts. Purchase other things you think you need, such as a chair, a small table, and a bookshelf. Of course, you can save money by shopping your house for some of these items and even upcycling others. After all, you are a crafter/DIYer…right? :)
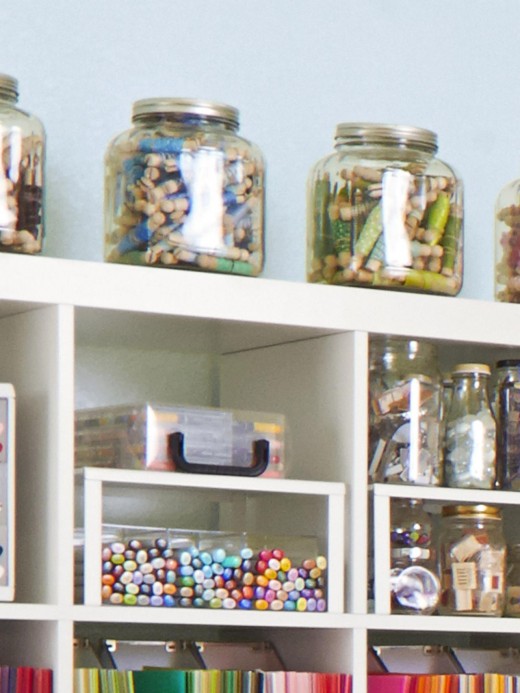
Store the materials.- Rolls of fabric can be stored in a cabinet or in cubbies, beads in small vases, ribbons in transparent boxes and other things in plastic containers or decorative cardboard boxes. If you have craft books, place them on a bookshelf or in cute storage boxes. You can find a lot of these items at your local thrift store or one of the dollar store chains.
Place your crafting equipment in easily accessible areas of the room, sewing machine - on the large table, vinyl cutting machine - on a table. Knitting needles, in a pretty wicker basket, etc. Place your equipment very close to your crafting table, or even on it (ensure they stay organized) remember to use your vertical space. Hanging items on pegboard or placing them on shelves is a great way to store items as well. Place paint brushes in mason jars and scissors in pencil cases. Do not store all of your tools on the craft table, make sure you leave space to work.
Note: Lighting is important and personal. Think about it and try several until you find one perfect for you and your space.
Make the Space Yours - Customize your organizational needs by finding unusual ways to house scrapbook paper or fabric in a separate space. Remember hanging paper is also a possibility if you use pant hangers with the clips. Once on the hanger paper and/or fabric can be stored in a closet or on a wall system and arranged by color.
Be Creative - Think outside of the box and come up with creative ways to organize small items like washi tape in plastic, see-through containers, craft paint on a shelf or bakers twine in a glass sugar dispenser. Attractive storage will help you maintain an organized creative space.

Finally
Final Touches - Finally, consider adding music. If you like listening to music when you are working, you must consider getting a music system in the craft room. Make your playlist, with motivating music and songs you love.
Now you have a pretty and personalized space where you can be creative. Do you have a creative space? What are some of your secrets to remaining organized and creative at the same time?
Enjoy your space and reach your creative peak!


")
