- HubPages»
- Home and Garden»
- Home Improvement»
- Kitchen Improvements
How to Paint Your Kitchen Cabinets Easy Diy

A cheap and great update!

Paint made my kitchen 50 years newer looking.
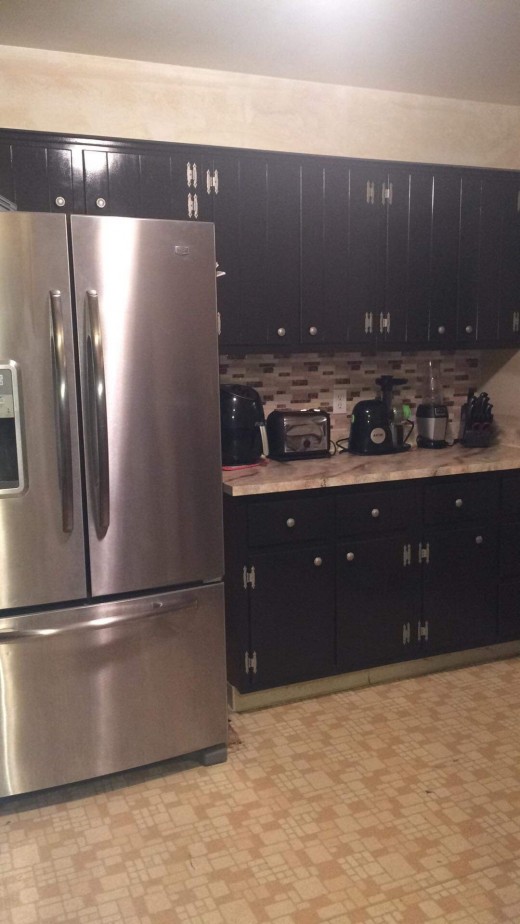
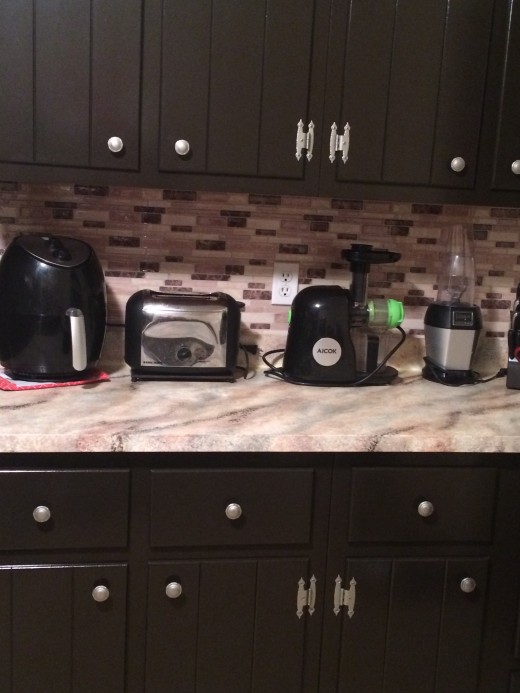
Kitchens in any home should be a place that inspires you to eat well, enjoy cooking, and be visually appealing to your heart. Our kitchen still needs the walls done, and flooring, but this is probably one of the biggest rooms to update as a homeowner. Our kitchen was straight out of 1970. You can see parts of it still are. At this time, a complete remodel was out of the question, it didn't financially make sense. We chose to do a lot of upgrades with paint, including the outdated range and oven. We also painted the countertops. It may not last forever but for the cost it will be fine for a few years. I won't lie, this is a lot of work, but the results are pretty spectacular. We painted the appliances, counters, and cabinets for about $200.00.
Make sure you have the proper tools and take your time. I included the link for the paint on the cabinets I used, but you could use any acrylic paint. I think the key to this being successful is proper prep, repair, and cleaning. If you're just going to slap paint over dirt, the paint will not adhere. So don't waste your time unless you're going to do it right. I did the majority of this project alone because I had the time. And many times I wanted to stop, but I just kept going at a nice pace. Don't rush. Seal it with a polyurethane sealer at the end and this will help extend the life and lessen chips.
The end result is a pretty great, inexpensive cosmetic update.

Doors redone

This is a long process but the effort is worth it!
- Find an area in your home to set up your "work station". Typically a basement or garage will work best, but if you're short on space any room where they can be properly prepped, cleaned and dry undisturbed will be fine.
- Determine what your counters are made of and buy supplies accordingly. Wood, melamine, laminate, will require different types of paint so make sure you are buying what you need for the material they are constructed of. Our cabinets are pressboard with wood laminate, any supplies listed in this article will be based on that.
- Always work left to right, top to bottom. It's the easiest way to stay on track with this tedious task.
- Number your doors and drawers with masking tape. The reason you do this is so you put them back where they came from. Over time things settle and they will be snug and used to the spot they've been.
- Remove all hardware and bag it with the corresponding number. If you are replacing hinges, this won't be as important you'll be repairing holes in the prep stage. If you're using the same cabinet hardware, bag everything separate and label it.
- If you have to remove drawer faces do this now.
- Clean the doors and drawer fronts with TSP or an equally good degreaser. Let them completely dry. Be mindful to get the places hands touch the most often.
- Once these are all dry, make any necessary repairs to your cabinets. Then sand them with 180-200 grit sandpaper or use a chemical deglazing solution.
- Wipe cabinets clean of any dust or debris from sanding. Use a rag or tack cloth.
- In the area you set up to paint them, you can use small paper cups as stands to keep them off the ground when painting. You can find these at the Dollar Tree.
- Prime your cabinets. Follow all directions for primer, paint, and polyurethane if you're sealing them with a top coat. Allow them to dry properly per directions for every layer of paint you do. In between coats you can work on your cabinet fronts.
- Repeat the preperation steps for your cabinet fronts as well as the painting directions. Just make sure to tape off areas you don't want paint and protect counters and appliances.
- Once everything is dry, reassemble your doors and hardware.
- Enjoy your kitchen makeover!
Doors and hinges removed.


Before and After

After some updates with paint!

Other fun things to paint!
- Update Old Ugly Appliances With Paint!
Appliance paint can transform old ugly appliances in a weekend DIY project! - How to Paint Your Kitchen or Bath Countertops
Complete this great and cheap update for outdated countertops in a weekend! - How to Paint a Concrete Basement Floor With Epoxy Pa...
An easy weekend DIY project. Paint your concrete basement floor and expand your living area! Add extra space or even another family room. - How to paint old tile and grout with Epoxy paint!
Give old tile and grout new life with Epoxy paint, skip the tear out! This is an easy DIY project that can rejuvenate yucky tile and an outdated space in no time flat!
This content is accurate and true to the best of the author’s knowledge and is not meant to substitute for formal and individualized advice from a qualified professional.
© 2019 Rebecca


")


