How to Replace Roof Cement

This article will expalin how to correctly remove and replace roof cement. I am referring to the cement that is located under the ridge/cap tiles.
If you are looking for information on how to replace cement on a gable/verge then I will soon have another article for you to read, so please check back soon.
Step 1
After all safety equipment such as ladders, scaffold and harnesses etc has been set up, the first step is to actually lift the ridge tiles and remove the existing cement.
On some roofs the cement will just crumble off, while on others you may need to carefully chisel it off. The cement should be completely removed from the ridge and roof tiles.
You may break some roof and ridge tiles so do make sure you have plenty spare.

Step 2
Next you should sweep off any dust from the roof, it's very important that the new cement adheres to the roof tiles, dust can act as a barrier and often stops the moisture from the cement bonding with the tiles.
Next you will need to keep several pieces of broken roof tile, approximately 200mm x 75mm. You will need one piece of broken tile for each ridge tile you intend to re-cement.

Step 3
Now it's time to mix the sand/cement. The ratio for all roof work is 3 parts sand to 1 part cement, this is a strong mix as we don't want rainwater to wash the cement away. This can happen if you use a bricklayers mix which is much weaker at 5-1 sand/cement mix.
Tip: The sand/cement must be well mixed but try to avoid making the mix too wet/sloppy, this will only make your life much more difficult when you try to work with the cement on the roof.
Step 4
Step 4 is to lay the cement onto the roof and bed the tiles onto it.
If the cement is too wet/sloppy then the tile will slump, if the cement is too dry then it won't adhere correctly so it needs to be just right - this is something that comes from experience.
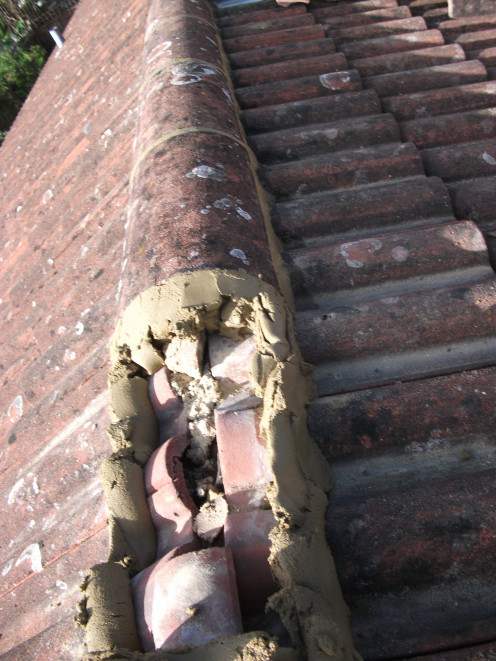
There is no need to fill the entire void with cement, only the perimeter. Use the bits of broken tile to prop up the cement at each end of the ridge tile (see photo as example)
For a better explanation please see the photos below:

Step 5
As the ridge tile is bedded down onto the cement, any excess should be carefully scraped off.
This can get messy, so it's best to be careful and try to scrape upwards a little at a time.
I usually lay 5-6 tiles and scrape off the excess as I go, after about 20-30mins I will then go back to the first tile and "point in" the cement. This is where the trowel is used to smooth over the surface of the cement, leaving a neat(ish) finish.

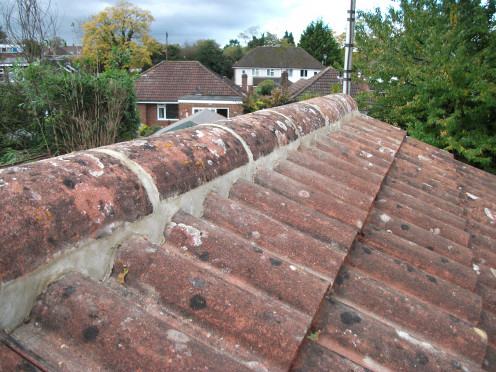
More Photos
Below are a few more photos from this project:

What You Will Need
You will need the following tools, equipment and materials:
- Sand and cement
- Bucket, board (to mix cement on)
- Hammer, chisel, trowel
- Spare ridge and roof tiles
- Disc cutter (the last ridge tile may need cutting to size)
- Ladder and any safety equipment such as a harness
Is This Work Suitable for DIY?
This type of work is generally carried out by experienced roofing contractors rather than by DIY.
If the roof is shallow and the correct safety equipment is used then it may be possible for a confident DIYer to give it a go.
If you are tempted to leave the old cement in place and just "point in" new cement over the old then you should know that this technique is inferior and the thin layer of cement will usually peel off after a year or so. The ridge tiles really need to be bedded down into the cement, this ensures they are securely held in place and will last for decades.
This site has more information about replacing roof cement.
How *Not* To Apply Cement


")
 To Install Hardiplank And The Like")