How to Reupholster the Seats of Dining Room Chairs

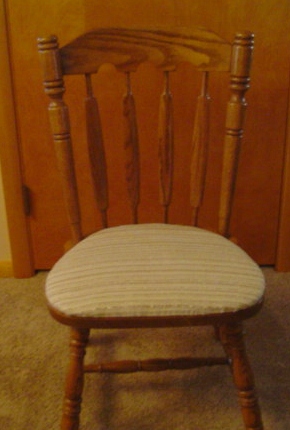
Finished Chair
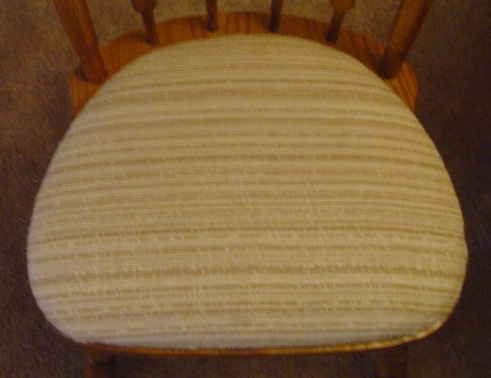
Chair Seat
Where Do You Start?
©joaniebaby 05/29/2012
Are your upholstered dining room chairs looking a little "dowdy?" New fabric on the pads will do wonders to improve their look, and even their feel. The dining room chairs we had were almost 20 years old and the fabric was beginning to look dingy. The fabric itself was still in good condition, just old and out of style. So my husband and I decided to tackle the job of reupholstering them. I did not take pictures of our "work in process." The only picture I have is of the finished product. These chairs were recovered approximately five to six years ago and they still look like new.
Removing the Old Fabric
Once you decide to reupholster your chairs, the first step is to remove the chair seat from the frame of the chair. The padded seat usually is attached with screws to the wooden seat of the chair. When you remove the padded seat, be sure to mark the seat and the chair so you know which seat goes back on which chair. Put No. 1 on the back of the padded seat and No. 1 on the bottom of the wooden seat of the chair. (Do the same for all of the remaining chairs, using Nos. 2-4 or 2-6 depending upon how many chairs there are.) We found this step out by trial and error! You would think that all the chairs would be the same, but they definitely are not. If the screw hole is off by just a small fraction of an inch, you will never get the newly covered seat back on the correct chair. Please believe me on this point. Since we neglected this at first, getting the seats back where they belonged was the most difficult part of the job.
Now that you have the seats removed from the chair frame, you need to take the old fabric off. There will be an unbelievable amount of staples holding the fabric to the seat frame, and the staples will be extremely hard to remove. (We counted the staples on just one chair seat and there were over 75.) The seat frame itself is made from the cheapest, hardest wood available. Once you have removed the fabric cover from the seat frame, please make an accurate pattern to use when you are cutting out your new cover. This is another important step in the process. Also, examine the padding and if it seems worn or matted down, purchase new padding. This is not an expensive addition to your project and will be well worth the added cost.
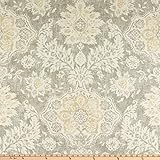
Do not, I repeat, do not, skimp on the quality of the fabric you are going to use! The quality of the fabric will definitely determine the outcome and wearability of the finished product. Quality upholstery fabric can cost anywhere between $20 and $50 per yard. (And it can go much higher, too.) A fabric that is inexpensive, thin, stretchy, and easily raveled will produce a very disappointing result. Start by going to a reputable fabric store, or upholstery store, and choose a fabric that fits your décor, but also will withstand the wear and tear of daily use. This material is not cheap, but will reward your work over the years, and it is usually easy to work with. You can determine how much material you need by using the pattern you made. In our case, each seat required a piece of material that was 20"x24" and we could get six pieces the size we needed out of two yards of 60" material. Upholstery is normally 60" wide, but sometimes it is only 54" wide. If you are having trouble figuring out how much material is required, just take your pattern to the store and the clerk will be happy to calculate that for you. They are used to doing that daily. If you choose a fabric that has a design or stripes in it, you may have some waste to your material. Ours had a stripe and we wanted the stripe to run across the chair seat, but that did not affect how much material we needed.
Cutting out the Material
Once you have chosen your material, ordered and received it, now comes the task of cutting out the pieces for your chair seats. You kept one of the old chair covers as a pattern, and now I would use that to make a paper pattern. A paper pattern is much easier to work with when cutting out your new covers. Be sure to place your pattern on the fabric in the same direction for every chair seat. It may not seem as though there is a design to the material, but something could show up if you cut them differently. Also some materials have a nap that gives them a different look from different directions. So with that type of material you need to be certain that it is cut in the same direction and attached in the same direction.
Attaching the New Covers
Now comes the fun part! Hopefully you have a heavy duty stapler as you will need one. We had to borrow one from our neighbor and we still had problems. As I said earlier, the wood used in the padded seats is hard and the staples like to bend when putting them in. The stapler needs to be held exactly square to the wood, and then they will go in straight.
Being careful to attach the fabric in the same direction on every chair, wrap the material around the padding and the bottom of the chair seat. When you go around the corners of the seat, you will need to carefully shape the material and try to work out all of the puckers. As you progress around the seat, tape the material to the wooden bottom to hold it in place until you can staple it. If your material is striped, make sure it is straight on the front of the seats as you stretch the material. Stretching the material is necessary to have a smooth firm surface on the top. This is another reason to have quality fabric to work with. Once you have the material taped to the bottom of the seat, check out the front of the seat to make certain everything looks good. If the seat meets with your approval, start stapling. Staple the four corners first, and then work your way around from corner to corner, carefully working the material smooth. Be sure to use enough staples to hold the material in place, especially on the corners. Now you can see why there were so many staples in the first place.
Reattaching the Seats to the Chair Frame
After you have stapled the material to the chair seats, you are ready to attach them to the chair frame. Be sure and check your numbers so that you have No. 1 on the chair seat matching No. 1 on the chair frame. Now you will see the importance of marking both with the numbers when you removed the seats originally. The screw holes on the seat should align with the screw holes on the chair frame and they will assemble with no problem.
ADMIRE YOUR FINISHED PRODUCT!
- How to Reupholster a Dining Room Chair: An Easy Home Improvement Project
Reupholstering chairs is an easy home improvement project anyone can do: there is no sewing required. If you can use a staple gun and a pair of scissors, you can upholster a dining room chair! Give your house a new, fresh look with this simple DIY pr