How to clean a compressor dehumidifier

If your dehumidifer isn’t working like it used to, there’s a very high chance that all it needs is a good clean inside, rather than taking it to the repair shop or buying a new one.
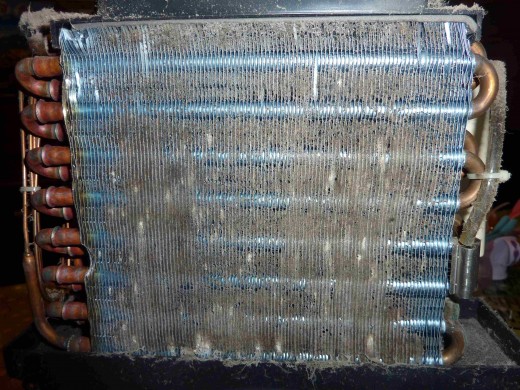
Months and years of dust will have accumulated between the cooling vents, restricting the dehumidifier’s ability to both draw air through the vents, and cool the air. The air filter, which in most cases is designed to be removed from the outside of the unit, only stops some of the dust.
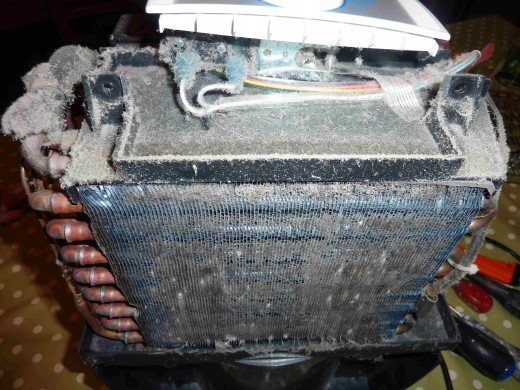
Here’s an example of what your badly performing compressor dehumidifier might look like! This is real bad! Very little chance of a good performance with the encrusted dust.
This might be your problem!
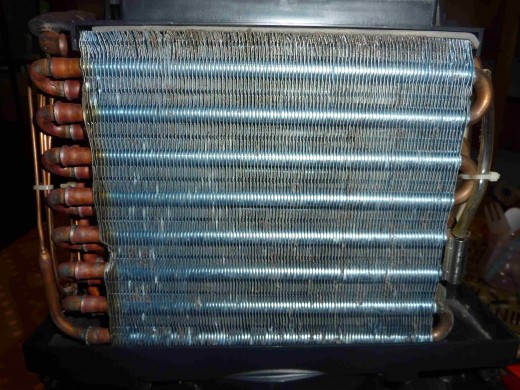
And here’s a picture of the same dehumidifier, newly cleaned. The machine works well again, as the air can now circulate freely through the vents.
Looking good after cleaning!
Return to efficiency
After some cleaning, the good news is that this machine returned to its previous efficiency.
All you need to clean the inside of your dehumidifier is an old toothbrush, a soft paint brush and a hoover. The toothbrush will be used on the vents themselves, and the paint brush on other parts of the machine.
In some cases, if the design of your dehumidifier is such that you have to get close to the power area of the unit before getting to the vents (which is unlikely), I’d suggest not attempting to fix your dehumidifier. If, however, you feel confident with regards to electricity, check out this page how to discharge a capacitor safely.
First of all start with the obvious things, such as cleaning the filter, before opening the machine.
Cleaning the filter
This is usually easily cleaned with a soft cloth, or by soaking the filter in water, washing it, then letting it dry.
If your machine then works well again, great! You won’t have to remove the outer casing. However, if this fails to improve the performance, then you’ll want to clean the vents on the inside of the machine, as well as the fan, which may not be rotating at its full potential.
How to clean the vents and inside the machine
First of all unplugyour machine.
Secondly, unscrew the outer casing. Sometimes these can be a bit fiddly and you need to have a good look at where the screws are located.
The vents at the front of the machine can accumulate dust that compacts itself over time, and needs a toothbrush to dislodge. Work in the same direction as the vents, making sure you don’t bend any of the vents. Vents that touch each other reduce the efficiency of the machine (once you’ve cleaned the vents, you may even went to gently prize back any touching vents). Working with the toothbrush, brush downward and hoover up as you go, making sure you don’t knock the vents with the end of the hoover attachment.
For other parts of the machine, for example the sides of the unit or the fan area, use a paint brush (long bristles preferably) and carefully work around all the nooks and crannies, dislodging as much of the grime as you can. Hoover as you go.
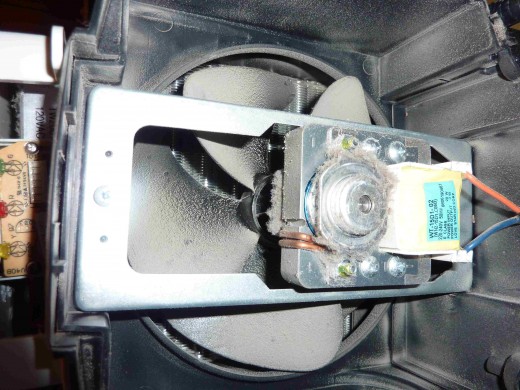
Be particularly careful when cleaning around the fan, as the the smooth mechanism musn’t be damaged as you clean. The fan blades will have accumulated a lot of dust (for example, see the photo below), as well as the axel. Just working gently with the pain brush should be ok, so don’t force anything. Again, hoover as you go.