How to Install a Water Saver Toilet with Photos


Duel Flush toilet Instalation
I am going to show you how to install an Water Saver Duel Flush toilet. With the old toilets they waste water. Drive you water bills up So you got tired of wasting water with the old toilet and decided to replace it. This job only requires a few tools and takes about an hour. The tools that you will need are
Tools Needed


Tools Needed
Putty knife (To Scape the wax ring)
Philips Screwdriver
Straight Screwdriver
A Crescent Wrench and/or Adjustable Pliers
Removing water line


Removing the old Toilet
1. Turn off the water supply at the toilet. If there is no shutoff then turn off at the house main. Flush the toilet to remove the water in the tank. Next take a plunger and plunger the toilet to remove the water from the bowl. Next remove the 2 to 4 bolts that hold it to the floor. Gently lift the toilet off of the wax seal. Whenever you lift the old toilet out if you tip it there will be water running out if you are not careful.
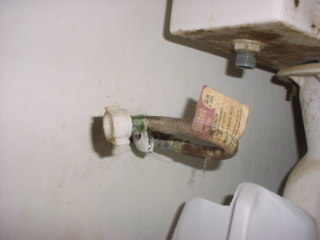
2. Using a small bucket, can or cut off a plastic milk jug remove the supply hose off the toilet. I suggest that you replace this hose with a new one. Remove the rest of the water out of the tank by unscrewing the nut at the top of the hose, letting it run it into a bucket or can. See photo.
3. Next remove the 2 to 4 caps on either side of the old toilet and remove the nuts on either side of the toilet. It is now ready to remove. Carefully tip it forward off of the seal and then lift it up and remove, setting it onto a piece of newspaper. The old seal will probably still be on the bottom of the old one and is bees wax so it might leave a mark if you don't put it on something.
Install Base of Toilet
4. Next using the Putty Knife scrape the old wax seal off of the ring. Remove or Reuse the bolts on the ring. See Photo
5. Next take the new Seal and put it in the ring with the rubber side down. See Photo
6. Next Position the New base and line up the 2 to 4 bolts that hold it down and gently lower it onto the new ring. Follow manufactures instructions and install the two to four bolts to hold the base down. They must be tight but do not over tighten or you could crack the base. It is made of porcelain and can break.
Tank Install


Installing water closet or Toilet Tank
7. Next take the tank and install the rubber ring see photos this seals the tank when you bolt it onto the base. Then lower it onto the base and using the screws sometimes there are 3 sometimes there are 2 depending on the make. See Photo. Follow the instructions with the toilet. You must make sure that the rubber is in the top of the bolt this seals the tank so that it does not leak when you tighten them. Usually there is a washer then the seal then it all goes thru the tank and the base and then there is a washer with a nut under the bottom of the base. It is better to tighten enough so it starts to collapse the rubber but not over tighten you can always tighten a little bit more if the tank leaks. These must be fairly tight but if too tight then you could crack the tank.
8. Hook up the supply line and turn on just a bit to let the tank fill check for leaks. If you find one then re tighten whatever is leaking. After tank fills flush and then let in refill again checking for leaks.
9. Open valve and put on top and again check for leaks, if there are any then re-tighten as needed.


