How to Remove Linoleum From Your Floor

Removing Lino and Sanding Floor
Do it Yourself or Hire an Expert?
The worst job we have ever thought or attempted to do was removing the linoleum from three rooms in our home. As we had renovated our first home without any problems, by taking down ceilings and walls and replacing them with new ones, we thought this would be a breeze.
How hard could it be to pull up the linoleum and lay the beautiful slate tiles ourselves? We did not realize how wrong we had been until we started.
The Hard Way
Never before had I seen anyone glue the entire floor covering to the concrete floor. It sure tested our patience and the rising blood pressure.
We spent hours scratching around like old hens, trying to remove this obstinate floor covering. The best tools we found to use were a wide paint scraper, a Stanley knife, and hammer. By using the wide scraper and hitting with a hammer, it allowed us to lift a wider area at one time. We used the Stanley knife to cut the sections of linoleum up into smaller pieces, where we could.
This backbreaking job would test anyone's patience. The blisters did not improve our temperament at the time. At last, the job was finished, vowing never to do it again. What we did not know at the time, was we had only just started, because we still had to remove the glue.
Lesson learned.
Protect your hands from blisters by wearing gloves. Cut linoleum into smaller strips to lever up, if not completely glued down. You could use a hairdryer or heat gun to help dissolve the glue. If you have a wooden floor, be careful you do not burn the wood, especially if you want to have a stained finish.
Removing the Glue
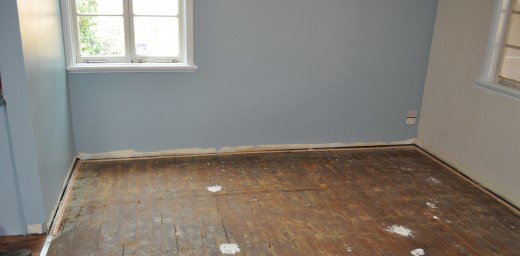
This proved to be very difficult. We tried various types of paint thinners, which removed some. In the end, we bought an Orbital sander, and this removed more. Then we found by adding water it formed a real slush across the floor, it worked but it went everywhere up the walls and all. We washed the floor twice and at last, it was clean. This also meant we had to repaint the walls again to remove stains from the sanding.
We laid the slate over the next few weeks once the concrete had dried out. It looks great and all the hassles we went through, a distant memory. The moral of this story is, prepare for the worst and you will not be too disappointed or preferably employ an expert if unsure.
The Choice of floor covering
The choice of covering your floor is now the next problem. What kind of floor covering will you choose to replace your linoleum with.
- DIY Repair Carpet Burns
Do not panic, most times burns in carpets are caused by a spark from either an open fire or a cigarette. The open fire burn could be harder to fix if a piece of wood fell out of the fireplace. Vinegar &...
Dewalt Orbital Sander

No it Did Not Finish There
We had noticed that the floor had a bit of a dip. So why not fix that too.
Cut a Hole in the Floor
Our Nephew gave us a big hand he got under the house and jacked one of the stumps up and replaced it with a bigger one.
So thankfully for him we got it fixed. My husband would never have fitted under there.
© 2007 Eileen hughes


