How to Fix Dryer Belt


Introduction
Look how easy it is to repair your own clothes dryer belt. Save yourself money and feel good about yourself. While repairing your own clothes dryer belt. Get simple step-by-step instruction with video and photo illustrations.
Signs Clothes Dryer Belt Will Soon Need to be Changed
If you have never changed a clothes dryer belt. You will be surprised to find out how easy it is to change your own dryer belt. Usually the drive belt on the drum is the first to wear out.
The first sign the belt is wearing out is a squeaking noise. So if your dryer is squeaking that is a good indication the dryer belt needs to be changed soon.
You Will Need
- Flat blade and Phillips screw drivers.
- Pliers or nut-drivers
- A Flashlight
- New parts


How to Change Dryer Belt
Instruction:
Step 1
Unplug clothes dryer from the receptacle.
Step 2
Pull the clothes dryer away from the wall.
Step 3
Disconnect clothes dryer vent.
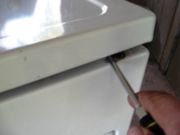
Step 4
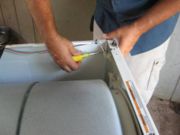
Remove clips or screws on the top rear of the clothes dryer. Check the lint catcher for screws or clips. Check all around the top of the dryer for either clips or screws. ( Most dryers body screws are either 1/4 inch or 5/16 inch machine screws, so a nut driver of the right size will make the repair easier)
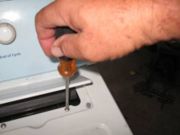
Step 5
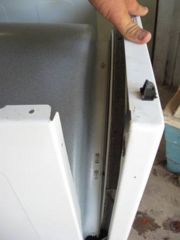
Pry the top of your clothes dryer up to disengage the clips that are holding the top down.
Step 6
Unplug the door safety switch in front of your clothes dryer. ( It’s a plug connecter on the wire harness. )
Step 7
Lift the top of the clothes dryer up. Let the top of the dryer hinge toward the back of the clothes dryer.
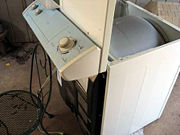
Step 8
Ask a volunteer to hold the top up or find something to prop up the top of the dryer. Be careful not to accidently damage or unplug any wires from the timer and machine controls.
Step 9
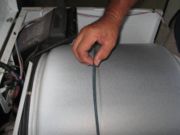
Lift up the front panel of your clothes dryer. Exposing the drum so that the drum can be removed.
Step 10
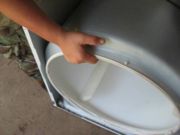
Pull out the drum from the housing. Remove dryer belt from the drum.
Step 11
Take the dryer belt and the information you have on clothes dryer to the appliance store. To ensure you buy the right dryer belt.
Step 12
Wipe clean any lint debris from inside of your clothes dryer.
Step 13
Wrap belt around drum in the same location in the old belt was located.
Step 14
Slid the drum back into the clothes dryer machine.
Step 15
Lie on your back and look beneath the drum. You will see your tension on the motor. Wrap your new dryer belt around the tension pulley on motor. (Make sure the traction grooves are facing pulley)
Step 16
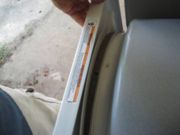
Put front panel back on the front of clothes dryer. Be careful not to damage the felt seal.
Step 17
Make sure all wires are connected. You may now screw in all the screws that holds the panel to the clothes dryer.
Step 18
Drop top of dryer into position. Press in on all the corners to engage the snap locks. Check to see if all your fasteners are all in tacked and tightened.
Step 19
Attach your dryer vent hose back on to your dryer. Slide back your clothes dryer against the wall.
Step 20
Plug-in your clothes dryer. Turn on your clothes dryer just to test to make sure your drum is turning properly.
© 2012 tamron


