Just add some color


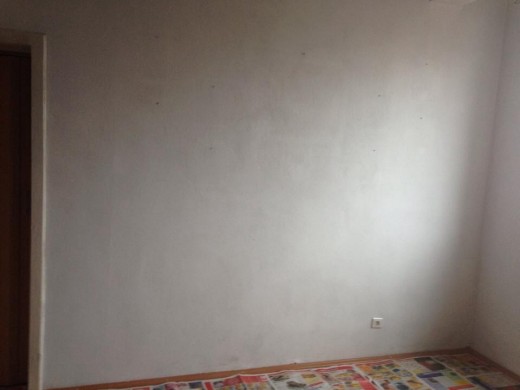
I am currently the happy owner of the biggest, sunniest bedroom from the whole house. What initially seemed a great idea, proved to be a curse during the summer days.
My white bedroom becomes under the summer sun, a glowing inferno even from the first sun ray. I bought drapes at first but that didn't seem to help at all. I started thinking a lot about what could I do besides switching rooms.
I decided to paint one wall, the wall that is the most exposed to the sunlight. I had in mind two colors either a chocolate brown or a burgundy red, as both colors match the color scheme of the paintings on the wall.
.... And so the adventure begins, because yes it was an adventure to paint that wall.
I started by cleaning the wall and evaluate it. It had some cracks that I filled before I started painting. It looked pretty good.
Tip: Before painting a wall that wasn't painted for a long time; take your time to dust it by using a clean cloth.
I decided to go for the chocolate brown, but I was unhappy with the premixed colors. As I am sure you know pigments are available for the the unhappy customers like me.
I calculated the amount of pigment, picked one more bottle just to be sure , and I went home.

As I poured the pigment in, I got very excited. The color was amazing! So I started to mix it in the white paint, the pigment started to spread in to the white paint mass. The color was blending in nicely, and then the unexpected happened.
Oh yes my beautiful brown started to fade away rapidly. Under my eyes the brown transformed first in a horrible orange and then pink.
I must confess, I am painting since I was 5, in all this time I mixed all types of color. But I had no idea pink is related to brown. I left the dirty pink rest and ran back to the store and bought another brand of brown. 2 hours later and 3 more brown bottles; the dirty pink transformed in a decent brown shade.
Tip: When picking a color to paint your walls, pick a premixed one, it is less adventurous but a lot safer.
Do you prefer premixed colors?
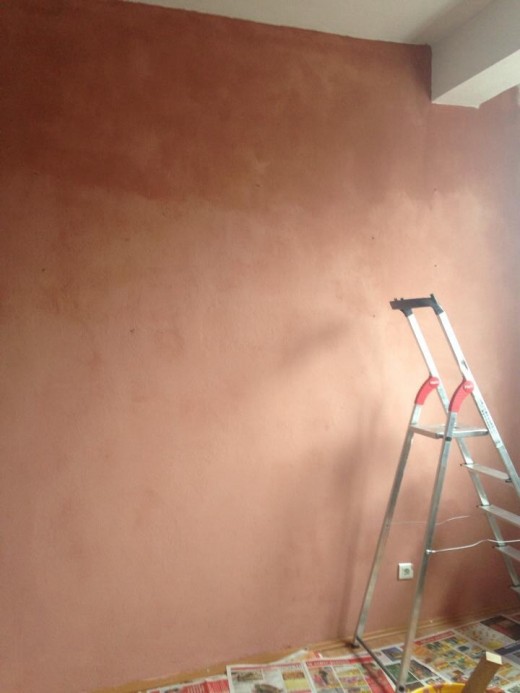
I learned something interesting in my years of wall painting, if you paint a wall that was painted in the last 2-3 years, and the wall is white, you don't need to apply any wall primer.
For a better coverage I applied two coats of paint.
This is an extra tip for you if you are deciding to paint your walls during the cold weather although not recommended because the humidity will persist longer and the walls will dry harder; depending on the temperature and humidity it will take about 1 to 2 days to dry. But if you decide to do that, keep the door closed to the room and open for a few minutes the window... of course this shall not be done if outside is a blizzard.
Lucky me I work nightshifts, so I didn't have to worry about finding another place to sleep.
So I returned the next day at noon to admire my masterpiece. You can imagine my surprise when I've seen the wall, it looked good overall, but two things kept nagging me. My friends told me it looks just fine. But the feeling persisted even after I put the furniture and paintings in their places.
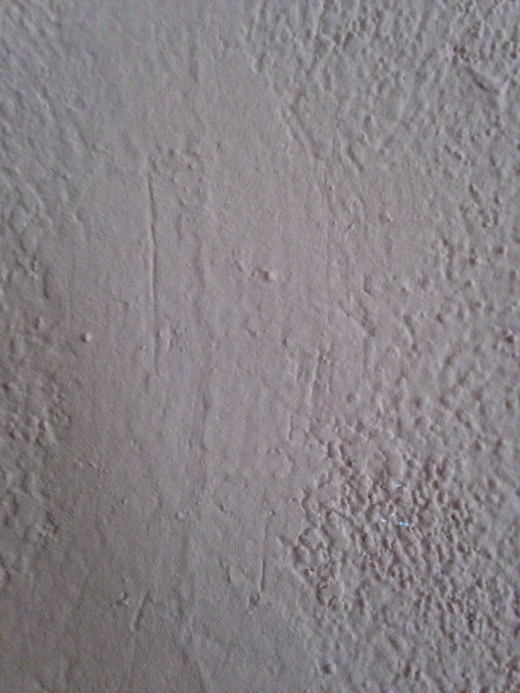
The crack I fixed before was so evident because the wall is rather grainy and the fixed part was so smooth. And to make things even perfect on the wall almost at the half of the wall, close to the celling the color was not as uniform as in the rest of the wall.
But this kind of things tend to happen. From where I was staying I could have left it the way it was or do something to fix it.
Leaving those issues unfixed will only frustrate me, so I thought of fixing it. The obvious thing to do was to repaint the wall but I wasn't actually in the mood to start again.


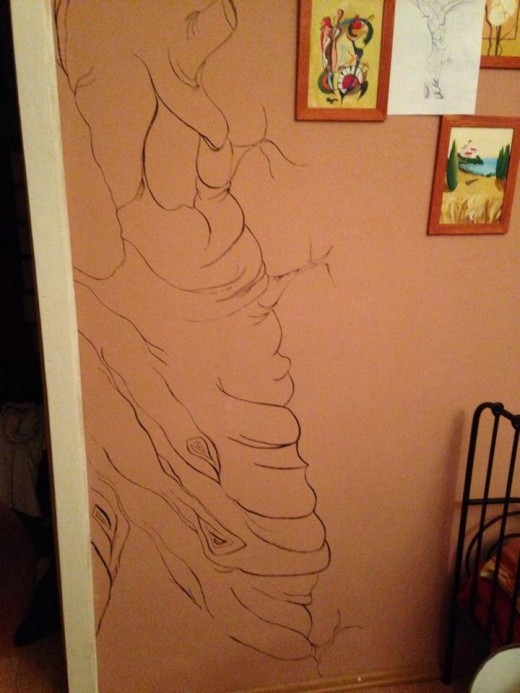
An alternative to wall stickers
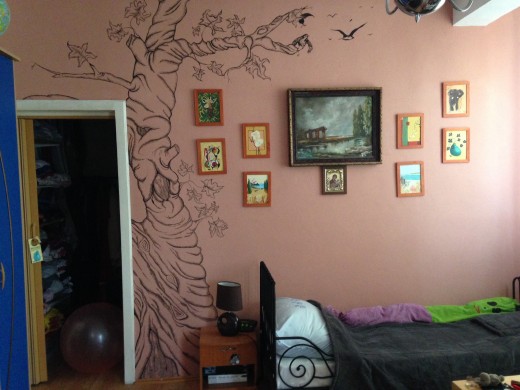
I found another fix for it. What if I changed the perspective, instead of fixing the spots, I decided to put something on the wall to focus on instead of those painting mistakes.
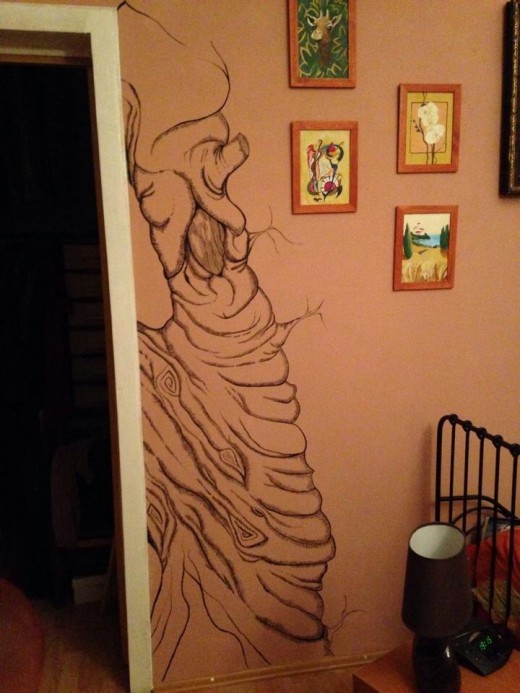
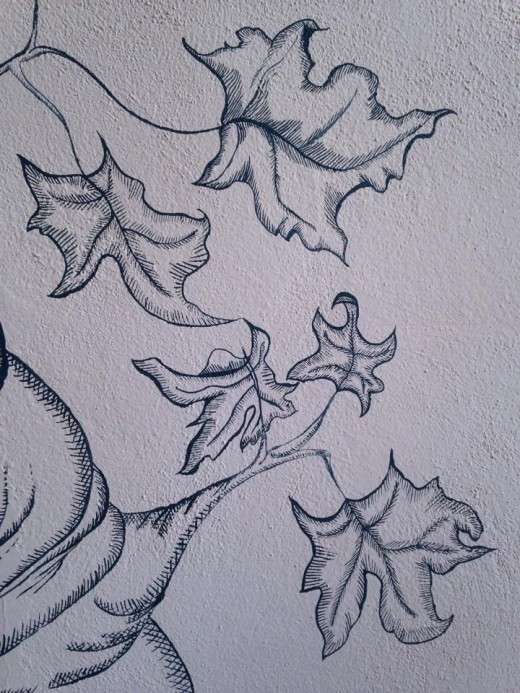
I started doodling on a paper, you see I like trees lately and I thought it would be nice to sleep under a tree.
I found a tree pattern that suited me , bought an acrylic black paint jar and I started doodling on the wall.
I used watercolor paints too in the past, but the result was not satisfying; the color was not solid enough for what I wanted this time. If you decide to make a water painting like mural, you should pick watercolor. If you want a solid color then you should pick acrylic.
I like to draw first on the paper to get an idea of what I want to paint, but on the wall I usually do free hand painting. If you don't have experience with this kind of projects use a crayon and make a sketch before applying the color.
Te advantage with the crayon is that if you are not pleased with the drawing you can erase it without compromising the wall or the painting.
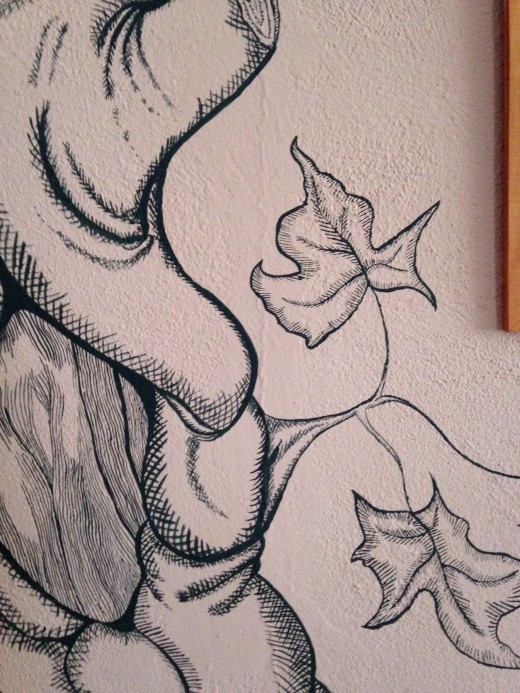
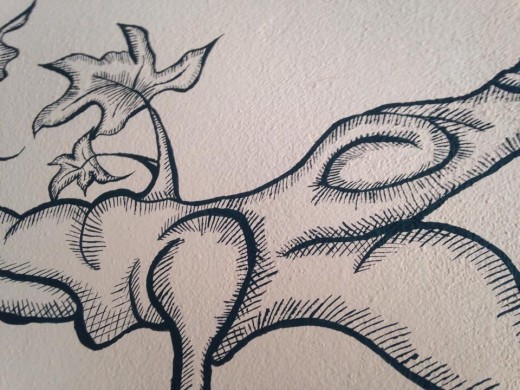
Start with the outlines and add the details at the end or after you finish a part of the painting.


Instead of buying a sticker that so may have on their wall you can. Use this method to customize your walls.
If you are not sure what to draw, take some time and think of a theme, then start researching that theme, see what it can offer, then play with the idea and change it so it will fit your needs.
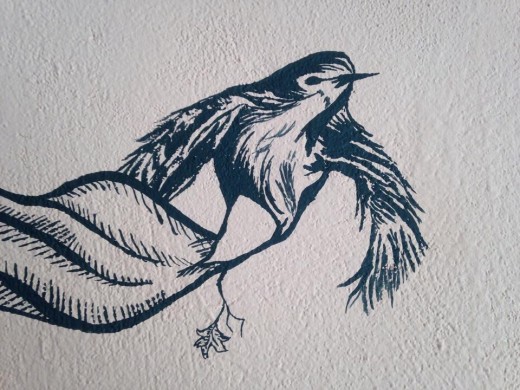
My painting didn't fully cover the crack as you can see in the photos, but it offered another focus point on the wall. I made my tree grow and cover every imperfection on it. I played with the shades to give it a 3D look as you can see in the photos.
If you are wondering why that bird is glued to the tree, well I had an idea about that branch. The branch and leafs will transform in to birds that will fly away.
Take a brush and have fun with it... I dare you!


