Make a Sprinkling System that Doesn't Use Electricity
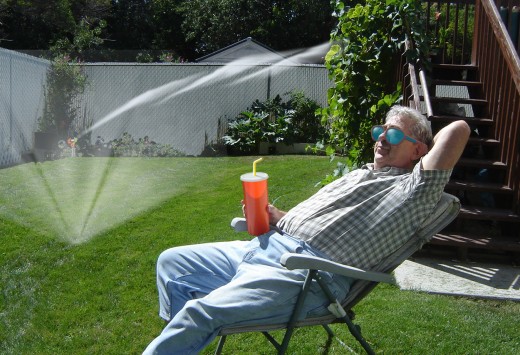
Ever had a blackout in the heat of summer for more than a week? If you have a large lawn, and you don’t want to spend the time watering it with a hose - in case of a power blackout (or just to save on electricity) - use a sprinkling system that doesn’t require electricity.
The only thing electricity does is it regulates the watering sessions, and it opens and closes the valves. All sprinkling activity - the raising of the sprinkler heads, the oscillating or rotation of the movable heads - is done through water pressure. Water pressure is the product of gravity. Gravity will always exist, whether in times of famine or feast. Either there’s a reservoir in a canyon somewhere near your home, or there’s a large tank towering high above the rooftops of your community. These reserves provide the pressure needed to spout water into your residence, or to give motion to your sprinklers.
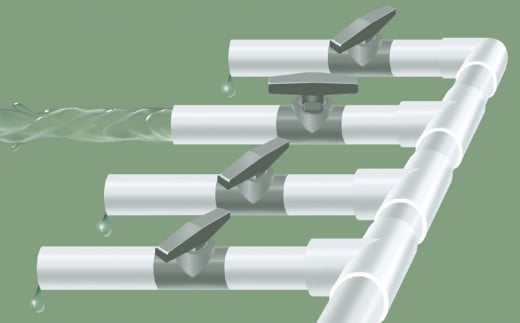
You can build your own manual system, or add one to your existing electronic system. If you build your own - independent of an electronic one, it will look something like the one in Fig. 1. If you add to an existing one, it will look a bit like the one in Fig 2.
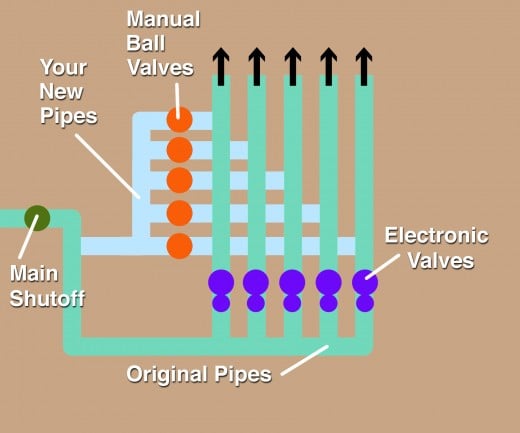
Let’s assume you already have a sprinkling system. Let’s proceed as if you wanted to add to it:
You begin by measuring and cutting the PVC pipes you need, which will be few, if you already have a sprinkling system. You can cut them with a hacksaw, then smooth the edges with sandpaper and a buffer.
Next, turn off the main sprinkler shutoff valve.
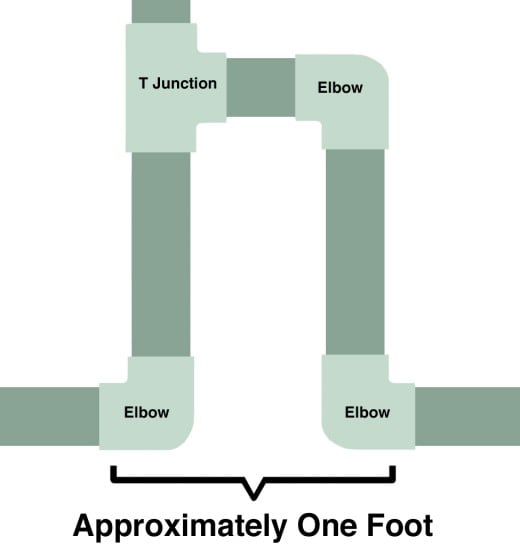
Connect a pipe to the main water source: To do this, find an elbow so you can move one of the pipes sideways to accept the Slip Slide Tee that will be used to add the new pipe. If you can’t find an elbow, you can cut out a one-foot (30.5 centimeters) section and put in a loop. The new arrangement will look like an “h” (see Fig. 3).
To this new supply line, connect as many short pipes as the number of stations you have. Put them fairly close together, so you can put a sprinkler valve access box over them when you’re done. Now, connect a manual ball valve to each of these short pipes. When you’re done, you’re ready to connect a pipe to each existing supply pipe that leads to the lawn or garden area to be watered (see Fig. 2). Connect these new pipes to the existing ones in the same manner as you did with the supply line.
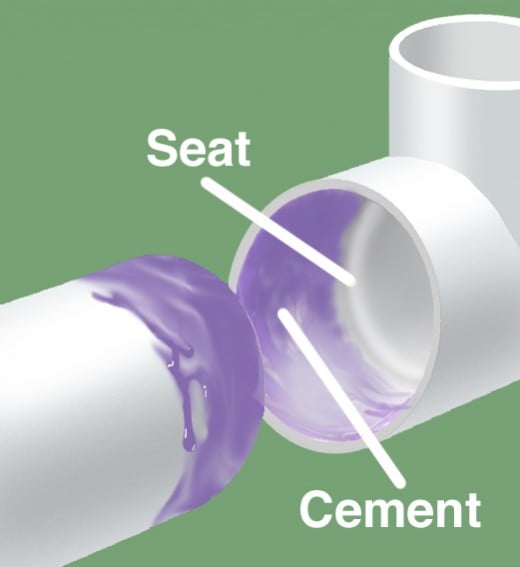
For cementing the pieces together, swab the connecting surfaces with a PVC primer, then with PVC cement as shown in Fig. 4. The store you buy your PVC from will be glad to help you know the specifics of cutting and cementing PVC connections. Also, here’s a site that gives more tips and helps:
Bear in mind that this site shows how to build things that are not used for high-pressure connections, so the methods shown therein may not apply to your plumbing project.
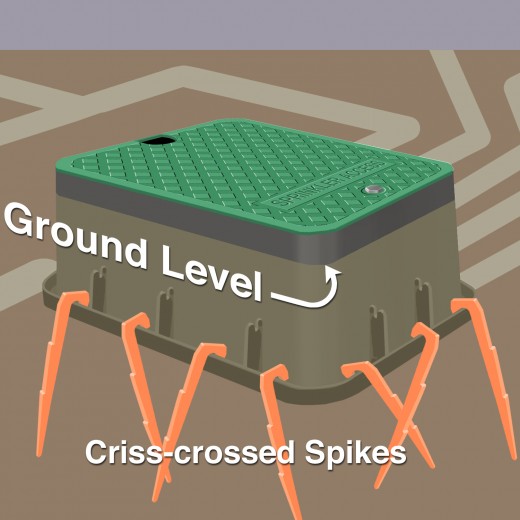
After you’re done with the cementing, put a sprinkler valve access box over the manual valve system. Bury the box as far into the ground as possible, leaving a comfortable space between the valves and the box lid. Use hooked pegs to hold down the box, hammering them down into the earth until their hooks are pressing firmly on the ridge of the box. I like to hammer the pegs in alternating directions. This provides additional vertical resistance so that it would be more difficult to uproot the box (see Fig. 5).
Fill in all the dirt and grass, and you’re ready to watch it work. Open the main sprinkler valve while putting your automatic sprinkler control panel on “Off” or “Rain.” Then, open one valve at a time in your manual control box and watch the sprinklers do their thing. If your water pressure is good, you can open two valves, and save on time. In this project you are the timer, and also the power that opens and closes the valves. Well, you needed a little bit of extra exercise anyway, right?


