Master Bath Makeover
Demolition is The Necessary Evil of Every Remodeling Project
Let me break down the steps for the demolition process of bathroom items that had to go.
-
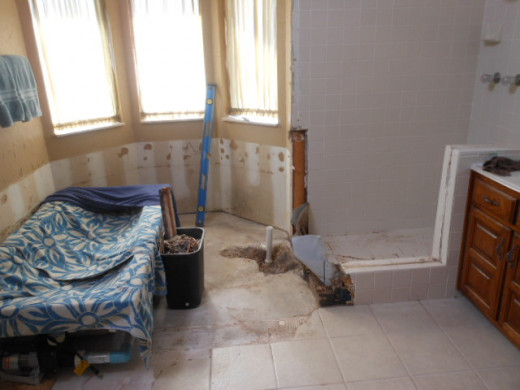
First, the enormous, 4-person, Garden Tub had to be removed. One can remove most tubs by simply extracting them from the work area through a doorway. This tub had to be demolished on-site before removal to the trash dumpster. Being made of some sort of composite quartz material, I had to break apart with a sledgehammer. If you have a similar problem tub, be sure to wear protective eyewear. Chips were flying everywhere during this process.
-
Next, I had to remove the shower enclosure carefully. This shower set-up was an old-style, full-panel glass shower. The glass was trimmed in gold-colored clad aluminum and was almost more than the eye could bear. These panels were anchored at the base to a tile ledge, which all had to come out. Trying to coax a glass panel free at its bottom and corners is tricky, not to mention dangerous, so take your time and wear leather gloves as well as safety glasses.
-
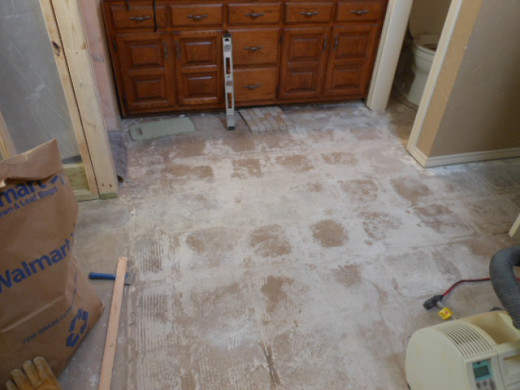
Lastly, the tile floor would have to be broken and chiseled up. This process is extra labor intensive and back-breaking, requiring some specialized hand and power tools.
Plumbing Issues First
As stated earlier, the Garden Tub was oversized and hard to deal with, but before I could begin demolition, there were plumbing issues that now needed attention. The bathtub had a Jacuzzi-type pump with hoses around the perimeter that delivered pressurized water into the bathing area through jets all around the interior. Hot and cold pipes coming up through the floor had to be cut and capped before moving it around.
When I began work on the shower, it was just the opposite. I had to remove the glass enclosure and wall tile before dealing with the plumbing. It was necessary to turn off the water to the entire house must first be turned off before any of this can occur.
So with the tub and shower removed, let's move on to floor tile demolition.
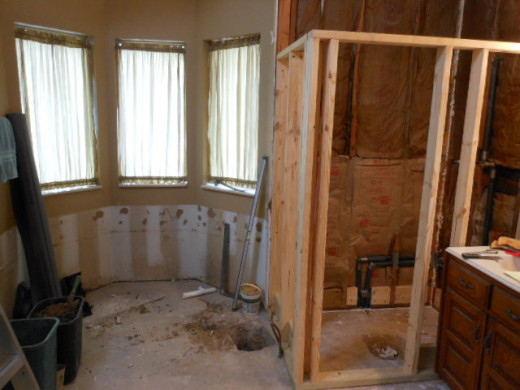
Tub and Shower After Demolition
Click thumbnail to view full-size


To Remodel or Not To Remodel, That Is The Question
Which Room In Your Home or Condo Would You Most Like To Remodel?
Removing Floor Tile Is a Real Challenge
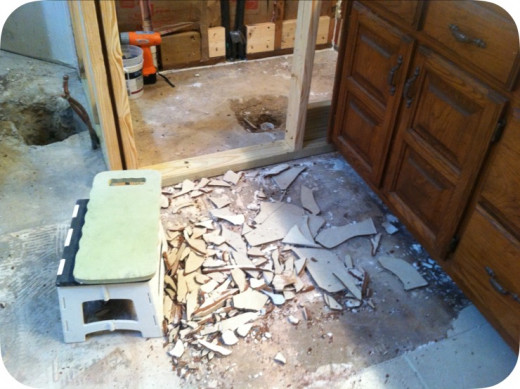
Whether you remove tiles by hammer and chisel or use power tools, it's still a ton of work. When I did this work, I never explored the power tool option. For some reason, it didn't even cross my mind to check it out. I simply grabbed my mini sledgehammer and stonemason chisel and began pounding tiles.
It was months later that I watched a video on how to use a hammer drill, a tool which I have owned for years, with a chisel attachment to do the work. With this tool or a rented commercial tool, one can complete a job like mine in just a few hours. Doing it my way took my wife and me several days to complete. Granted, we were not in a hurry and took plenty of rest breaks, but using the power tool could have put us days ahead on our project.
Tips For Floor Tile Removal
The Hard Way (which is my usual way of doing things, duh)
1) Break up the first tiles with multiple hammer blows.
2) Use the chisel to chip away the remaining broken pieces.
3) Break up numerous tiles at a time and remove it with a floor scraper. ...
4) Remove the mortar from the underlayment by hammering.
The Easier Way
Buy or rent a Hammer Drill (a power drill that has an impact feature) with a chisel bit to break up the tiles. Using this power tool is a much easier way.
An Easier Way to Remove Stubborn Floor Tiles Using a Hammer Drill.
Where To Buy a Rotary Hammer Drill. You Can Also Rent at Most Tool Rental Centers
- MPT 1 Inch SDS-plus 8.5 Amp Heavy Duty Rotary Hammer Drill, 3 Function and Variable Speed, Include 3
MPT 1 Inch SDS-plus 8.5 Amp Heavy Duty Rotary Hammer Drill, 3 Function and Variable Speed, Include 3 Drill Bits, Point and Flat Chisel with Case - - Amazon.com - https://www.amazon.com/VonHaus-Electric-Vibration-Functions-Adjustable/dp/B07G136TRT/ref=sr_1_27?key
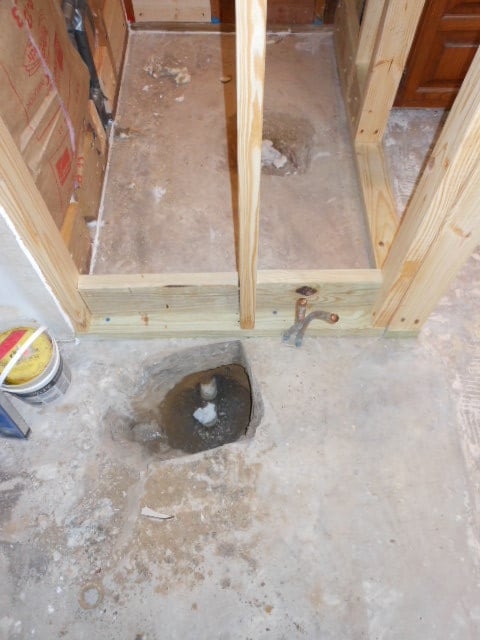
Now Is a Good Time to Inspect the Floor Drains
After you remove the floor tiles and have the area ready for tub placement, make sure your drains are properly situated and inspect for any leaks. Most drains lines are now PVC, and they are susceptible to joint breaks. If you find they are leaking water, it's the perfect time to repair while accessible. Living in the southern US there's always the threat of termite infestation, so I applied a generous amount of Taurus to the soil around the drain pipes
Taurus Termite/Insecticide
- Amazon.com : Taurus SC Termite Insecticide - 1 Each : Garden & Outdoor
Amazon.com : Taurus SC Termite Insecticide - 1 Each : Garden & Outdoor
Tile Removal
Click thumbnail to view full-size

Starting the Rebuild
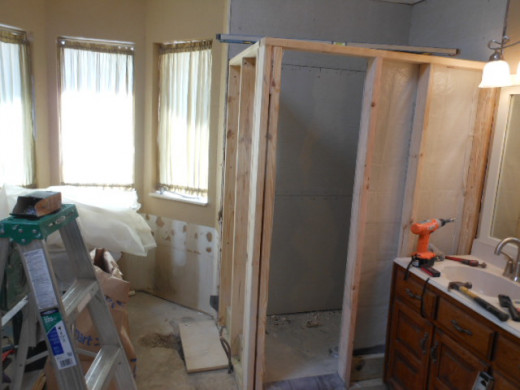
We had decided to remake our shower enclosure completely. This process required several steps from start to finish.
Step 1. The newly framed walls for the shower enclosure needed to be covered. We would use sheetrock on the outside of the shower and concrete fiberboard on the inside. Both materials are adequate to hold tiles to the wall, but the concrete wall covering on the shower side will be water and rot-resistant.
Step 2. I needed to contain the water at the bottom and direct the flow to the floor drain. This step requires that I lay a waterproof membrane on the floor and a hole cut out for the drainage pipe. It also needed to extend up the sides eighteen inches to ensure that if any water seeped through the floor tiles, it would be directed to the drain and not up the walls.
Step 3. Before covering the walls and screwing the wallboard in place, be sure to mark the location of the studs. I had plumbing pipes running horizontally along the rear wall and vertically to the faucets on the sidewall. Marking the stud locations will ensure that you drive your screws into wood and not into water lines.
Waterproof Wallboard Attached to the Inside Shower Walls
Needed items: What, Why, Where
Tools You'll Need
| For What Purpose
| Where to Buy
|
|---|---|---|
Hearing Protection
| Protect your hearing. With all the banging, it gets pretty noisy
| Amazon, Home Depot, Lowes
|
Protective Eye Wear
| With tile removal, chips fly everywhere
| Home Depot, Lowes, Amazon Ebay
|
Hammer, Sledge Hammer and/or Mini Sledge Hammer, Stone Chisel
| For breaking us and removing floor tiles
| Lowes, Home Depot, or Garden Supply
|
Power Saw, Framing Lumber, Screws, Level, and Carpenters Square
| Building the framework for shower and tub. Be sure to keep things level and square
| Any of the Home Centers above, Amazon or ebay
|
Tub, Tiles, Mortar, Grout,
| You'll need to pick out the style of tile and color of grout to accent your tub and shower
| Home Depot, Tile centers, Lowes
|
This is not an exhaustive list of supplies but should be enough to get you started and on your way to your custom bath makeover.
A New Jacuzzi-Style Bathtub Will Complete the Fixtures
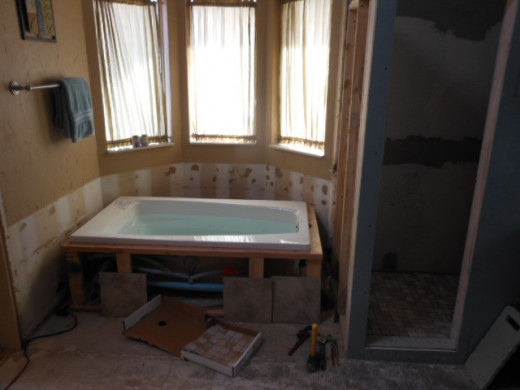
Installing this spa tub was a 4-step process.
-
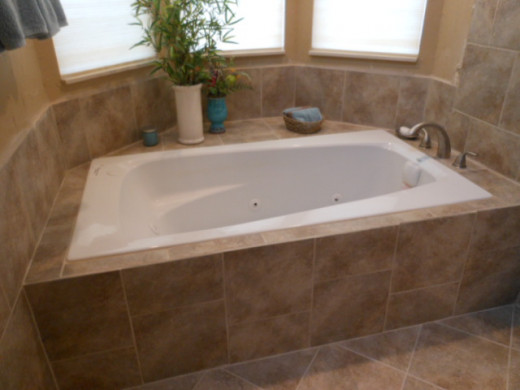
After taking accurate measurements, the first thing to do is to build a frame to enclose the tub. I was replacing a six-sided bathtub that was designed to fit into a matching room, at least on three sides, with a rectangular tub. Filling that gap along the back wall meant having a shelf on the backside of the tub.
-
Setting the tub requires a special process to ensure that the fixture rests solidly on a firm foundation. To do that you must mix up a large amount of mortar and spread it on to the floor before you put the bathtub in place. The mortar mixture needs to be wet for this operation so that when you drop the tub down and fill it with water it will settle into place until the mortar dries.
Whirlpool Bath Tub
- Amazon.com: American Standard 2770018W.020 Cadet 5-Feet by 32-Inch Whirlpool with Hydro Massage Syst
Amazon.com: American Standard 2770018W.020 Cadet 5-Feet by 32-Inch Whirlpool with Hydro Massage System-I, White: Home Improvement
Tile Layout Is Key
It may not seem like much of a decision, but the layout of tiles is critical at this point. You can't change (at least not easily) after they are stuck down and grouted.
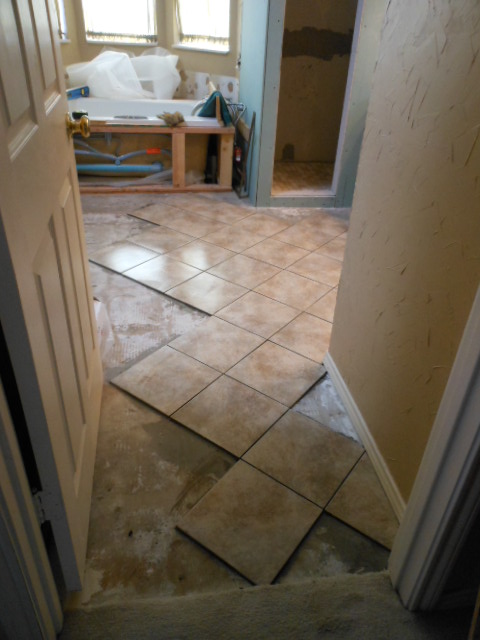
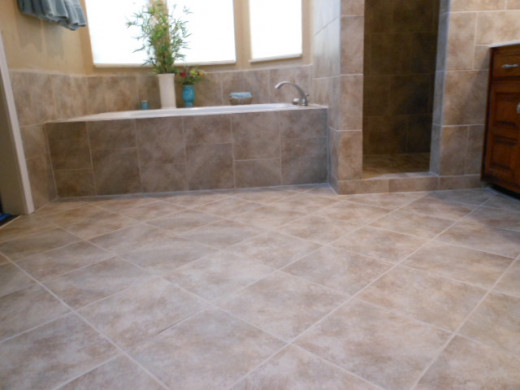
As you can see, we chose to have tiles in a 'diamond' pattern instead of being viewed as square rows for the visual effect when entering the room. It's a little more work because it requires more cutting of the tiles, but worth the impact from our point of view.
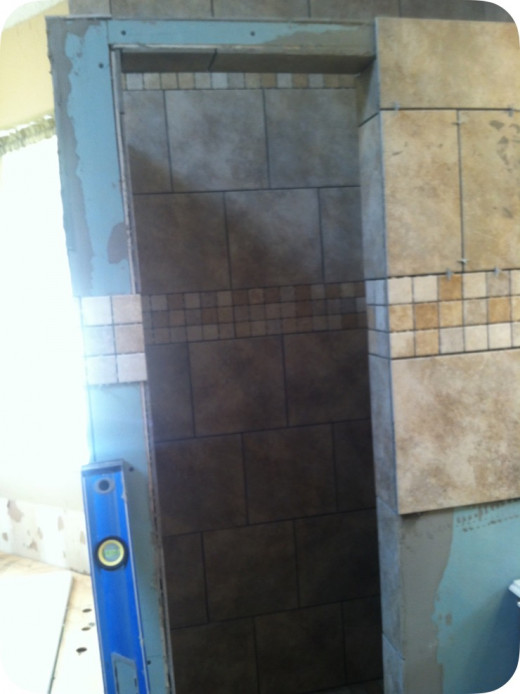
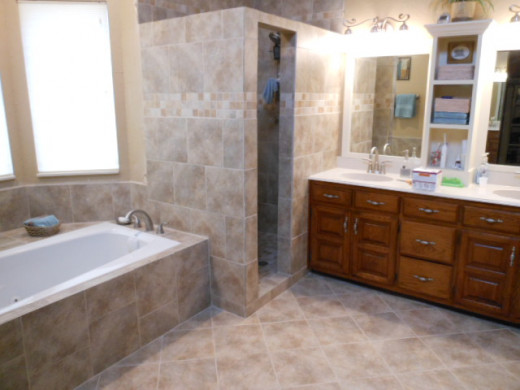
The same goes for the tile pattern on the shower walls and tub surround. I elected to keep the shower walls in square rows (not diamond pattern) because of the decorative strip of 2-inch tiles dividing the larger tiles on the walls, as you can see for the pictures below. Had I arranged the larger tiles in a diamond pattern, it would have added additional cuts that I was averse to doing this far along in the project.
Start With the Floor Tiles, and Then Work Your Way Up
Click thumbnail to view full-size


Tiling on Vertical Surfaces Presents It's Own Set of Challenges
Installing floor tile is a breeze when compared to setting them on the walls. Allow yourself plenty of time to complete this operation and try not to rush the process. If you're the only one doing the cutting and tile placement and you're not a professional, like me, take this in small steps. For instance, don't mix up a large amount of thin-set, or it will start to dry out before you can finish the job. Just try to complete one short row until you get the hang of it before increasing the amoun
It Was a Lot of Work, but Worth Every Penny
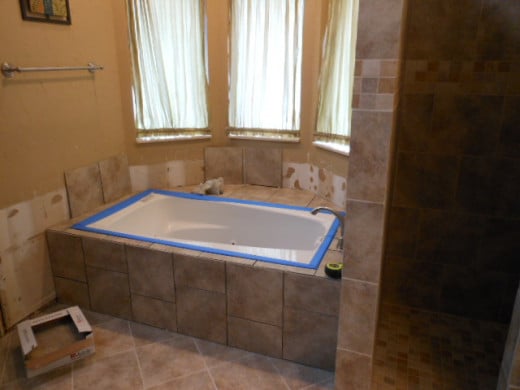
Halfway through the project, you may wonder if the work and expense are worth the benefit. It was a lot of hard, back-breaking work, and having the bathroom in disarray for a few weeks is also very inconvenient, but I think you'll agree from the pictures. It was money and time well spent.
The Finished Job Was Worth the Effort
Click thumbnail to view full-size


This content is accurate and true to the best of the author’s knowledge and is not meant to substitute for formal and individualized advice from a qualified professional.

