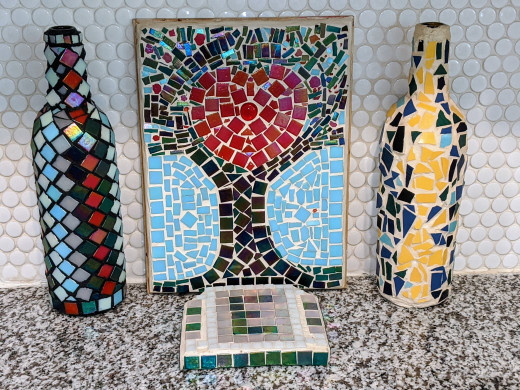
My First Tree mosaic
Project Tree Mosaic
My Step by Step Process
I used a very basic cut and paste formula to create this mosaic. As the project progressed I made mistakes and learned from those mistakes for future projects.
- First, for a base, I selected a wooden frame my children purchased for me from Micheal's for my birthday.
- I pencil sketched a tree design on to the base.
- I chose the tile color and type of tile I thought would look best for this project. I organized the tiles by color for easy access.
- I gathered my favorite
glass tile nippers, my
Weldbond glue, goggles, and grout.
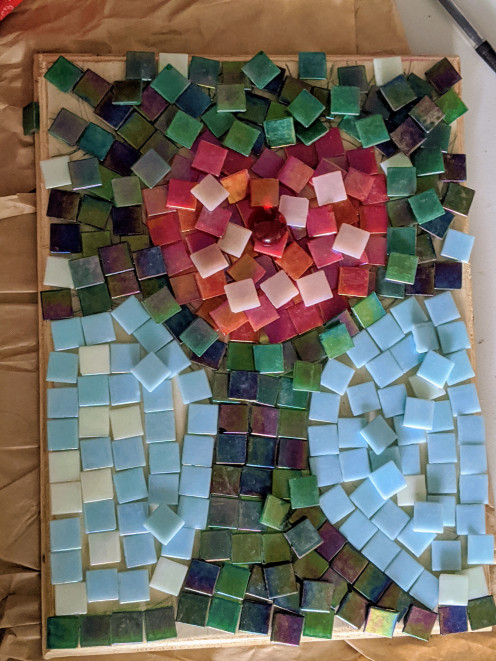
- Then I placed the uncut tile on the design to size it up to see what tiles needed to go where and how they needed to be cut or shaped to fit into the tree and the background.
- Each mosaic project is different and can require different techniques. With this piece, I began filling in the trunk of the tree and the heart as well as the edges of the frame.
- I glued each section in place and let it all set to dry for at least 48 hours. the glue I use works well but takes a bit to fully dry.
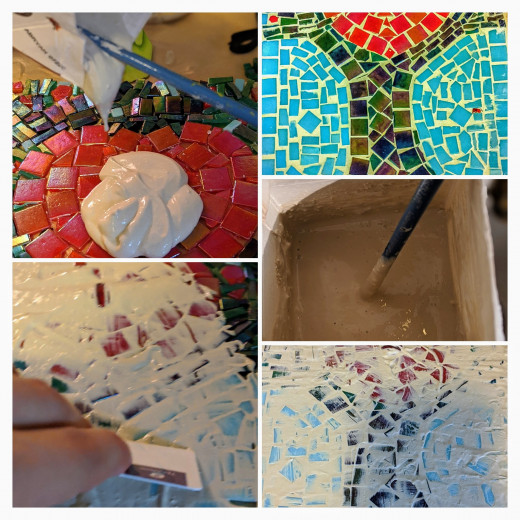
- I filled in the spaces between and around the tiles with grout, let it sit a bit, and then wiped away any excessive grout.
- After the excessive grout was wiped away I let it all sit for a day and then polished it clean the following day.
- For my very last step, I added
grout sealant to the grout to protect it from the elements.
It took about two weeks, give or take a bit, to complete this project. Some projects depending on the size of the project or the difficulty of it can take a longer time to make and finish.
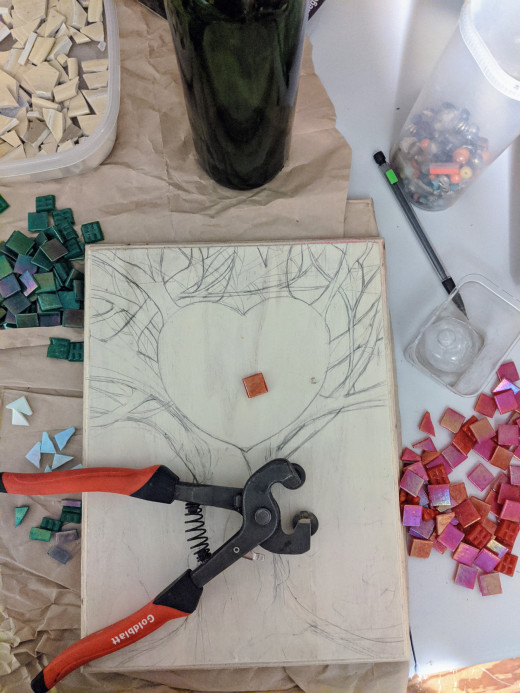
The sketch
I drew the sketch over a year ago, but I touched up the sketch to fit my current idea. The original drawing was fall-themed and had two fallen leaves at the trunk of the tree. If you look at the picture closely you can still see an outline of these leaves. I would still like to recreate this image with a fall theme for another project in the future.
I need to learn carbon copy techniques.
Mosaic Tree Sketch
The Material
The materials I had:
I always have these basic materials on hand: tile glue, tile nippers, a base/platform, grout, adhesive, tile, grout, grout sealer.
For this project, I had to add tweezers. Some very small pieces become too difficult to handle with fingers. Tweezers come in handy.
The materials I plan to get for future projects:
After I cut my finger on a sharp cut tile I learned I should also get sandpaper too to dull/smooth out some of the sharp edges of the tile. etc.
Paint is also good to have on hand. Though I did not paint the platform I used for this project. I often do use paint to fill in the background or help the unmosaiced part of the base create a frame around the mosaic part.
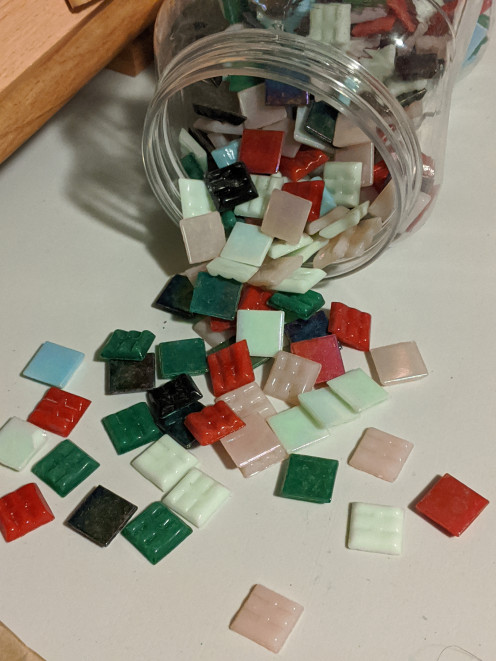
Glass Tiles
Placing the tiles
Applying The Grout Collage
Mosaic Tree Blog Entry
- Mosaic Tree: Sketch 04/06/2020
And it begins... - Mosaic Tree: Tiles 4/6/2020
Most of my mosaic pieces are aquired through friends or family as gifts. Sometimes I collect everyday things to reuse in my mosaics like: broken plates, tile, broken jewelry. However, for my current project I purchased glass tile on sale at Micheal's
This content is accurate and true to the best of the author’s knowledge and is not meant to substitute for formal and individualized advice from a qualified professional.
© 2020 Canela Ajena

